My First Pair of Trousers


These are a pair of high-waisted trousers with a zip up the back instead of the modern fly front zip. I looked around in a couple of charity shops for a large pair of trousers that I could recycle the material from and I found a pair of size 16 linen trousers for 3.50 (this is in pounds still, turns out I’m not blind, there really isn’t a pounds key on this new keyboard).


This was the pattern that I used. Even though it was a size 12 they fit fairly well, but just need a bit shaving off at the hips which is to be expected. As they are fairly loose trousers I’m guessing that was why I didn’t encounter any of the difficulties that  I was anticipating.


I strategically placed the back pattern pieces bearing in mind the placement of the back pockets that I recycled from the original pair of trousers. I also used the waist band so I didn’t have to figure out how to do a buttonhole. The bottom of the pattern pieces was cut on the hem so I didn’t have to hem it but next time I’ll let down the hem because I don’t like the raw edges at the sides so visible near the hem. The zip was handpicked and obviously needs doing again, as I look at that photo.
And please don’t ask why my head is in a forest of leaves because I don’t know either…


Why can’t I stand straight like a normal person?!
Anyway, I love these trousers as they put me back into proportion as I have a long torso and I’ll probably make them again in a suiting fabric for sixth form.


Thanks for reading!
Lauren x

A Dress in a Day


As a thank you for the tons of help my friend Meghan (to your left) gave me towards my maths GCSE I wanted to make a dress with her, and this was the finished product! We managed to make a muslin of the bodice, and a fully lined dress from 10am-10pm with breaks for lunch and tea which was pretty good going, we thought. Meghan did 95% of the sewing (I did a bit of the hemming) and I instructed, which was good for me because I “consolidated my learning” by passing it onto another human being.


We used view E from Simplicity 3823 with a button loop halterneck as there wasn’t enough fabric for ties as we had 2 metres of fabric.
The construction of the bodice is really clever as the lining leaves no raw edges, making it lovely inside. As we cut out the skirt pieces in a white cotton for the muslin we thought that we might as well line the skirt. The lining fabric and the fashion fabric were hemmed individually so they could hang properly.
I have attempted to use this pattern before without much success, because even though it has a size 6 there are an extra 2 1/2 inches of ease which I could really do without! I realised though that when I did my previous muslins I shouldn’t have lined them as that makes it so much harder to alter. With this in mind we cut a size 10 as that was what her bust measurement fitted with the finished measurements at the bottom of the envelope.


The only changes we made were to alter the neck line slightly to stop it from gaping and to make sure that Meghan doesn’t flash everybody.
We slip stitched the hems on both the lining and the fashion fabric. In reflection we could have just machine sewn the lining and saved oodles of time.
We found a perfectly matching yellow zip to go down the side of the dress which was handpicked for precision.


This was the halterneck button closure. We found a button that matched from Mums massive button collection. The pattern called for two but one fairly big one seemed to work fine. For the loop, I folded some thin red ribbon in half and slip stitched it together as I can’t figure out for the life of me how I am supposed to turn a tube of fabric 0.5 cm in width the right way out.


The fabric was amazing, with all sorts of things on, including unicorns and suits Meghan perfectly. It was sourced at a local market stall.


A massive petticoat complemented the full skirt perfectly.
It was great fun making this dress together and I’m sure that we’ll do a lot more sewing in the future.


Thanks so much for reading!
Lauren x

Before and after: A floral tank


I was looking around the charity shops in Leicester for some items to refashion and in one shop every single item of clothing was 1.99. (Pounds this is, I must be really dumb but I can’t find the pound sign on my new laptop keyboard, so with every number from now on, just assume I mean pounds.) This was a real bargain because in most charity shops in my area the dresses tend to cost up to 6.00.


The top was a size 16 but I chose it because I really liked the print and I thought I could do something with it.
To refashion it, I unpicked all of the shirring which you can see the result of to your left.


I then unpicked the sides and the sleeves and folded it. My tank pattern from Sew You Home Stretch (where else?) was put on the fold of the front and then the back of the top. The tank was sewn together as normal.

I’m not sure if just cutting pieces out of an existing garment is proper refashioning but oh well. I do love this tank and have worn it loads already because it looks so great with jeans and a corduroy blazer. It should be okay to wear for sixth form as well which is another plus.
By the way, the place where these photos were taken was where some of Les Mis was filmed! It’s really cool to know that Helena Bonham Carter stood on the same stone floor as I did. Or is that just me?


Anyway, thanks so much for reading!
Lauren x

The Coffee Date Dress

This dress was inspired by the Coffee Date Dress sewalong hosted by Project Sewn.
The pattern is multisized, but I used the size used for the original garment from the designer The Selfish Seamstress.


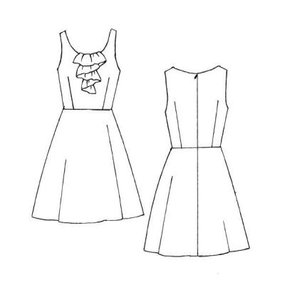
8691db51b9e686cf80a6675a95db44e247e34a11_largeThis was the original design, and as you can see, I added a few things and omitted the ruffle, as I am not a very ruffley person at this period of my life. 


I only had 1 metre of lace so I had to think carefully about how I was going to use it, but I knew that I wanted to use it somehow. It ended up being on the bodice and the hem.
To add it to the hem I extended the pattern pieces by 8 inches and cut out 1 of each fabric for the 3 pieces.This was then sewn right sides together to the hem and then turned over to the wrong side of the dress. The new hem was then gathered to fit the new hem. I’m hoping that made a little sense?
The peter pan collar was a last minute decision as I decided that you can’t have two lace covered bits and one uncovered bit. Oh I am not having that. So the peter pan collar evened things out. It does also look pretty, and makes the dress a bit more interesting which are slightly more sane reasons for adding it on…


And the zip was a success! Yay! It was handpicked as usual, as I feel that I have slightly more control over what’s going on. I think the only alteration I made was to add an inch or so to the back bodice and skirt pieces, to make sure that there was enough room for a zip.


And that’s everything I think! Thank you so much for reading onwards, in spite of brief insane moments. As with all of my dresses, now I need to make up an event of some sort so I can wear it out! I get my exam results tomorrow so fingers crossed that this will be my celebration dress! Ah, so many exclamation marks.
Bye! Lauren x

Heart applique t-shirt


This top started as one thing and ended as something totally different, mostly because I’m a bit of an idiot, but actually I quite like what it evolved into so all is good.
I seem to be having a knit faze I’m afraid and I’ve still got one to blog! There are some wovens on the way though.
The pattern (as are most of my knit patterns) is from the Sew U Home Stitch book by Wendy Mullin. For this top, I used the basic T-Shirt pattern. I did cut off quite a few inches though, making this top more of a crop top.


The original plan was to have a lace front and sleeves and a plain back as I was using the leftover lace from my prom dress and I cut out the front pattern piece, realising that the piece was upside down so the fold line was on the other side of the pattern piece meaning that I had cut out 2 halves of a front. Stupid Lauren. So, in the end what I decided to do was to applique a heart onto the front and add lace sleeves to give the top some interest.
It doesn’t matter that the heart is pretty subtle, in fact I quite like it when you look closer you see something that you didn’t think was there before.
FYI, the box in my hand is my first ever take away pizza which was purchased in france. However it wasn’t a pizza as it didn’t have a tomato base. Instead it had a white sauce? and ham and cheese and onion on top. It was scrummy.


I french seamed the sleeves so the raw seam didn’t show through the lace, and zigzagged appliqued on the heart.
Even though this top is pretty simple, it made me feel super confidant whilst wearing it around the streets of France and I think that is all you can ask of a garment.


That’s everything for now I think!
Thanks for reading,
Lauren x