Pink Shirred Barbie Dress

Hello all, this project was a chance to just have some fun with an outrageous (to me) colour. I originally bought this cupro from Sherwood Fabrics in ‘Raspberry’ with a sienna maker jacket/dress in mind, but it was much pinker than I’d imagined when it arrived, so it was set aside whilst I mulled over what to do with it.

IMG-20200823-WA0022.jpg

2 years later, I decided that I was in the mood to embrace the pink, in a big way. I used my bodice block as a base, leveling off the neckline above my bust, and taking out a small dart to prevent gaping. My back bodice block neckline was leveled off at the same point and the width of the piece doubled. I took my sleeve pattern and slashed and spread until it was the width that I wanted. I used the same skirt measurements that I worked out for my curtain dress until I realised that I didn’t have quite enough fabric, then I had to rework the length of each tier slightly.

IMG_20200905_101856_252.jpg

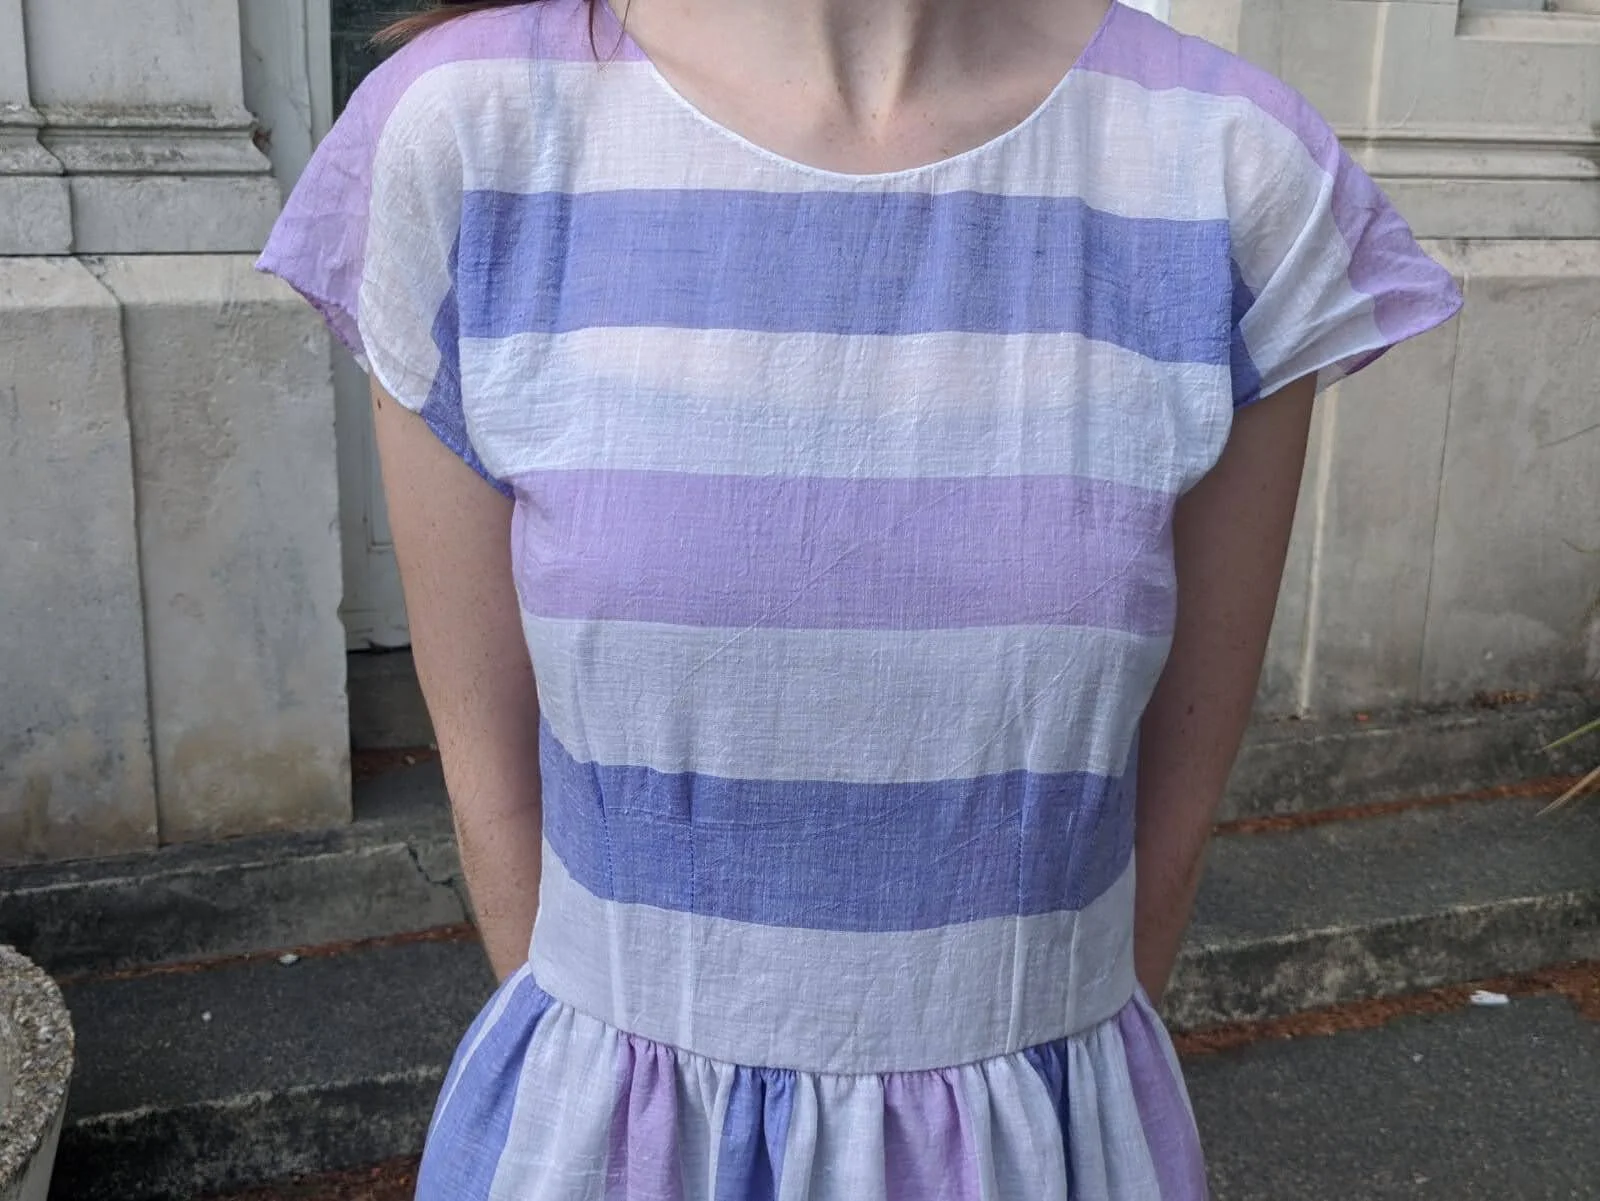
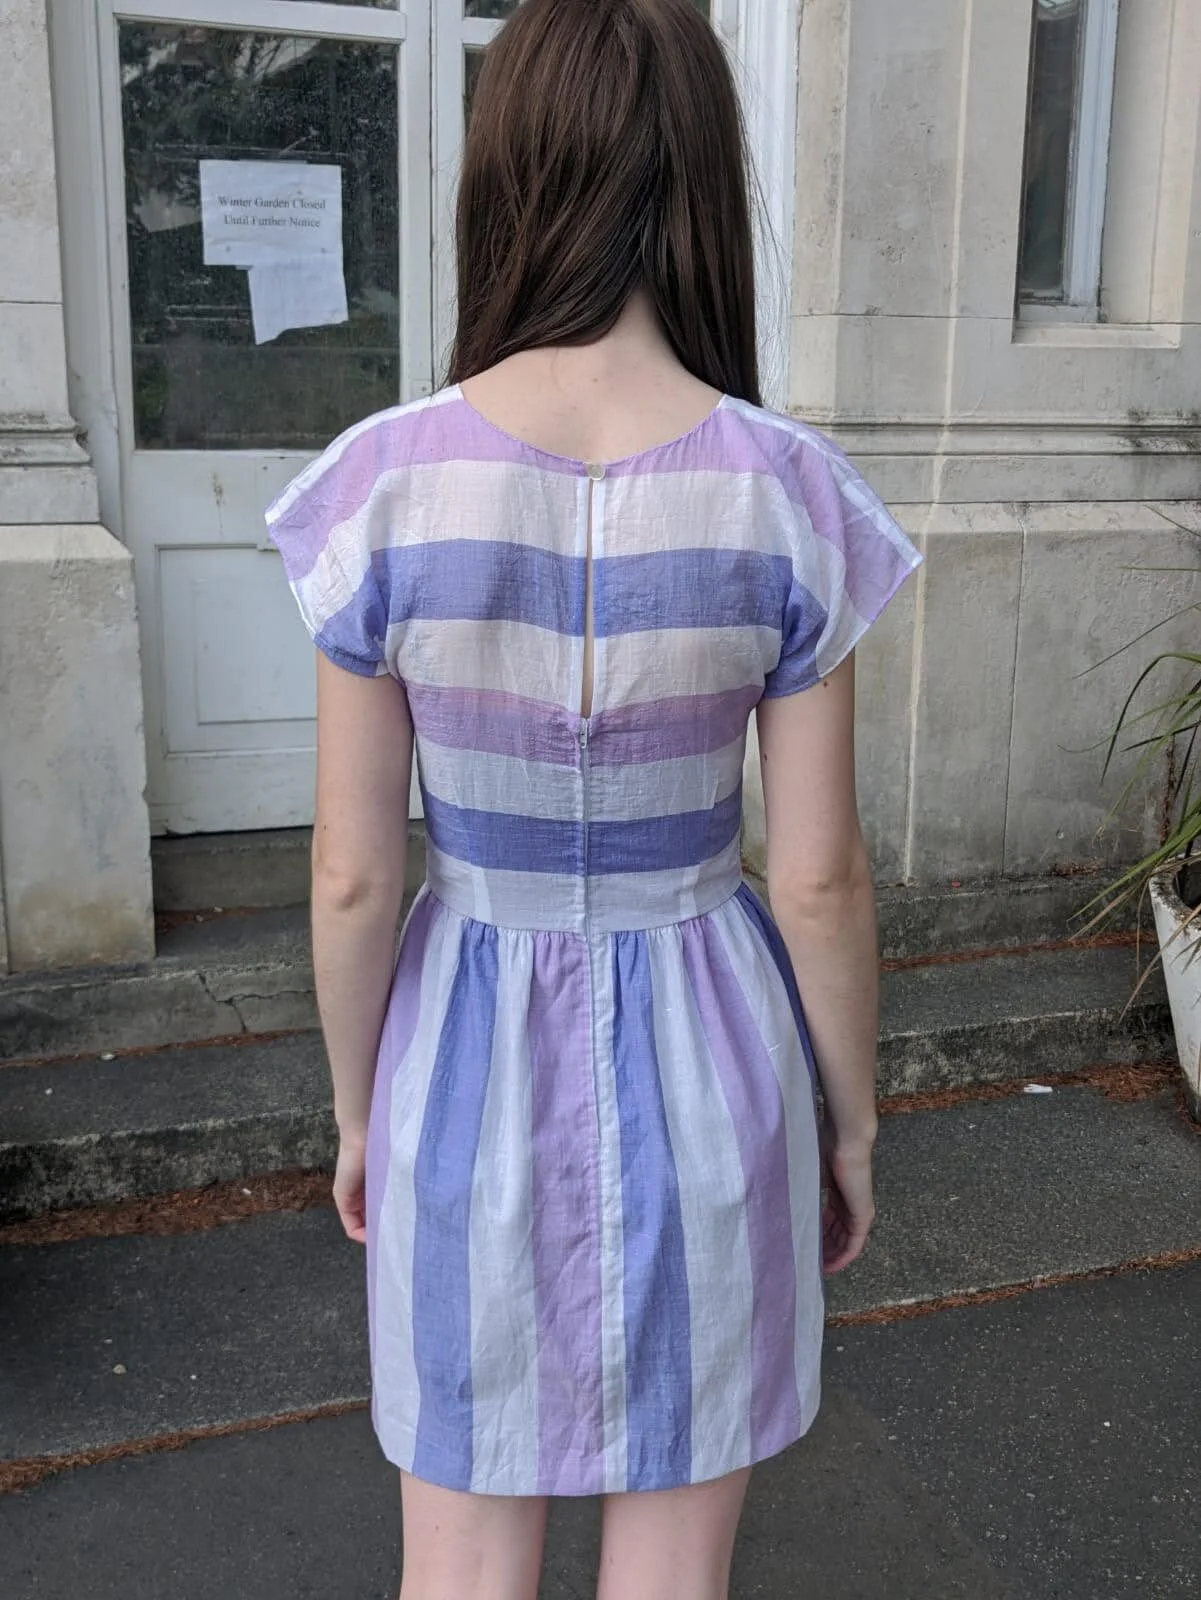
Each bodice piece neckline was finished separately and the back piece shirred before joining them both together at the side seams. I used a facing for the front neckline and simply turned the back neckline over twice and topstitched it. In retrospect I should have used a white interfacing for the front facing because annoyingly the black interfacing I used can be seen a bit through the front bodice. Of course another option to finish the neckline would have been bias binding. Next it was time to pay attention to the sleeves. The side seams of the sleeves were sewn first and an elastic cuff inserted. Then the sleeves were sewn to the armholes of the bodice, matching notches where each neckline ended. This seam was then overlocked, continuing around the entirety of the sleeve head, pressed under and topstitched, creating a channel for the elastic to go through.

IMG-20200823-WA0003.jpg

Then it was just a lot of gathering. Only the front half of the top tier was gathered because the back half was sewn to the shirred bodice (stretched out) which automatically gathered it.

IMG-20200823-WA0016.jpg

I rolled hemmed the skirt purely because I ran out of matching thread. I did overlock the hem first because it’s such a fray-y fabric but I think it did add a little unnecessary bulk. You can see in the picture below a comparison of the beginning of the hem and the end. It took me a little time to work out which distance I needed the stitches to be apart from each other to make sure everything rolled nicely. (I went back at the end and re-did the beginning bits.)

IMG_20200905_102500.jpg

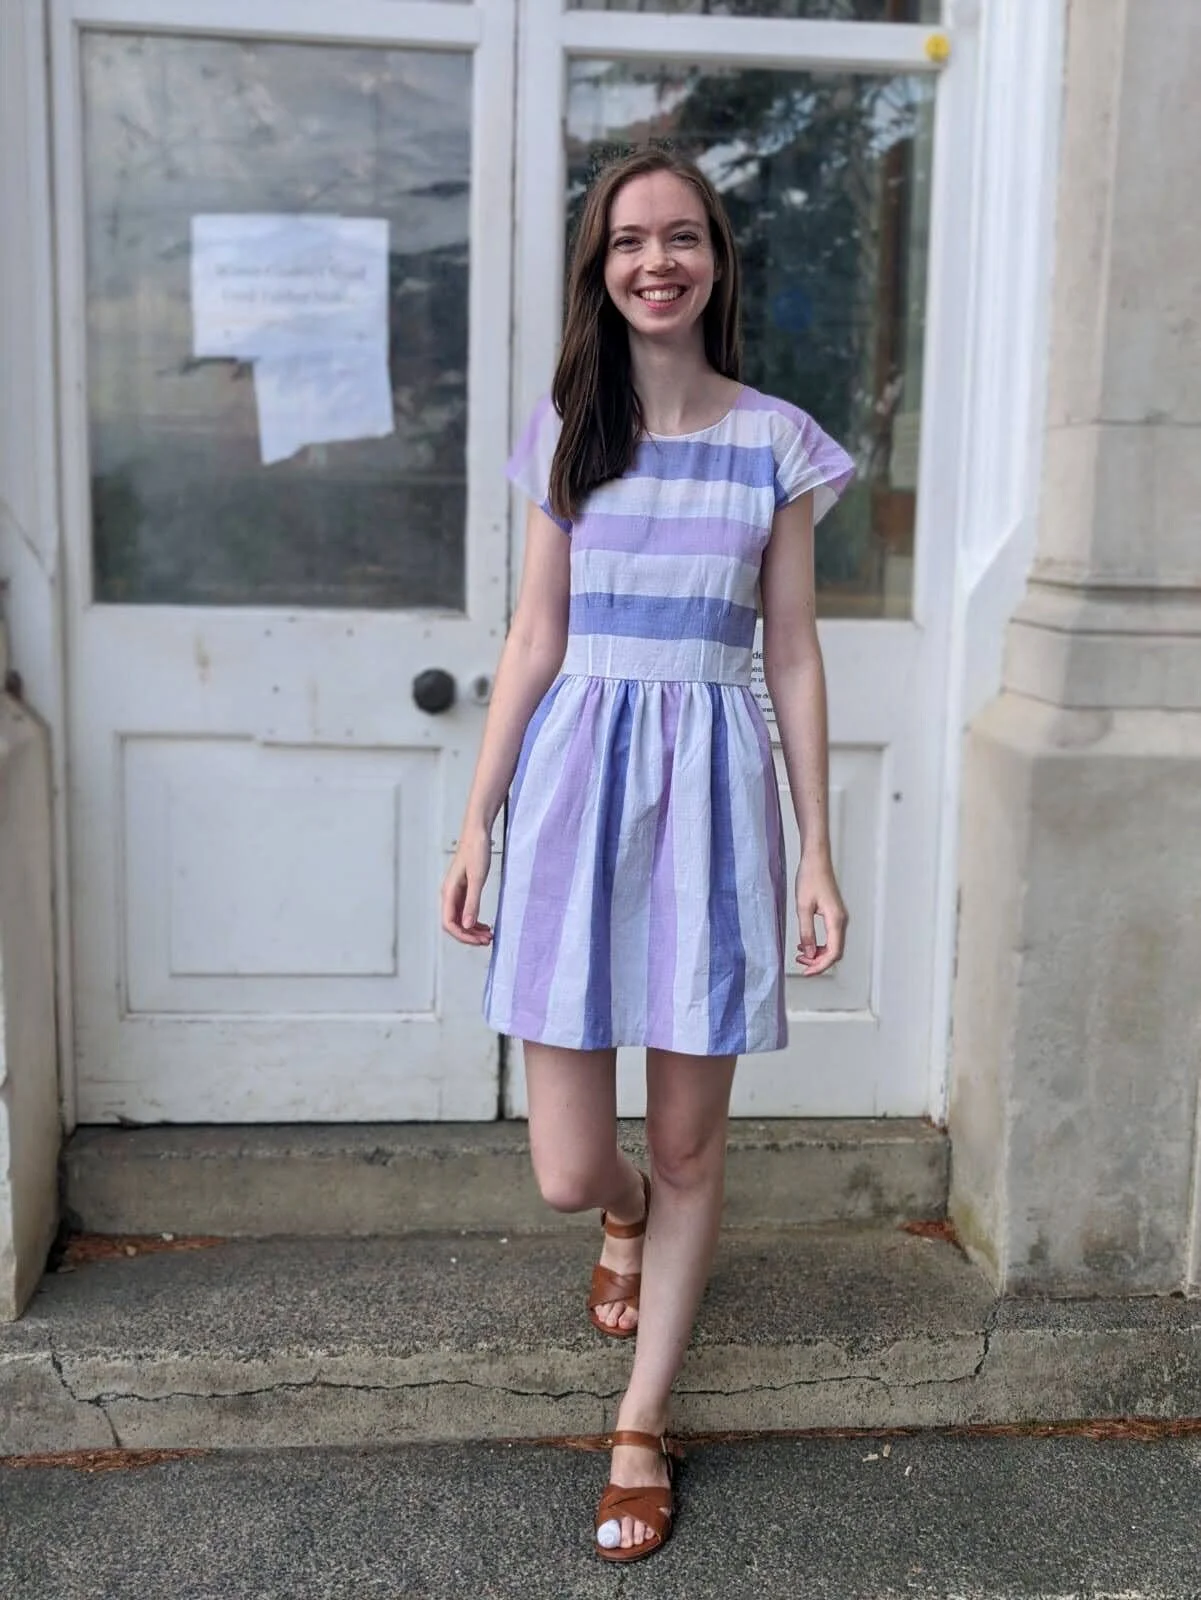
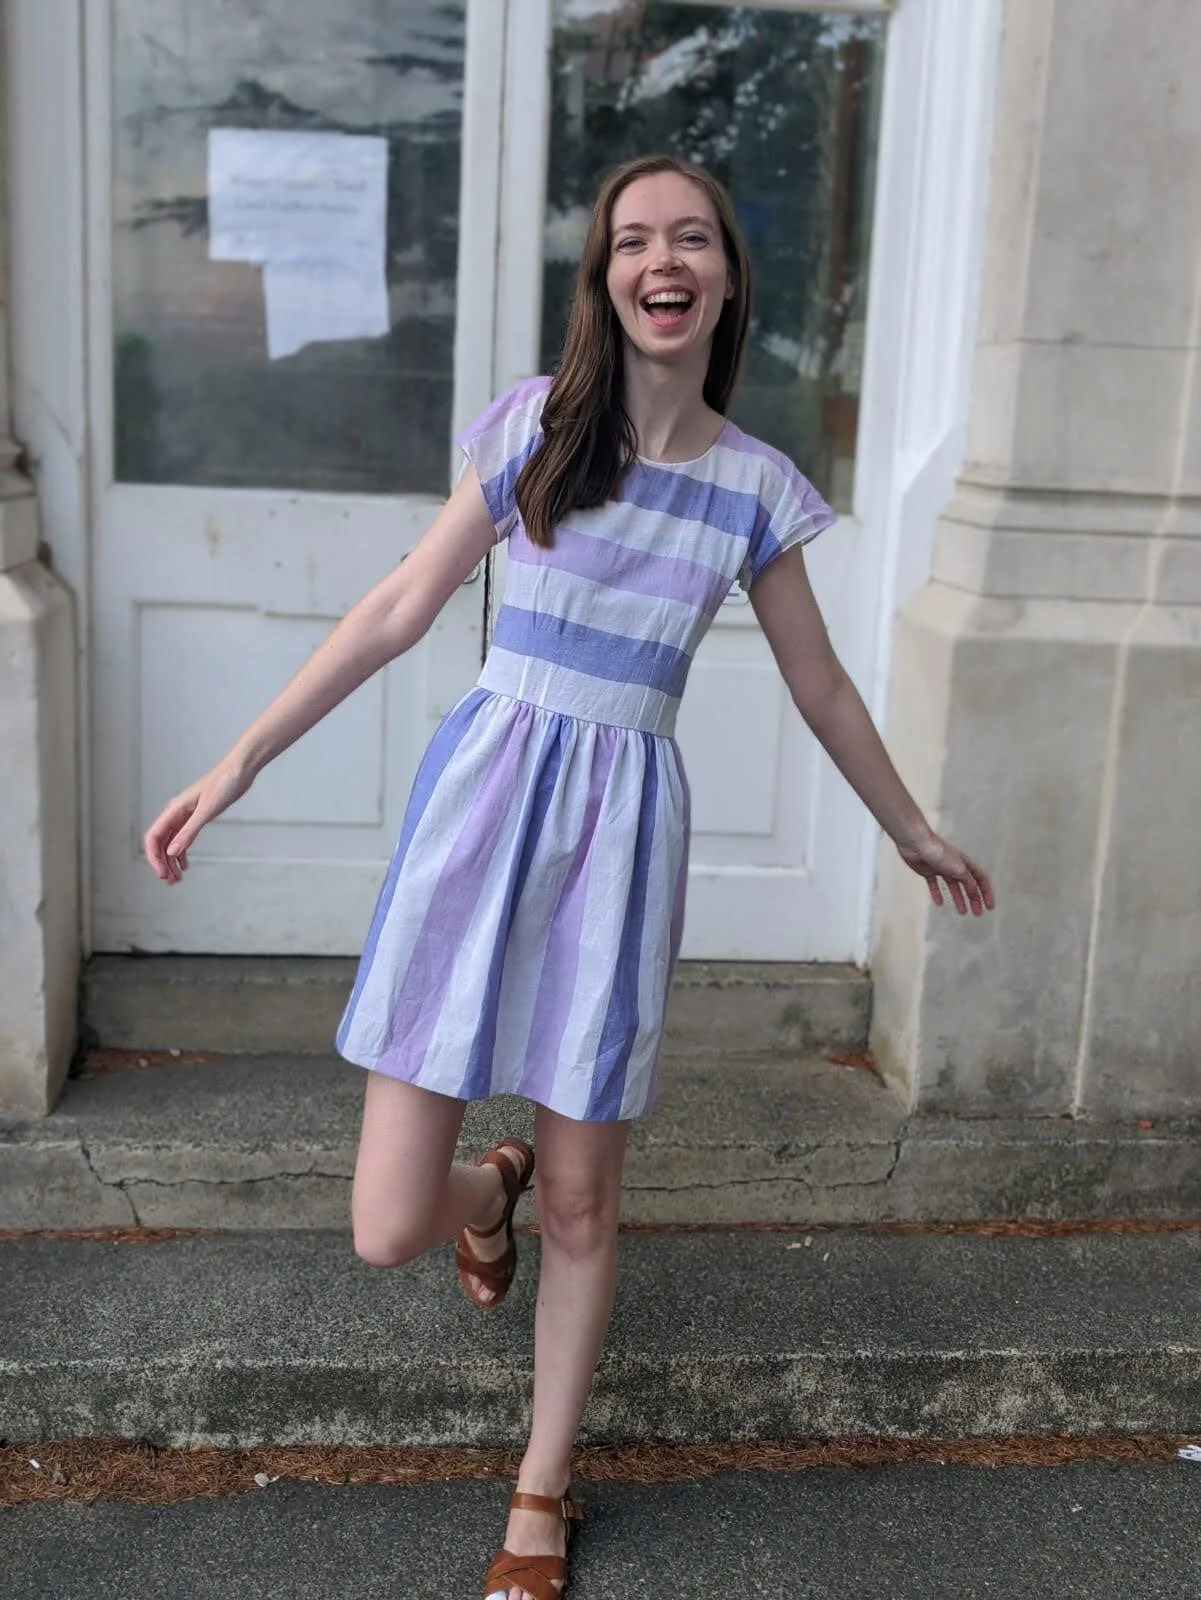
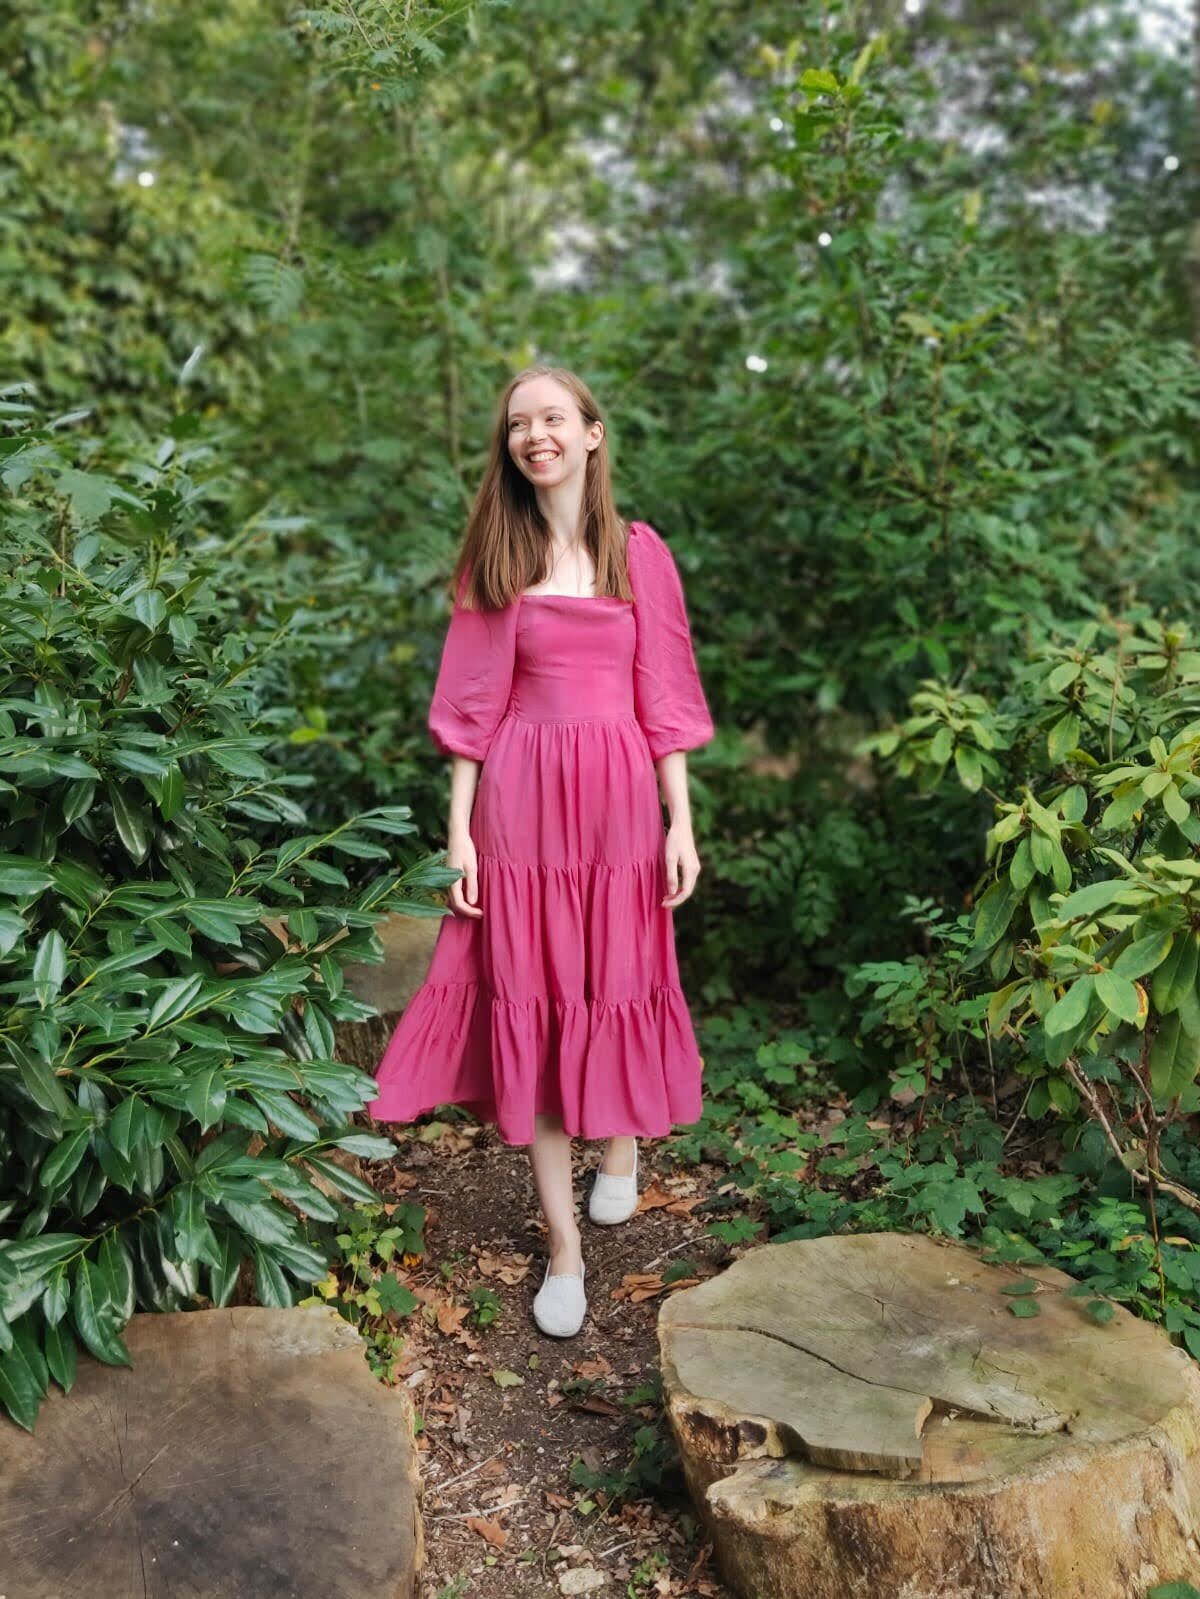
There we have it, a finished dress! It was a bit of a punt for me, style wise, but it’s so much fun to wear and I keep finding myself reaching for it when I want something to feel good in. There are a few things I’d change if I were to make this design again. I’d take a little width out of the front neckline, lengthen the sleeves, and either make the ease only 1.5 times the bodice width or add some kind of waist stay? Because there’s only elastic in the sleeves holding the dress up there are some points when the weight of the dress drags everything a little too far south of where I need it to be. Also, I added pockets (woohoo!) but I made the pocket openings slightly too narrow, making them slightly tricky to use easily. On the plus side, very good for pick-pocketing prevention.

IMG-20200823-WA0030.jpg

It’s the first time I’ve used cupro as a dress fabric and I’m not really sure what to think about it. It wrinkles very easily, but presses okay. It frays very easily and shows sweat more easily than other fabrics would. It does drape well and is a good weight for gathered skirts like this. I wouldn’t want it to be any heavier.

IMG-20200823-WA0000.jpg

Thanks for reading!

Lauren xx

Stripy Purple Dress

Hello all!

My latest project was entirely inspired by this dress that Keira Knightly wears in the film “Begin Again”. The main feature that I took from the dress was the horizontal stripes in the bodice and vertical stripes in the skirt. I then added a dolman sleeve, bust pleats and pockets to the equation.

IMG-20200824-WA0015_Original.jpeg

I wanted to use a purple striped cotton gauze that was in my stash, but it was a bit see through, so I added a built in cami underneath. The skirt was underlined in the same fabric as the cami. The photo below was taken before the zip was put in the back, joining both layers together.

IMG_20200819_163701501_Original.jpeg

It was my first time drafting a dolman sleeve bodice and I laughed a lot when I saw how small my bodice pleats came out (most of the dart is absorbed into the sleeve.) No wonder the pleated bodices of the other dolman sleeve dresses I’ve made previous have turned out so baggy. Their pleats are at least double the size! I had a big debate about whether to have one normal sized pleats or two ridiculously tiny pleats, but I went for 2 in the end because I just liked it more visually, even though they are a bit of a non event.

IMG-20200824-WA0008_Original.jpeg

I had a slight crisis about how much fullness was in the upper part of my bodice, but I was assured in the Foldline Facebook group that a little extra fullness is just the nature of the beast when it comes to dolman sleeves. When it came to construction I french seamed all of my gauze bodice seams for a clean finish. My french seams ended up being 1cm wide but next time I’d aim for 0.5cm which would be much more delicate. At first I used a silk organza bias binding to finish off the neckline but the neck was too tight so I just chopped it off and rolled hemmed the neckline instead.. I was worried that a rolled hem on a neckline wouldn’t be stable enough but I’m really pleased with how it turned out. In this photo you can also see a hint of the underbodice!

IMG-20200824-WA0016_Original.jpeg

I’m glad that I took the time to put pockets in because I always regret it when I don’t!

IMG-20200824-WA0046_Original.jpeg

The zip in the back of the dress goes up to where the underbodice stops. I then attached a button and a thread loop to the top of the neckline.

IMG-20200824-WA0037_Original.jpeg

I used up pretty much every scrap of the fabric to make this dress and a was worried that the skirt wasn’t going to be full enough. Luckily I think it just about works! This is the perfect easy breezy summer dress for me, and it was great to experiment more with drafting different styles.

IMG-20200824-WA0023_Original.jpeg

Thanks for reading!

Lauren xx

Colour Blocked Bomber Jacket

Hello all! This is a project that simmered in my brain for over a year before it came to fruition. Way back in April 2019 I wanted a light jacket to take on my trip to New York and I thought a bomber jacket would be perfect. Alas, I took too long deciding on colour combinations and ran out of time. Originally I bought just teal and white softshell to make the jacket with, but as lockdown started and I started debating the project again I decided that it needed a third colour, a light pink. Also, prepare yourself for various stages of me looking like a drowned rat in these photos - you have been warned.

IMG-20200820-WA0014.jpg

I spent a while in photoshop mocking up different colour block options and trying to avoid well known flags, football teams or an overtly 80s look. In the end (as you will have already guessed) I went for the top left option.

BeFunky-collage.jpg

After finalising the design, it was time to draft the thing! I actually ended up drafting a mens t-shirt block to my measurements I think, purely because I couldn’t find any instructions for a dartless bodice block in my womenswear books. I also remember doing a small bust adjustment. Once I was happy with my pieces it was time to do the fun part and draw on my colourblocking lines. I only did the front and back bodice pieces at first and I think I worked out some kind of maths to make sure that all of the angles were relevant to each other.

IMG-20200820-WA0000.jpg

I cut the sleeves out in calico first and inserted them into my front and back jacket pieces so I could try it on and get my boyfriend to use a ruler to just continue the lines of the main body onto the sleeve as per the design. Then I took the sleeve off, trued the drawn on lines and split the pattern piece into 3 different colours.

IMG-20200820-WA0012.jpg

I put most of the jacket together really early on in lockdown, then it sat on the mannequin for a couple of months. This was mostly because I was trying to work out what to do with the seams. The softshell fabric that I used was not a fan of pressing, but I also didn’t want to topstitch. In my head that would have counter-acted any water resistance it had? In the end I glued every seam down using impact adhesive because that’s what I had. I did regret that because there’s a slight yellowy tinge to some of the seams on the white part of the jacket. I then decided to line the whole thing because even though the softshell has a nice fleecy backing, all of the colourblocking seams made the insides a bit messy, and I wanted the CF seam of the jacket to be finished nicely. I used a cotton remnant that I had in the stash for years as a lining for the bodice, lining the sleeves in a more slippery tencel. It does look so much more polished as a lined jacket!

IMG-20200820-WA0006.jpg

Most of the issues that I had during the making process were with the ribbing. I ended up taking a big wedge out of the ribbing at the waist so that it sat closer to my body and I took a smaller wedge out of the cuffs. Annoyingly I did one cuff, adjusted it, and then abandoned the project for a few months. When I came back to it I of course forgot that I had made the other cuff smaller so had to take it out, make it smaller to match the first one and put it in again. The neckband I originally drafted as a band collar, but as soon as I sewed it in, I realised that I had put nowhere near as much neagative ease in, so that came out, had 7 inches removed from the centre back, and went back in again so that it would sit flat.

IMG-20200820-WA0002.jpg

My main issues with this jacket is length. Width is all good. When I tried the jacket on before putting the cuffs in, the sleeves were too long so I shortened them by 1.5cm. Unfortunately basically the equivalent of that is taken up at the join from cuff to sleeve (as the fullness puffs it up a bit) so now the sleeves are slightly too short for my liking. It’s also slightly too cropped for jeans I think, but works perfectly with dresses. Potentially longer ribbing at the waist would have worked better as well?

IMG-20200820-WA0003.jpg

All in all, it was a brilliant experiment and has already had a ton of wear. I’m so pleased with how the colour blocking worked out.

IMG-20200820-WA0034.jpg

Thanks for reading!

Lauren xx

Red Summer Dress Refashion

Hello all! Today’s project is the remaking of a dress that Mum dontated to me because the fabric was just too good to pass up on.

IMG-20200805-WA0027.jpg

So let’s have a look at the original dress. It’s a size 14 (I’m a size 8) made from a red cotton broderie anglaise. The neckline and armhole edges are finished with a visible bias trim and there is a zip in the CB seam. The hem has an embroidered scalloped edge. Originally I wanted the bodice design to stay pretty much the same but the larger size meant that the shoulders were too wide for me, so I went with a strappy bodice design instead with a pencil skirt to complete the dress.

IMG_20200728_212234896.jpg

Before cutting out the skirt, I wanted to do a little finessing of my skirt block pattern. I used an old tablecloth to make a mock up, sharpie-ing on all of the horizontal and vertical lines to make it easier to find any fit issues. The main adjustment that I made was a Prominent Hip Bone Adjustment which as detailed in Fitting and Pattern Alteration is when the fabric is taut over the hip bones causing diagonal lines. You can see the changes that I made to my pattern below. I then pegged in the sides of the hem to make it more of a pencil skirt.

IMG_20200731_133955064.jpg

I used my bodice block as a base for the top half of my dress, rotating all of the darts into the side seam, drawing on a lower neckline and splitting the back bodice into two pieces. I cut the skirt out of the skirt piece from the original dress first, hoping to cut the bodice pieces from the original bodice. Unfortunately someone had already shortened the bodice, making my front bodice piece too long, so I had to cut that out of the skirt pieces as well. I did unpick the binding to reuse but I cut fresh binding out as I had the spare fabric to.

IMG-20200805-WA0034.jpg

When the dress was all cut out and put together I ended up pinching excess out of the neckline and adding it to the bust darts so that it would lay flat. I also pinched bits out of the CB to better match the contours of my body.

IMG-20200805-WA0033.jpg

The zip was hand picked in, but that was the only handsewing that I did as all of the binding was topstitched and the fact that there was no hemming to do! The reason that the zipper pull isn’t all the way up is because my boyfriend pulled it off the dress when he was zipping me up just before we left. Luckily it was fixable with the good old dressers trick of cutting into the zip on one side at the bottom and threading it back on. I just now need to make sure that the top of the zip is reinforced so that doesn’t happen again!

IMG-20200805-WA0036.jpg

I love this dress. It feels super elegant, but also still young. I wore it on the beach with a silk shirt loosely tied around the waist and felt like superwoman! The only niggle I have with the fit is that the bust darts are too high. I want to lower them at least an inch on my next version. Oh and I need to add a slit to the centre back because my strides are much longer than the circumfrence of this hem!

IMG-20200805-WA0023.jpg

Thanks so much for reading!

Lauren xx

Bikini 2020 edition

Hello all!

I made this bikini in May so that I could sunbathe in the garden during the hot weather and it was such a pleasure to properly test it out in the water over the last couple of days. I generally seem to make one piece of swimwear a year, so this is the 2020 edition! I used up the leftover supplies bought in New York last year which I made my 2019 swimsuit from.

IMG-20200804-WA0029_Original.jpg

I used my front bodice block as a base to draft the bikini from, but essentially as long as the triangle is big enough to cover the important bits you’re onto a winner! I pinned my triangles of swimsuit fabric and lining right sides together with my neck ties in the middle pinned to the top corner and zigzagged some elastic around the two sides that aren’t the bottom of the triangle. I could have stretched the elastic slightly tighter than I did because the sides are looser than I’d like. Luckily I can just tie the straps around my neck a little tighter and can just about get away with it. The triangles were then turned the right way round, pressed, and the bottom edge folded up twice and top stitched to form a channel for the bottom ties to go through. A super quick make! I didn’t have enough swim elastic for any of the ties which is a shame, because that would have really helped with their recovery.

IMG-20200804-WA0041_Original.jpg

The great thing about this type of bikini top is how flexible it is. I want to flatten each triangle out for full coverage? No problem! I want to minimal coverage for maximum sunbathing potential. No problem! I’ll just gather the cups up a bit more.

IMG-20200805-WA0012_Original.jpg

I made the bikini bottoms in another sewing session using my leotard pattern as base. I was working from the scrappiest of scraps at this point, so against my better judgment used the leotard pattern instead of using my pants pattern which takes up more fabric. I can get them on, but they do squish my buttocks in half a bit! I had some issues with the lining showing on the outer side of my bikini top so when I cut out the bottoms I cut out the lining a bit smaller. Unfortunately I cut a bit too much off, which definitely assisted in making them that little bit smaller than I wanted them to be. Next time I am only cutting the smallest smidge off!

IMG-20200804-WA0042_Original.jpg

All in all, on it’s first proper outing my bikini held up brilliantly.

IMG-20200805-WA0013_Original.jpg

Thanks for reading!

Lauren