The Golden Dress

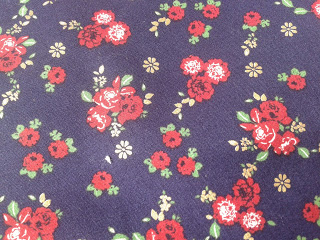
This was one of the times that you go to a fabric market stall with a list of fabric that is needed and you come away with something completely different. What can I say, this print was just too good to walk past.


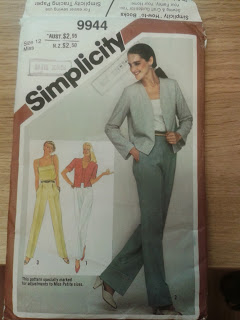
The fabric is quite a thick knit that cost four pounds per metre and one metre was all that I could afford to get which rules out any full skirts (sad face). I browsed through Wendy Mullins Sew You Home Stretch ( I can hear you all sighing and thinking “oh no not this book again”) and found a fairly fitted dress which consisted of two bodice pieces (front and back), two skirt pieces (front and back) and some sleeves which I missed out in favour of being able to fit a tank top out of the fabric as well. The design in the book had a contrasting bodice to the skirt but I just ignored that bit.


I learnt that if you zigzag too close to the edge the fabric goes all weird so you have to have quite a big seam allowance. I think I ended up slipstitching the neck line. I had to take it in quite a bit at the hips and the waist to make it fit properly even though I cut out the smallest size which was an extra small. Next time I’ll lengthen the bodice quite a bit because the seam is really high above my natural waistline but isn’t high enough to be empire line.

 I commandeered my friends into directing and taking the photos. I’m going to say that some of the trampoline shots were more successful than others. It was great fun though.I’ll just leave you with one of the outtakes which I realise isn’t an outtake any more because it’s in the post but oh well.


INCOMING!
Thanks to Connor for the use of his trampoline and for taking brilliant (if slightly scary photos) and Meghan for instructing me how to jump elegantly on a trampoline without legs spread right open.

As always, thanks for  reading!
Lauren x

Sixth Form Top

I MANAGED TO GET THE PICTURES TO BE BIG!!!! YAAAY!!!!

So this is a top that I made for sixth form, which I start on Friday. I had a few issues with this top, mainly because I thought it was a knit when it really was a cotton. I figured it out when it started to fray…  The fact that I thought it was a knit meant that there was an unnecessary amount of zigzagging going on plus the using a pattern designed for knits. I was really worried about the sleeves being really tight because there’s no stretch, so phew. You can see me testing this below.


 It’s a tad short but that isn’t a problem as all of my high skirts are high waisted anyway. I thought very carefully about the pattern placement for this top because there was an interesting border parallel to the selvage which meant that I couldn’t use it as a hem so I used it for the sleeves instead.


 I used the same pattern that I did for my  from Sew You Home Stretch by Wendy Mullin which had an elasticated waist which I ignored. I just used the pattern for the sleeves which are gathered with elastic at the bottom.

 I’m obviously not wearing the skirt for sixth form, however that was the only black skirt available as I still need to hem the pencil skirt that will be worn in its place.
That’s it for now, thanks for reading, and again, BIG PICTURES! Oh and thanks to Connor who took the photos with his lovely camera and for the use of his garden.
Lauren x

Floral Shorts


It’s boiling here in the UK so I decided that I was in need of some nice floral shorts. These are high-waisted because I have a very long torso, and the high waist breaks it up a bit.
This is my second attempt at bottoms. The first was a pair of trousers which I approached with trepidation as I have heard about all the issues that you can face with the crotch length etc. However these fitted fairly well with just a few alterations. The second time round with these shorts only took a couple of hours in total as they are quite simple to put together when you know what goes where.


The pattern I used was a vintage Simplicity 9944 released in 1981 which was inherited from someone or other. They are high waisted with a back zipper, which relieved me from figuring out how to do a fly front zipper.
It is a size 12 but the muslin was fairly easy to fit as it just needed tapering in at the hips and the waist.
To make the trouser pattern into a shorts pattern I just cut off 5cm after I wanted the shorts to finish.


 The fabric was a fairly light weight cotton which was a bargain at £2 a metre. The shorts only used up 1m so I still have 3m left to figure out what to do with. There have been several ideas, but none have come to fruit just yet. It is going to be a dress, but any more I can not tell you.


The only issues I had with these was the hem as I tucked it underneath there was excess fabric so there was a bit of tuckage in various places, but no one will notice…I hope…
All in all I’m really pleased with these shorts. They have already become a summer wardrobe staple.
Oh and I’m going on a Symphony Orchestra tour tomorrow so i wont be posting for a week or so.


Thanks so much for reading!
Lauren x

My First Pair of Trousers


These are a pair of high-waisted trousers with a zip up the back instead of the modern fly front zip. I looked around in a couple of charity shops for a large pair of trousers that I could recycle the material from and I found a pair of size 16 linen trousers for 3.50 (this is in pounds still, turns out I’m not blind, there really isn’t a pounds key on this new keyboard).


This was the pattern that I used. Even though it was a size 12 they fit fairly well, but just need a bit shaving off at the hips which is to be expected. As they are fairly loose trousers I’m guessing that was why I didn’t encounter any of the difficulties that  I was anticipating.


I strategically placed the back pattern pieces bearing in mind the placement of the back pockets that I recycled from the original pair of trousers. I also used the waist band so I didn’t have to figure out how to do a buttonhole. The bottom of the pattern pieces was cut on the hem so I didn’t have to hem it but next time I’ll let down the hem because I don’t like the raw edges at the sides so visible near the hem. The zip was handpicked and obviously needs doing again, as I look at that photo.
And please don’t ask why my head is in a forest of leaves because I don’t know either…


Why can’t I stand straight like a normal person?!
Anyway, I love these trousers as they put me back into proportion as I have a long torso and I’ll probably make them again in a suiting fabric for sixth form.


Thanks for reading!
Lauren x

A Dress in a Day


As a thank you for the tons of help my friend Meghan (to your left) gave me towards my maths GCSE I wanted to make a dress with her, and this was the finished product! We managed to make a muslin of the bodice, and a fully lined dress from 10am-10pm with breaks for lunch and tea which was pretty good going, we thought. Meghan did 95% of the sewing (I did a bit of the hemming) and I instructed, which was good for me because I “consolidated my learning” by passing it onto another human being.


We used view E from Simplicity 3823 with a button loop halterneck as there wasn’t enough fabric for ties as we had 2 metres of fabric.
The construction of the bodice is really clever as the lining leaves no raw edges, making it lovely inside. As we cut out the skirt pieces in a white cotton for the muslin we thought that we might as well line the skirt. The lining fabric and the fashion fabric were hemmed individually so they could hang properly.
I have attempted to use this pattern before without much success, because even though it has a size 6 there are an extra 2 1/2 inches of ease which I could really do without! I realised though that when I did my previous muslins I shouldn’t have lined them as that makes it so much harder to alter. With this in mind we cut a size 10 as that was what her bust measurement fitted with the finished measurements at the bottom of the envelope.


The only changes we made were to alter the neck line slightly to stop it from gaping and to make sure that Meghan doesn’t flash everybody.
We slip stitched the hems on both the lining and the fashion fabric. In reflection we could have just machine sewn the lining and saved oodles of time.
We found a perfectly matching yellow zip to go down the side of the dress which was handpicked for precision.


This was the halterneck button closure. We found a button that matched from Mums massive button collection. The pattern called for two but one fairly big one seemed to work fine. For the loop, I folded some thin red ribbon in half and slip stitched it together as I can’t figure out for the life of me how I am supposed to turn a tube of fabric 0.5 cm in width the right way out.


The fabric was amazing, with all sorts of things on, including unicorns and suits Meghan perfectly. It was sourced at a local market stall.


A massive petticoat complemented the full skirt perfectly.
It was great fun making this dress together and I’m sure that we’ll do a lot more sewing in the future.


Thanks so much for reading!
Lauren x