Hello all! This is the point in my British Outfit project in which I go properly out of my depth. I have never attempted shoes before, and here I am attempting to do it with British materials, making the job at hand 100 times harder. When researching making shoes I decided that I had 3 options: clogs, ballet pumps or espadrilles. Ballet pumps were quickly out of the equation because glue is heavily featured in their construction. I decided that espadrilles would be my best bet if I could just source some British rope. Unfortunately, as far as I could find out, British rope does not exist. This left me with one option: clogs. I was very much inspired by Carolyn's clog making and decided that if she could do it, I could too. This meant that I had to try and find some British wood. Luckily I had to look no further than my Dad for this information. A keen cricketer, he was quick to point me to Hunts County Bats, a company that makes British cricket bats from British willow. I gave them a ring and a lovely man named Tony invited me to his workshop and said he'd see what he could do.

The first step was to draw around a template of my foot that I had handily prepared. That guideline was then used to trim the block to the rough shape of my foot.
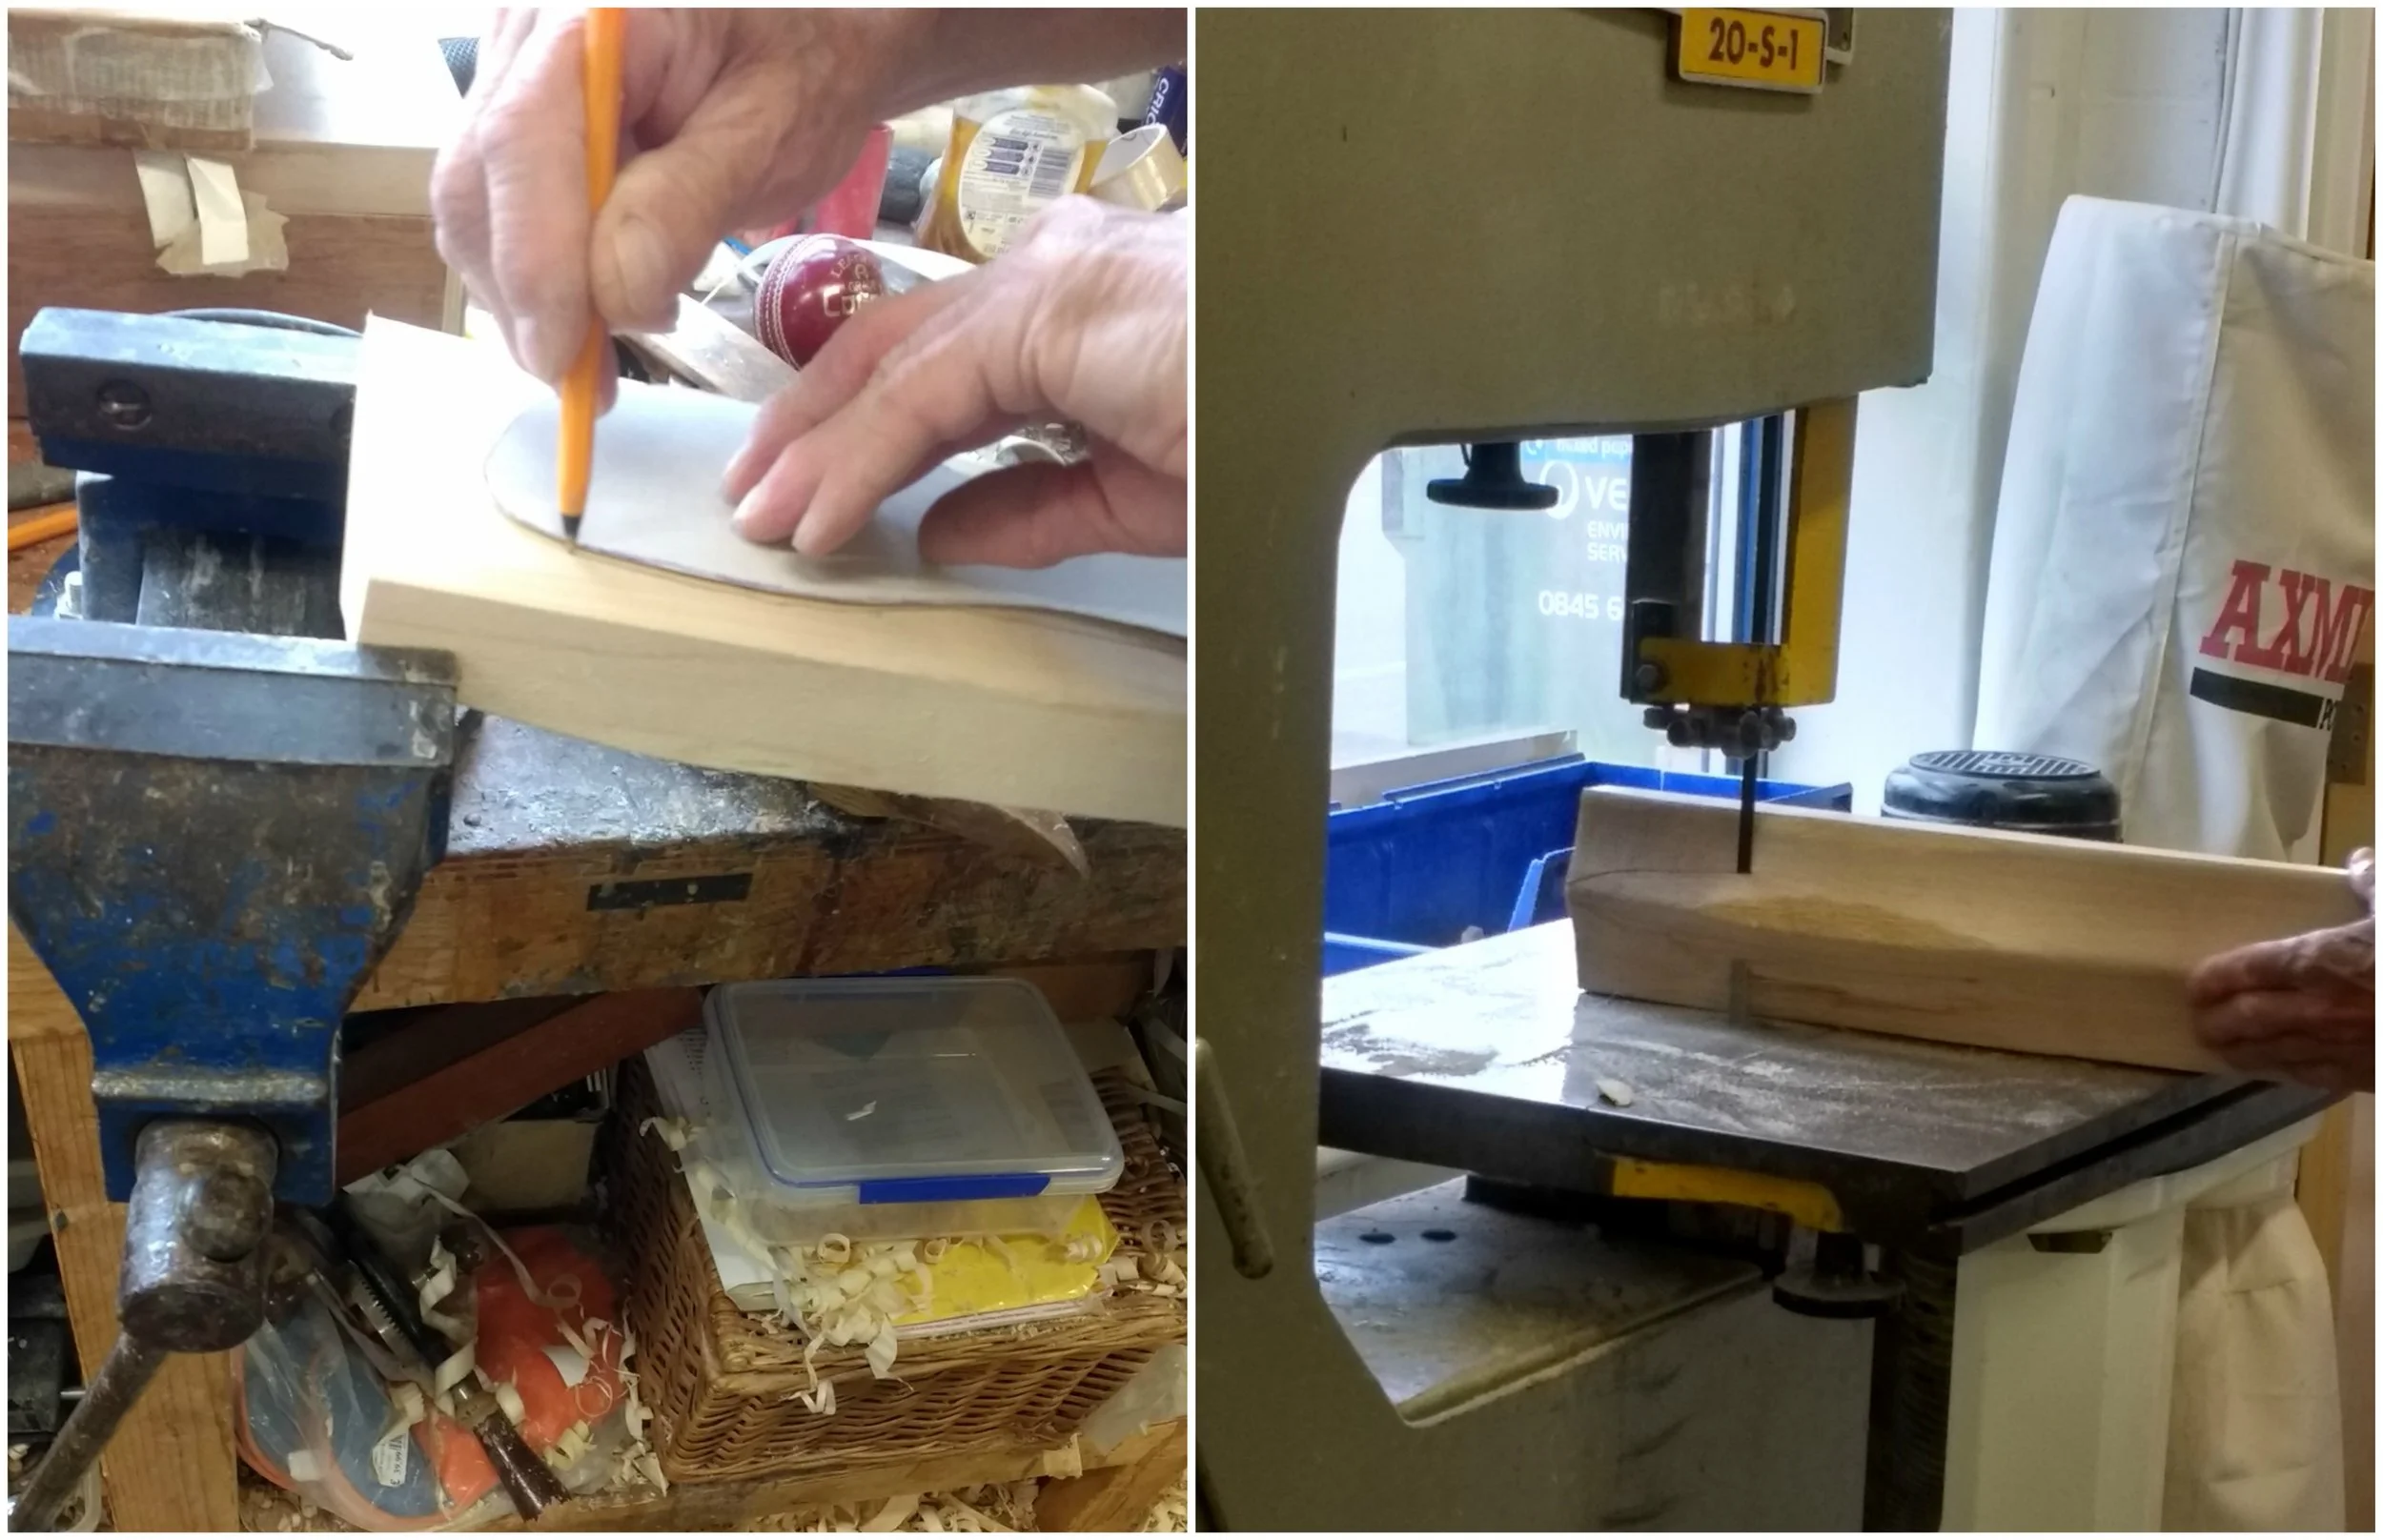
The next step was to cut in the heel and the arch, and also gently shape the top of the shoe. This was very much guesstimated as we had no point of reference.

When we had the shape that we wanted, Tony sanded them down using an electric sander to make them super smooth. You can see the difference it makes in the picture below, (left shoe sanded, right shoe unsanded).

And there we have it, my beautiful clog bases! I can't thank Tony enough for his help. Without him this would have involved many hours of struggle, and I think this whole process took less than an hour.

I oiled my clog bases with linseed oil (Thank you Dad for having it in the cupboard all ready to go) to make them a bit more waterproof and give them a nice shine. In the picture below the bottom clog has been oil and the top clog is unoiled.

The next step was to source some leather for the uppers. It proved to be a bit of a minefield to find leather that fit the requirements that it had to be British made with no chemical processes. It turns out that most leather (even if it is manufactured in the UK) is Chrome tanned, which is a chemical process that is quicker and therefore more cost effective than the more traditional technique of vegetable tanning leather. When I did find British veg tanned leather, it still wasn't feasible to use it for my project because most leather suppliers sell leather by the hide. I only wanted a square foot for the uppers of my sandals and couldn't afford to pay the £100+ that these hides cost. Luckily I found the company Tanner Bates who produce handmade leather goods using traditional skills, who agreed to supply me with a foot of oak-tanned leather for £30, which was much more within my means.

Whilst I was looking for British leather for my uppers I came across Thomas Ware and Sons, who supply English sole leather. I thought that I was all set for soles with my wooden clog bases, but I contacted them anyway and they very kindly sent me samples of their different soles: full soles, half soles, heels and insoles. I decided to attach the half soles and heels to my clog bases to give the soles of my clogs some more grip, and to prolong the life of my shoes. Unfortunately the only way to do this is glue, and this is where I had to compromise. I used Evo-Stik contact adhesive which is at least manufactured in the UK if not made from British materials. The way it works is that you apply the glue on both of the surfaces you want to adhere to each other, you let it dry until it becomes tacky, and then stick them together. Then I trimmed off the excess leather with a stanley knife which was quite a painful process, especially near the heel of the shoe.

The next step was to work out the design which was very much directed by the lack of fastening needed. I could have easily gone for a slip on design, but I like having my heel supported and I needed these to be wearable for me. After I looked at some inspiration images on Pinterest I played with bits of paper until I had what I wanted, and then cut the shapes out of leather.

After I cut the leather out I found it really hard to try and get the fit right on the shoe base. In the end I had to resort to using my tutors unicorn duct tape to try and get the leather to stay where I wanted it to, but then this needed moving when the nails were hammered in. There was no way of marking the strap placement on the wood which made the whole thing a bit of a struggle.

Next it was time to nail the leather to the wooden base. I was originally very proud to find British made iron nails but then I was informed that they weren't suitable for my shoes and that they would split the wood. Ring shank nails were recommended to me as an alternative (the ring shank acts a bit like a screw and makes sure that they stay in the wood) but unfortunately these nails are definitely not British made. I'm quite sad about this, as this is the only element of my entire outfit that isn't at least partially British. However, there was no other way to get the leather to stick to the wood so that compromise had to be made.

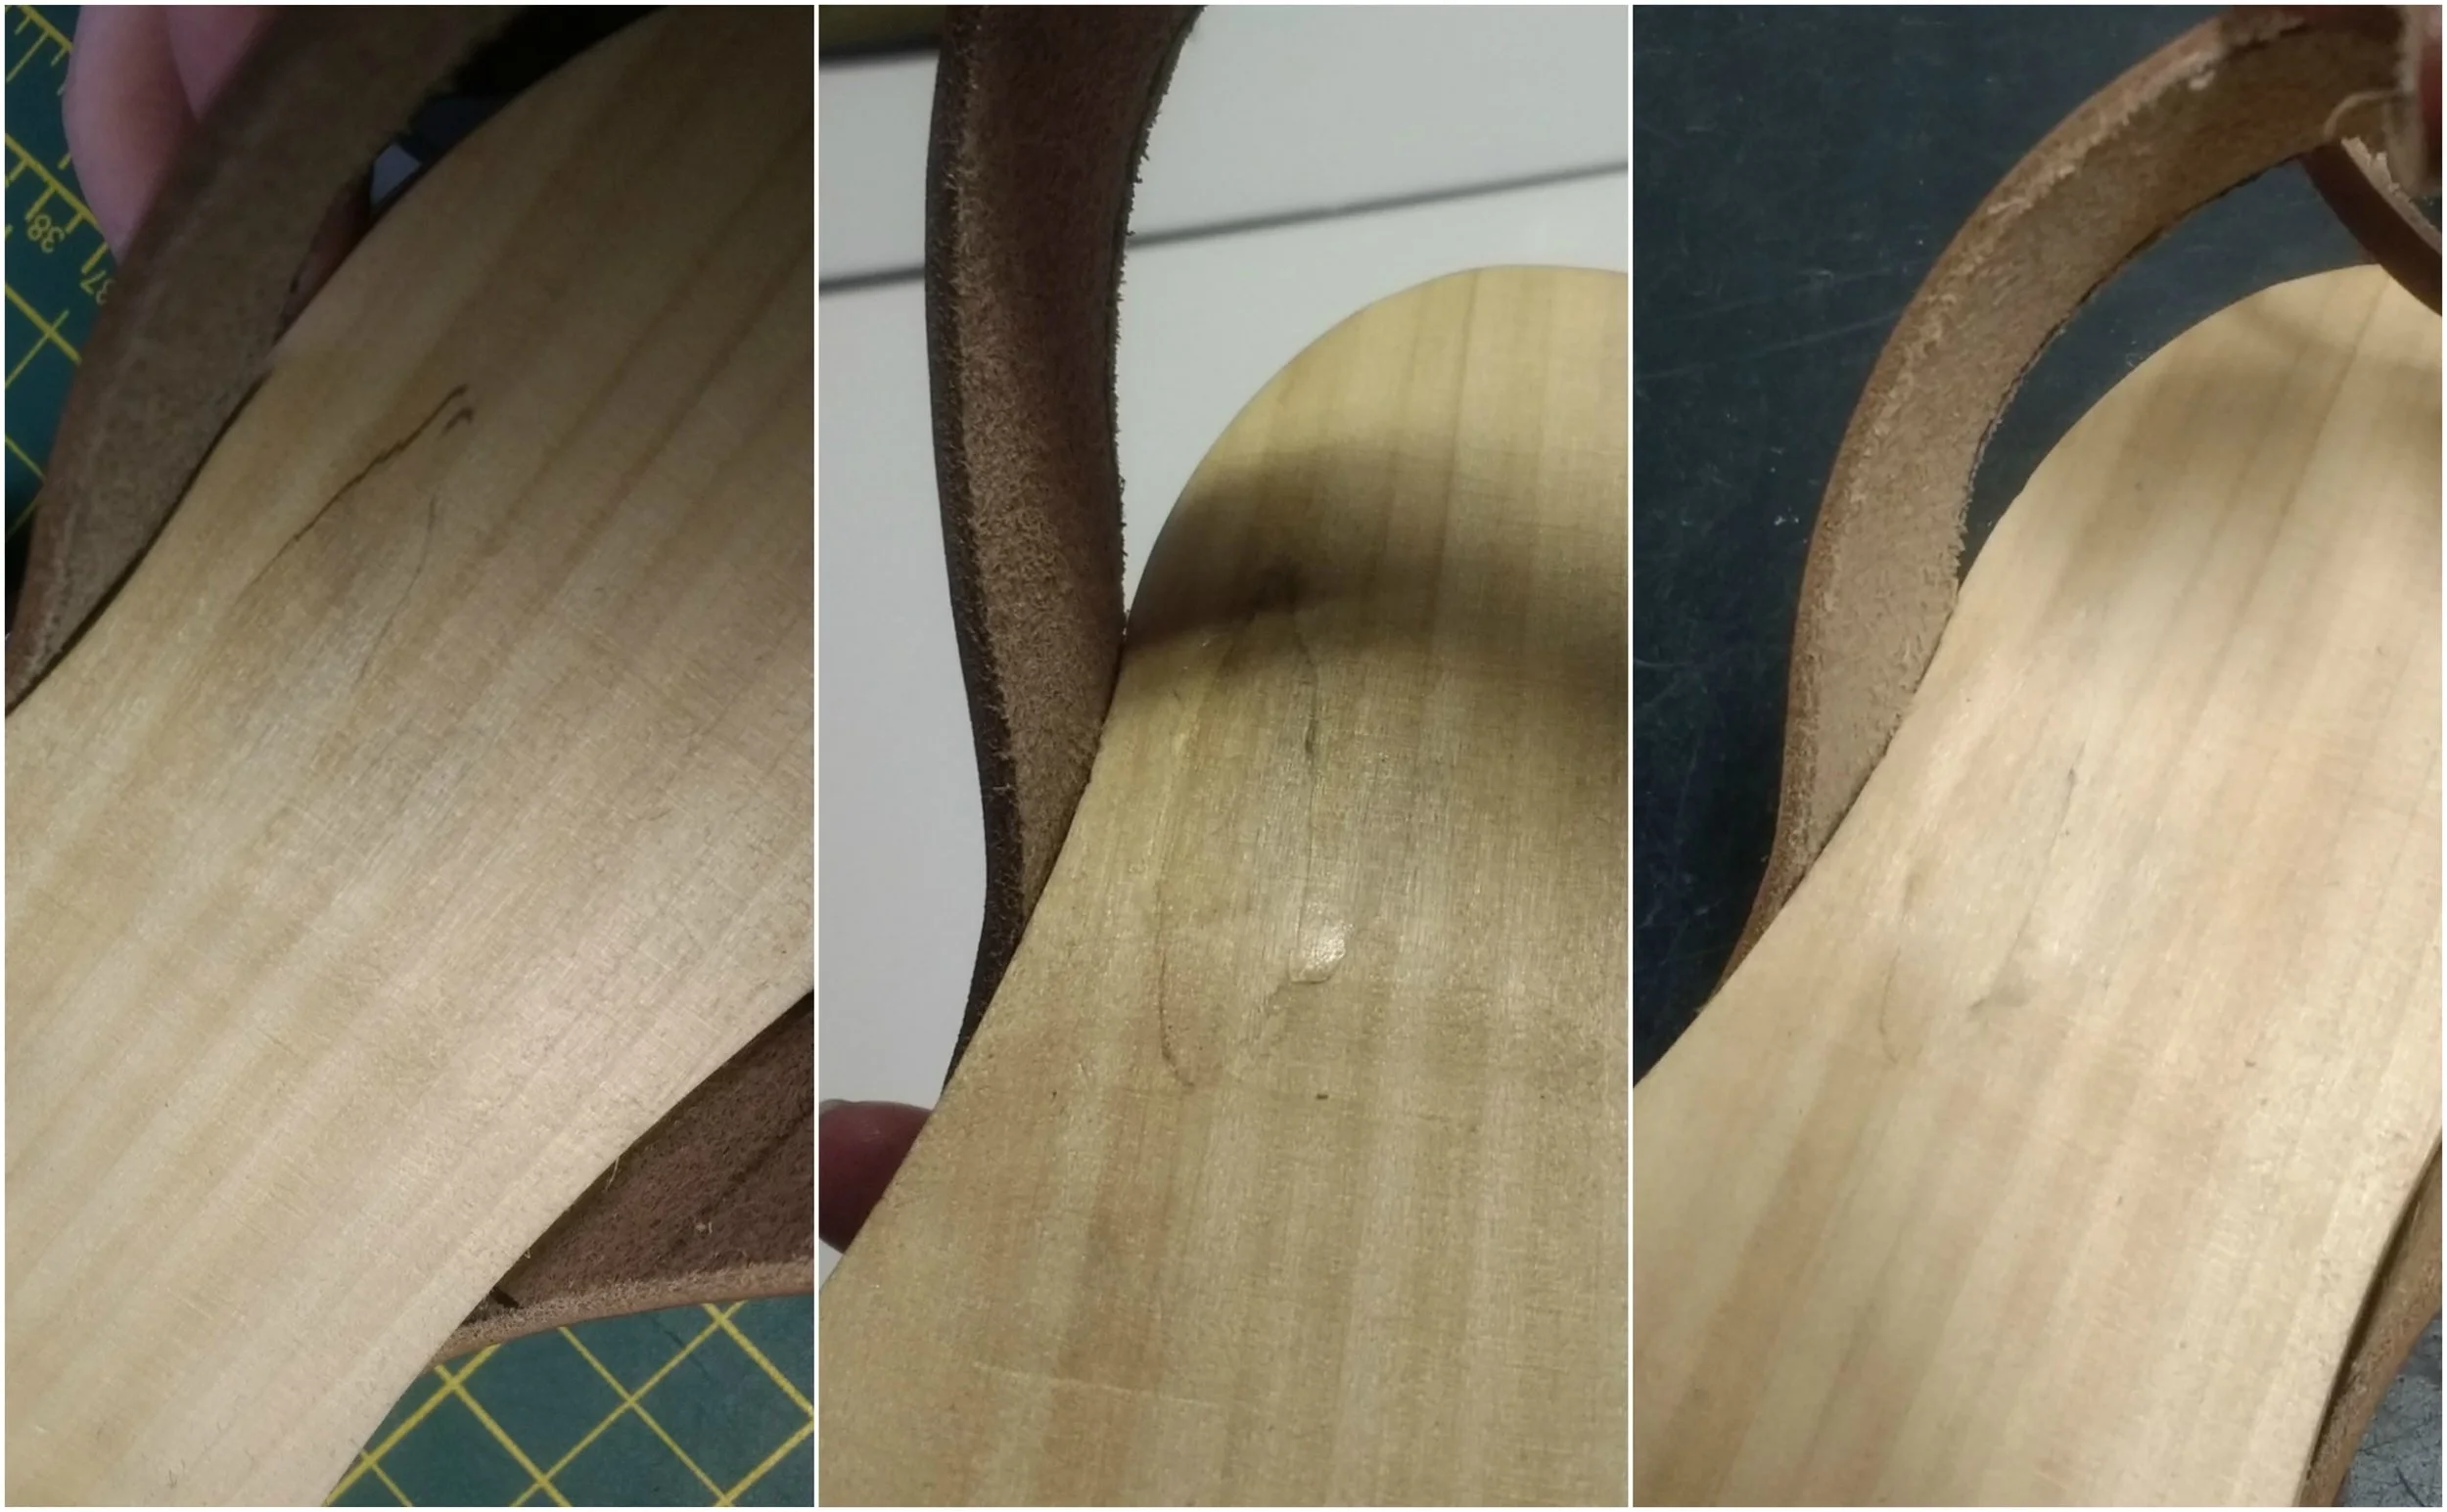
I was very much a novice when it came to hammering in my nails. Hammering nails in straight is hard! Sadly, when I was hammering in the nails on my second shoe it went too close to the top and split the wood (as you can see in the far left picture below). After a bit of a cry and a phone call with Dad I popped down to the scenic department to see what their advice would be. Luckily Michael knew exactly what to do. We got the wonky nail out, stuck down the splintered wood with PVA glue (I know not British but it was an emergency) and then drilled a new path for the nail which wouldn't split the wood again. The middle picture below is just after the repair and the picture on the right is after it's all been sanded down. Almost as good as new!
In the picture below you can see how the nails look on the shoes. Some of them are straighter than others, but it was a very steep learning curve. I'm really angry with myself that I sharpied the cutting lines on the back of the leather. I completely forgot that the wrong side of the material would be seen. Pencil would have been just as functional.
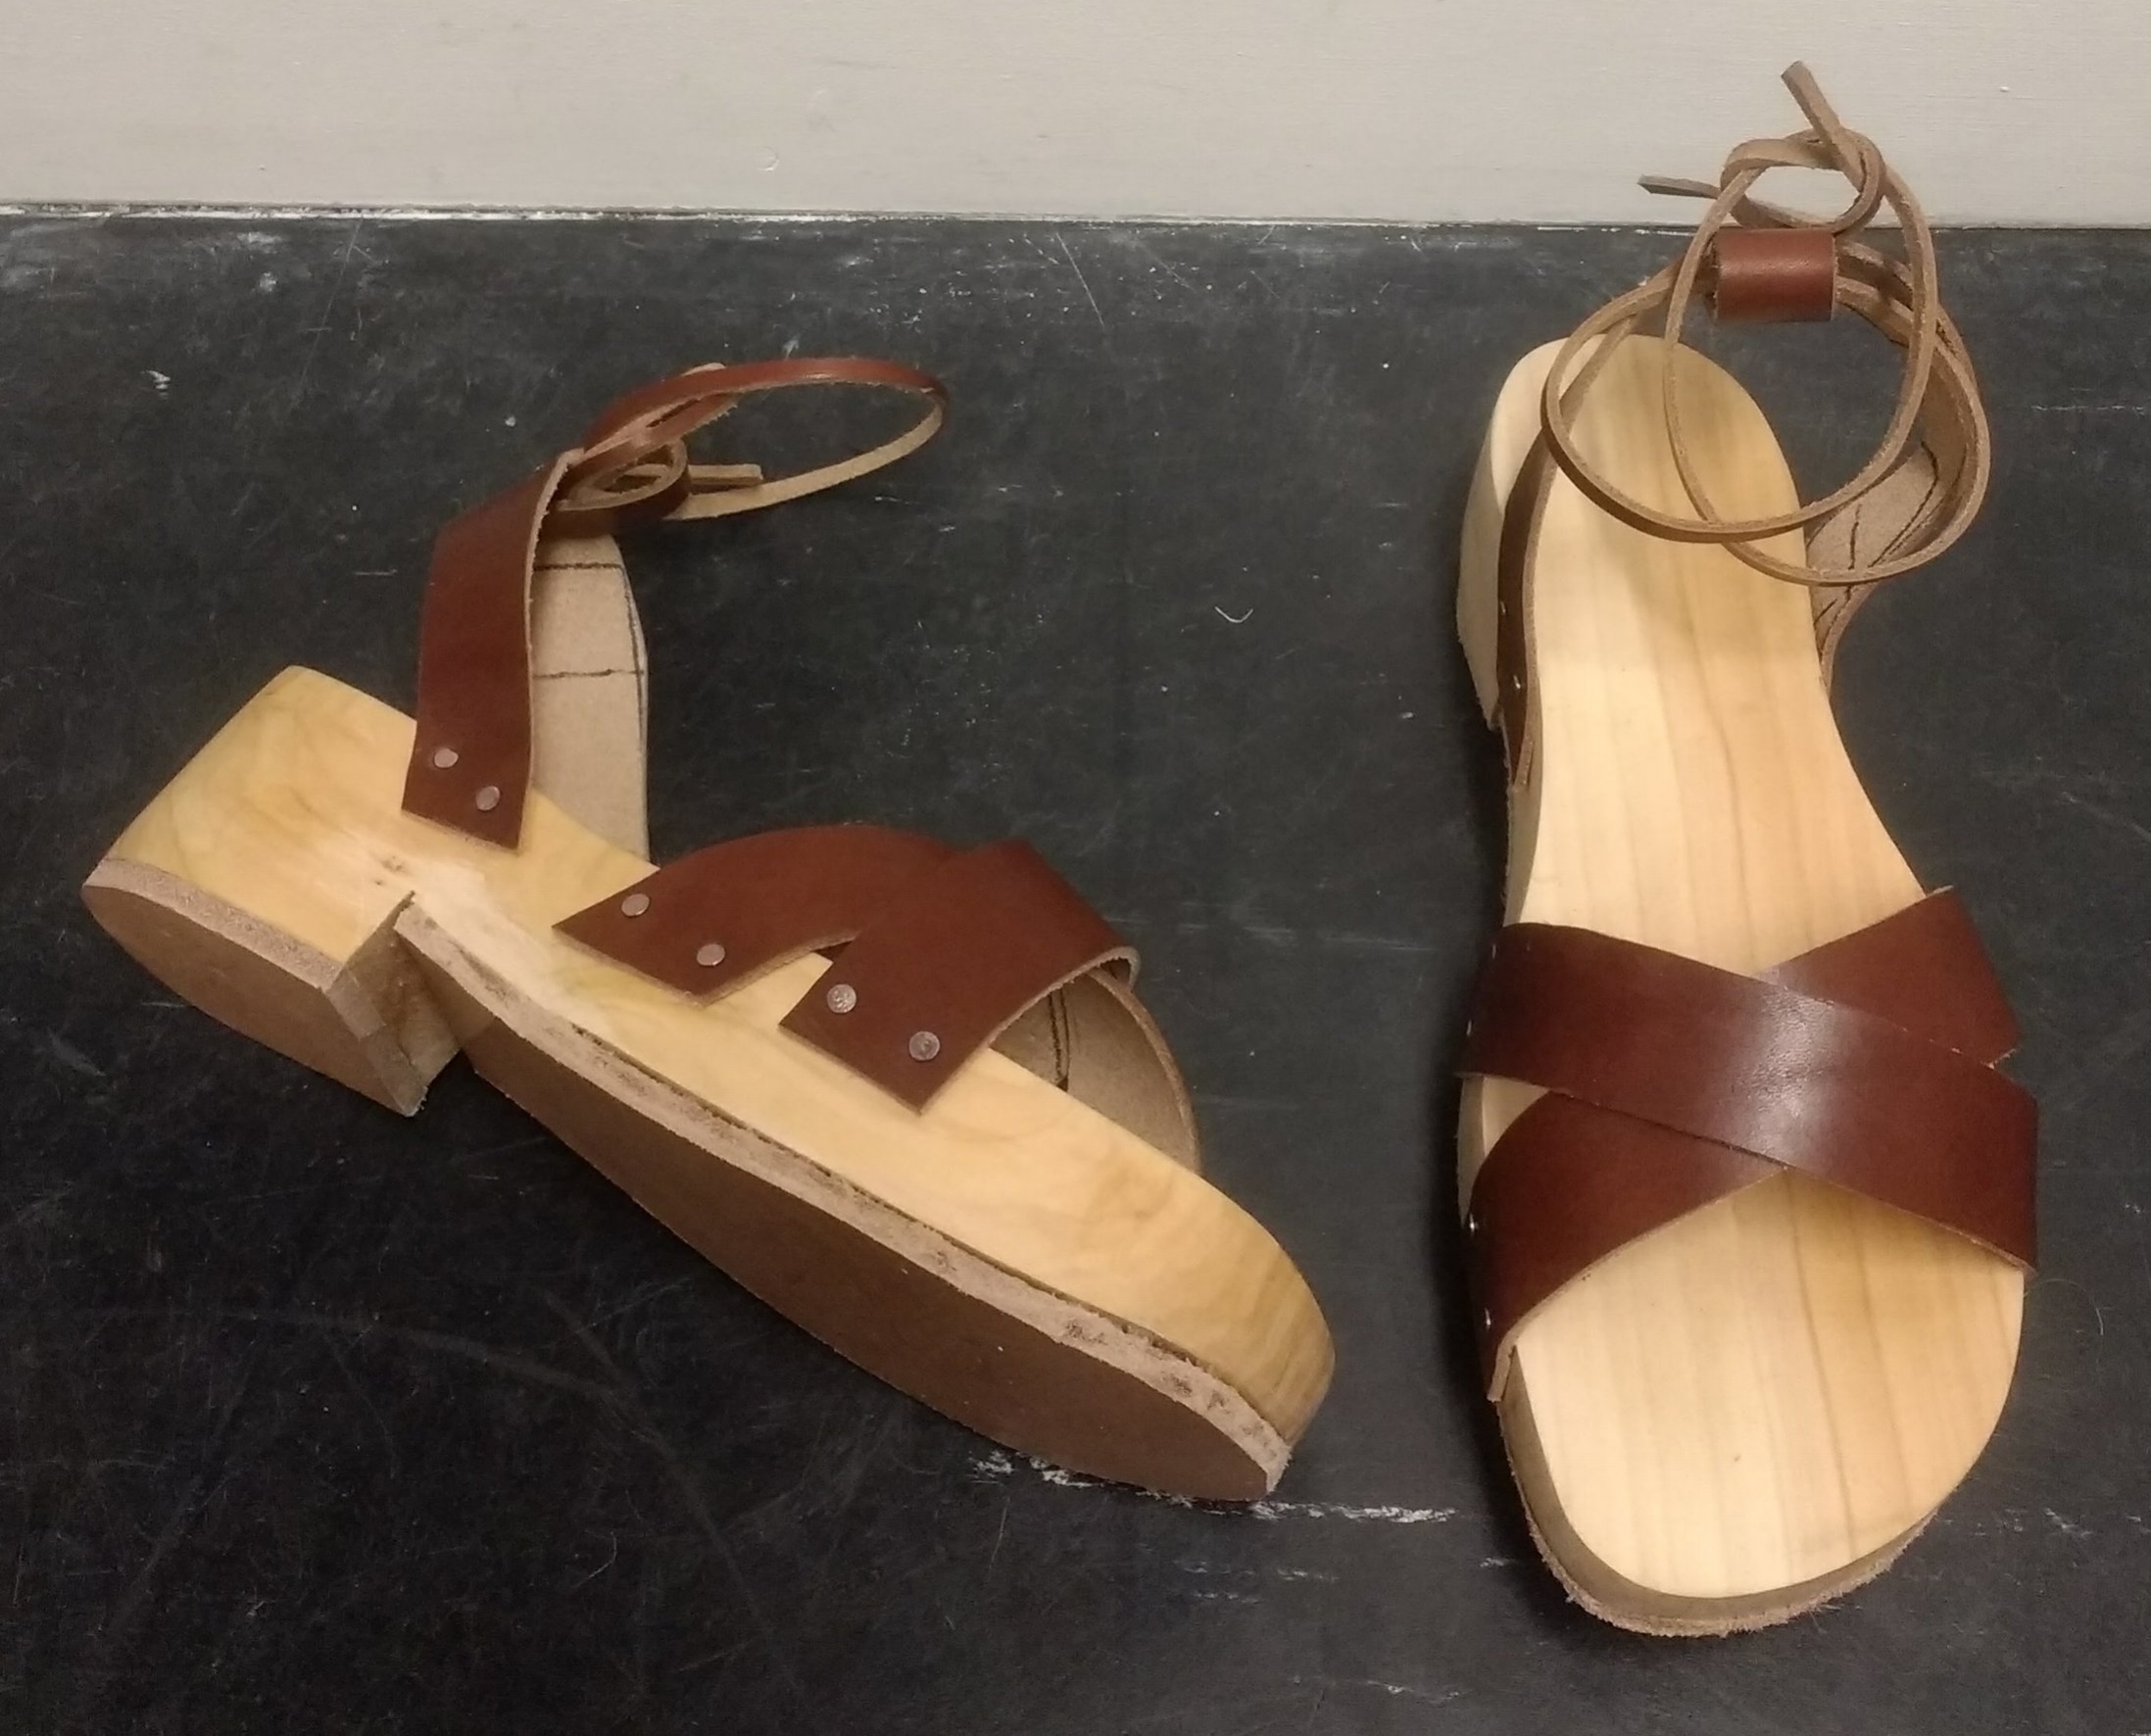
I cut a very thin strip of leather to act as a cord to tie around my ankle as a strap. Unfortunately it doesn't tie very well and I think the thin width of the tie is very much at odds with the widths of the leather strips on the rest of the shoe. I'm thinking about making some fabric ties for the ankle straps instead. As the clog bases are handmade, they are very much sisters and not twins. This meant that it was nigh on impossible to make the crossed leather on the front of each shoe look even. Even though it measures even, it still looks a bit off which is frustrating.

The clogs have probably been the trickiest aspect of my British outfit so far, purely because I was going into the whole thing blind, with very little knowledge and experience. I am very proud of them though, scars and all, and I look forward to seeing how well they wear in the next month or so.

Thank you very much to Dave and Michael in the Scenic department who were there for me everytime I had a question or dilemma. Your recommendations were invaluable. Thank you to Alex for lending me a sharper knife and to Amy and Bethan for holding my shoes down while I hammered the nails in and for taping my feet when I asked them too.
Just the jumper and the trousers left to go!
Lauren xx