Stripey Top

Hello all! Today I’ve got to share with you a new top of mine for this months Minerva make. A good navy stripe is very hard to come by so when I saw this one I pounced. I wanted an off the shoulder crop top to add to my wardrobe so that is what I made!

ST3.jpg

You can read all about the making process on the Minerva Crafts blog here

Thanks for reading and to Minerva Crafts for providing the supplies for this project!

Lauren xx

Summer Ball Dress 2018

Hello all!

Today I have to share with you the summer ball dress from my third and final year of university. I'm not going to lie to you, this years dress was a bit of a rushed affair. The thing is, I had a plan. I was going to make a scuba dress which would take a couple of hours at most and at 2 days before the ball I had plenty of time. However, after I'd cut out this scuba dress and the moment I tried it on I knew that I looked like sausage meat in a floral scuba casing and needed a plan B. At the same time I was having this realisation my boyfriend had just cut out the tie I was helping him to make out of the scraps of the teal silk left over from a BHL Anna dress I made a few years ago. I knew that I wanted a dress out of the scraps of the scraps of that teal silk, and suddenly it was 3pm the afternoon before the ball and I had until midnight to draft, construct and finish the dress. Totally doable right?

SB70.jpg

At first I wanted something drapey, but without access to a mannequin it just wasn't going to work.  I did try to use myself as a human mannequin, but I'm not that flexible and don't react well to having pins stuck into me. This meant that it had to be drafted on paper. I looked at the patterns I had and the BHL Holly jumpsuit jumped out at me. I ended up using only the front bodice piece from the pattern (mainly because I'd lost the back bodice pieces) and splicing together  side back and centre back pieces from a strapless bodice block I had laying around. The skirt is a quarter circle skirt drafted with the BHL circle skirt calculator. 

SB19.jpg

I managed to squeeze out the dress from the scraps left over and then it was time for construction. The bodice was sewn together and then the skirt attached. The straps were pinned on and then it was time to work out the fit. I fiddled around with the drape of the pleats in the front bodice and ended up tacking them down where I wanted them. I don't think that there was quite enough space so next time I would add more room in. Excess width was taken out from each underarm and down the centre back for a snug fit. What I could not get rid of were horizontal wrinkles in the back bodice, which had I had more time and fabric I could have pinned out the excess and recut. Sadly at this point it was 9.30pm and this was not going to happen, so after a bit of a paddy I had to make peace with them. There's a lapped zipper in the centre back which isn't ideal but I was lucky that I had one lying around to use. 

SB40.jpg

Then it was time for the finishing touches, bias binding the armholes which continued into the straps, and bias binding on the hem, both of which were slipstitched so the finishing would be as invisible as possible. I spent the next hour or so doing little alterations just to minimise the wrinkles as much as possible, then it was midnight and time to call it a day. 

SB150.jpg

I found it really frustrating to finish a garment which was less than perfect, because over the last couple of years I've really made the effort to perfect fit and it felt like a backwards step. However, sometimes you've got to cut yourself a little bit of slack and admit that that's the best you can do in a tight situation. I wore my dress for summer ball and had a wonderful wonderful time which is what mattered. 

SB170.jpg

Thanks for reading and to Edward for taking the photos on a beautiful beach in Hawaii!

Lauren xx

Black Dungarees

Hello all!

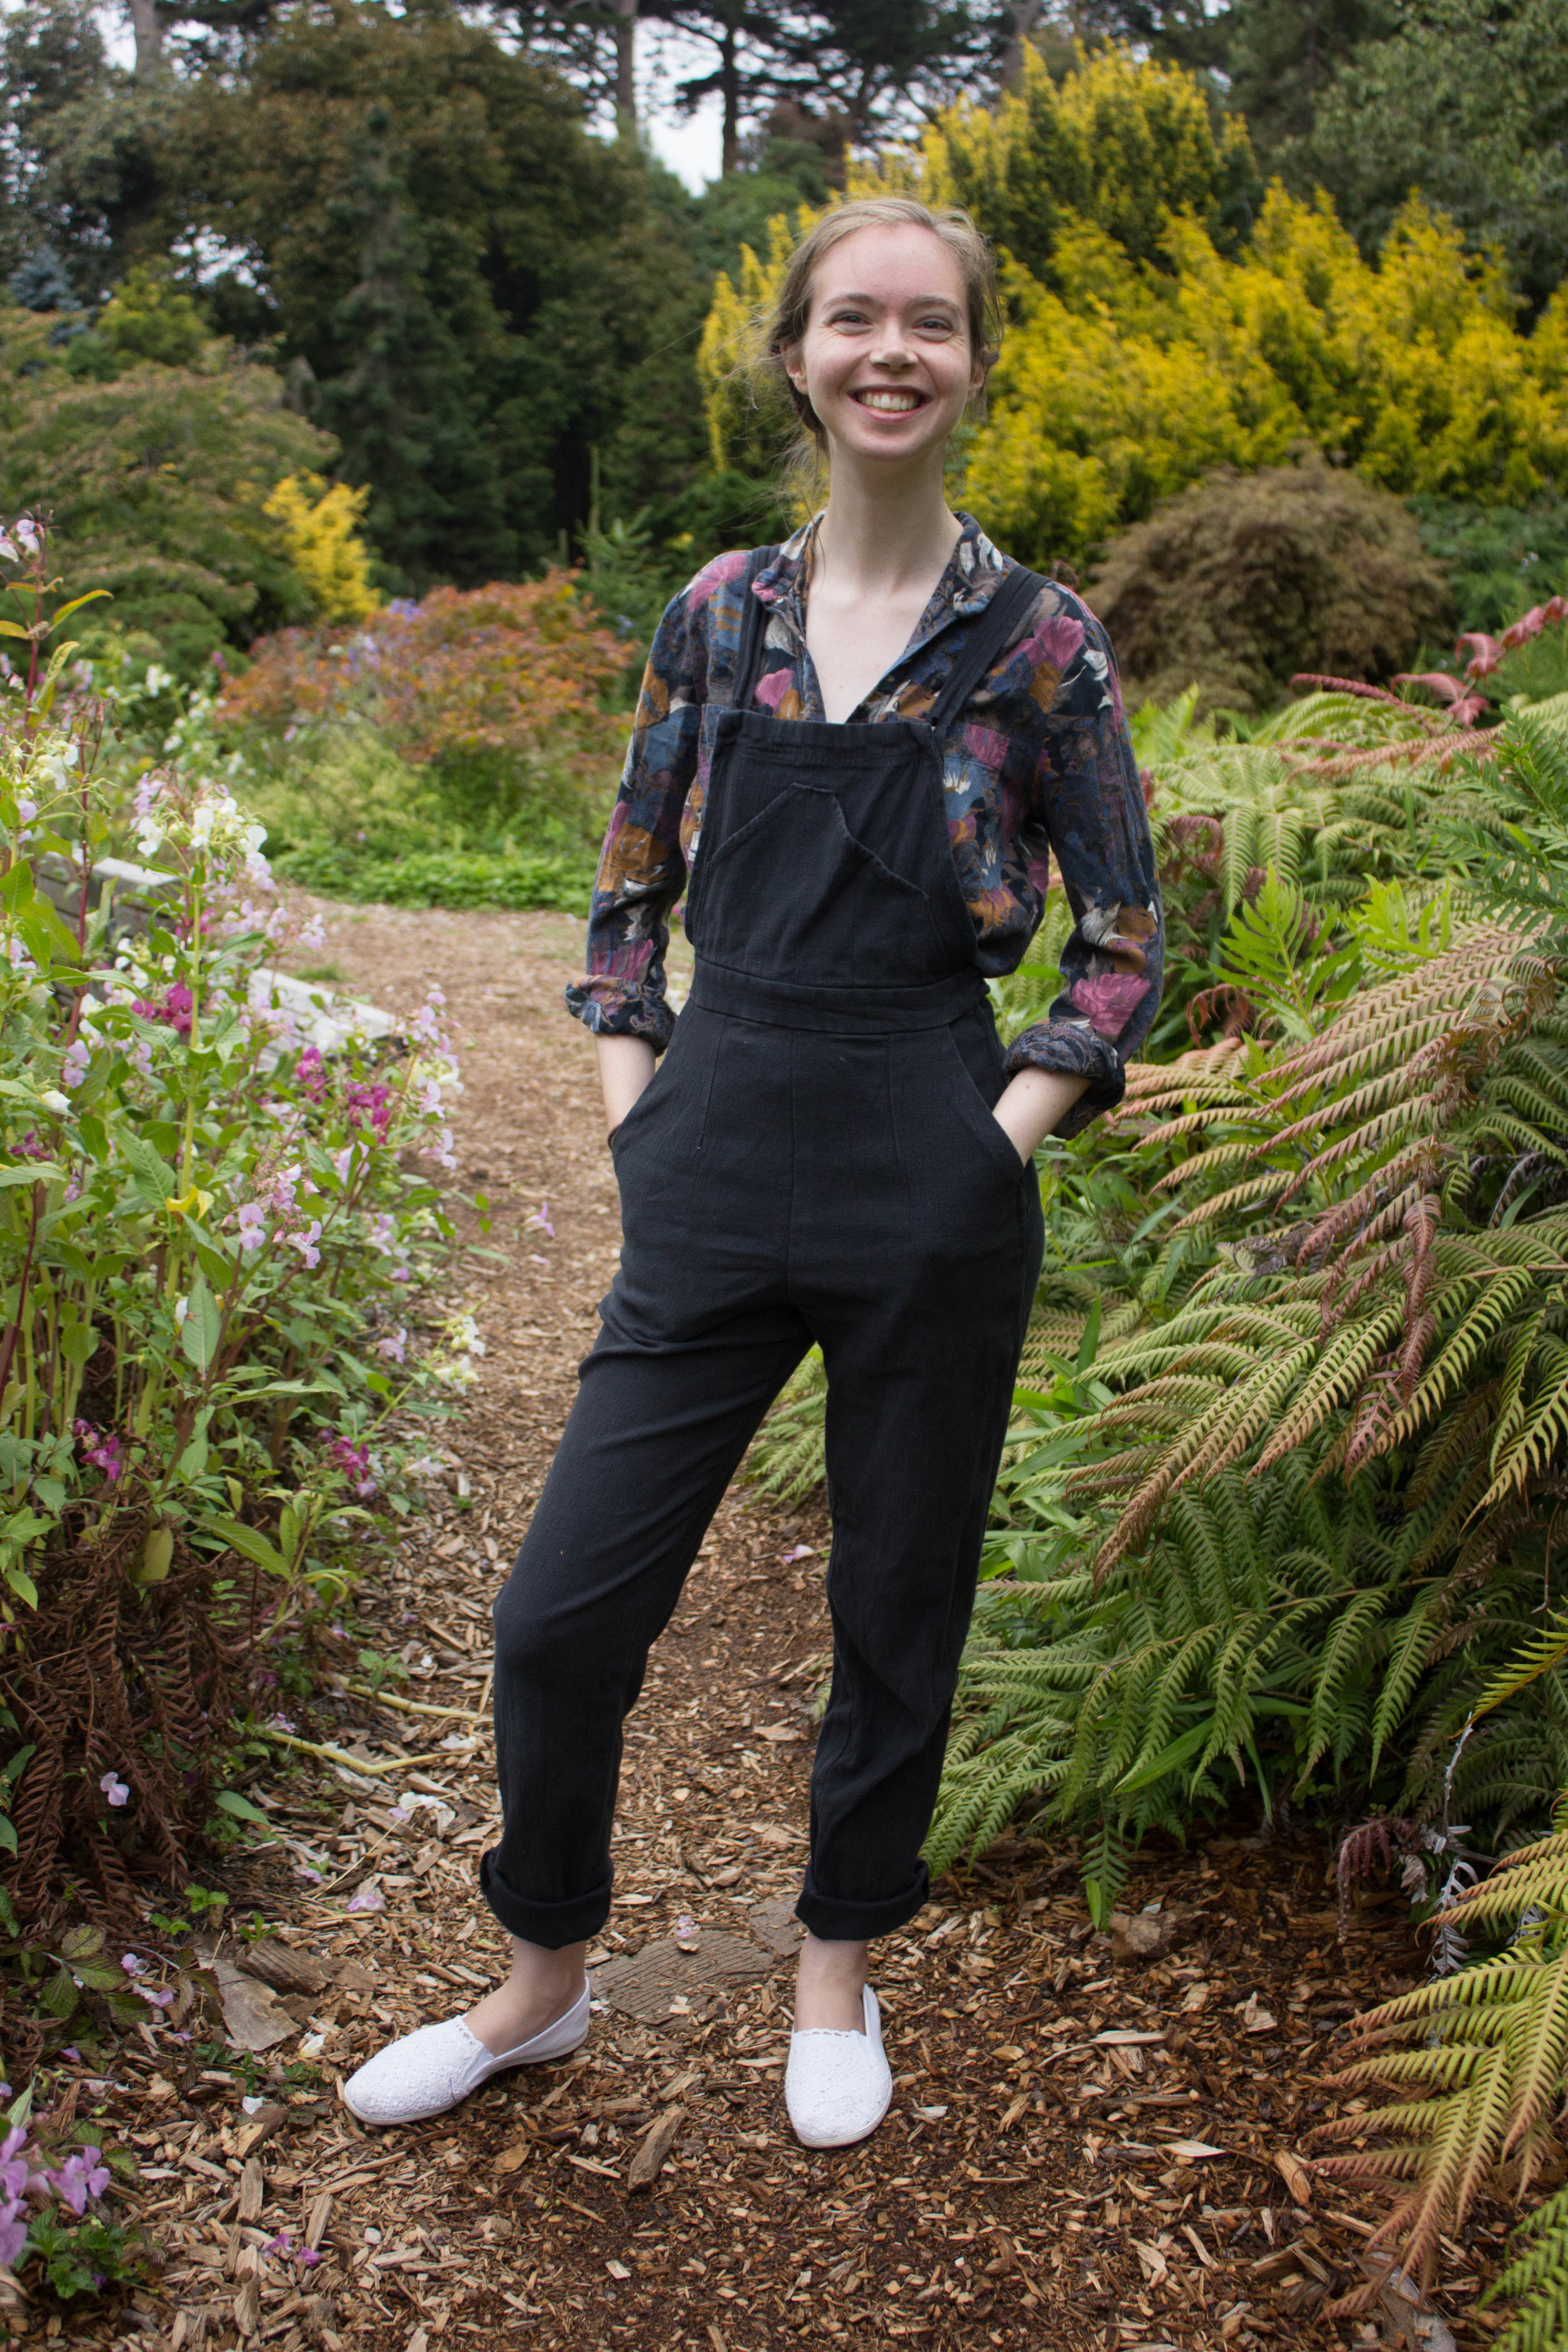
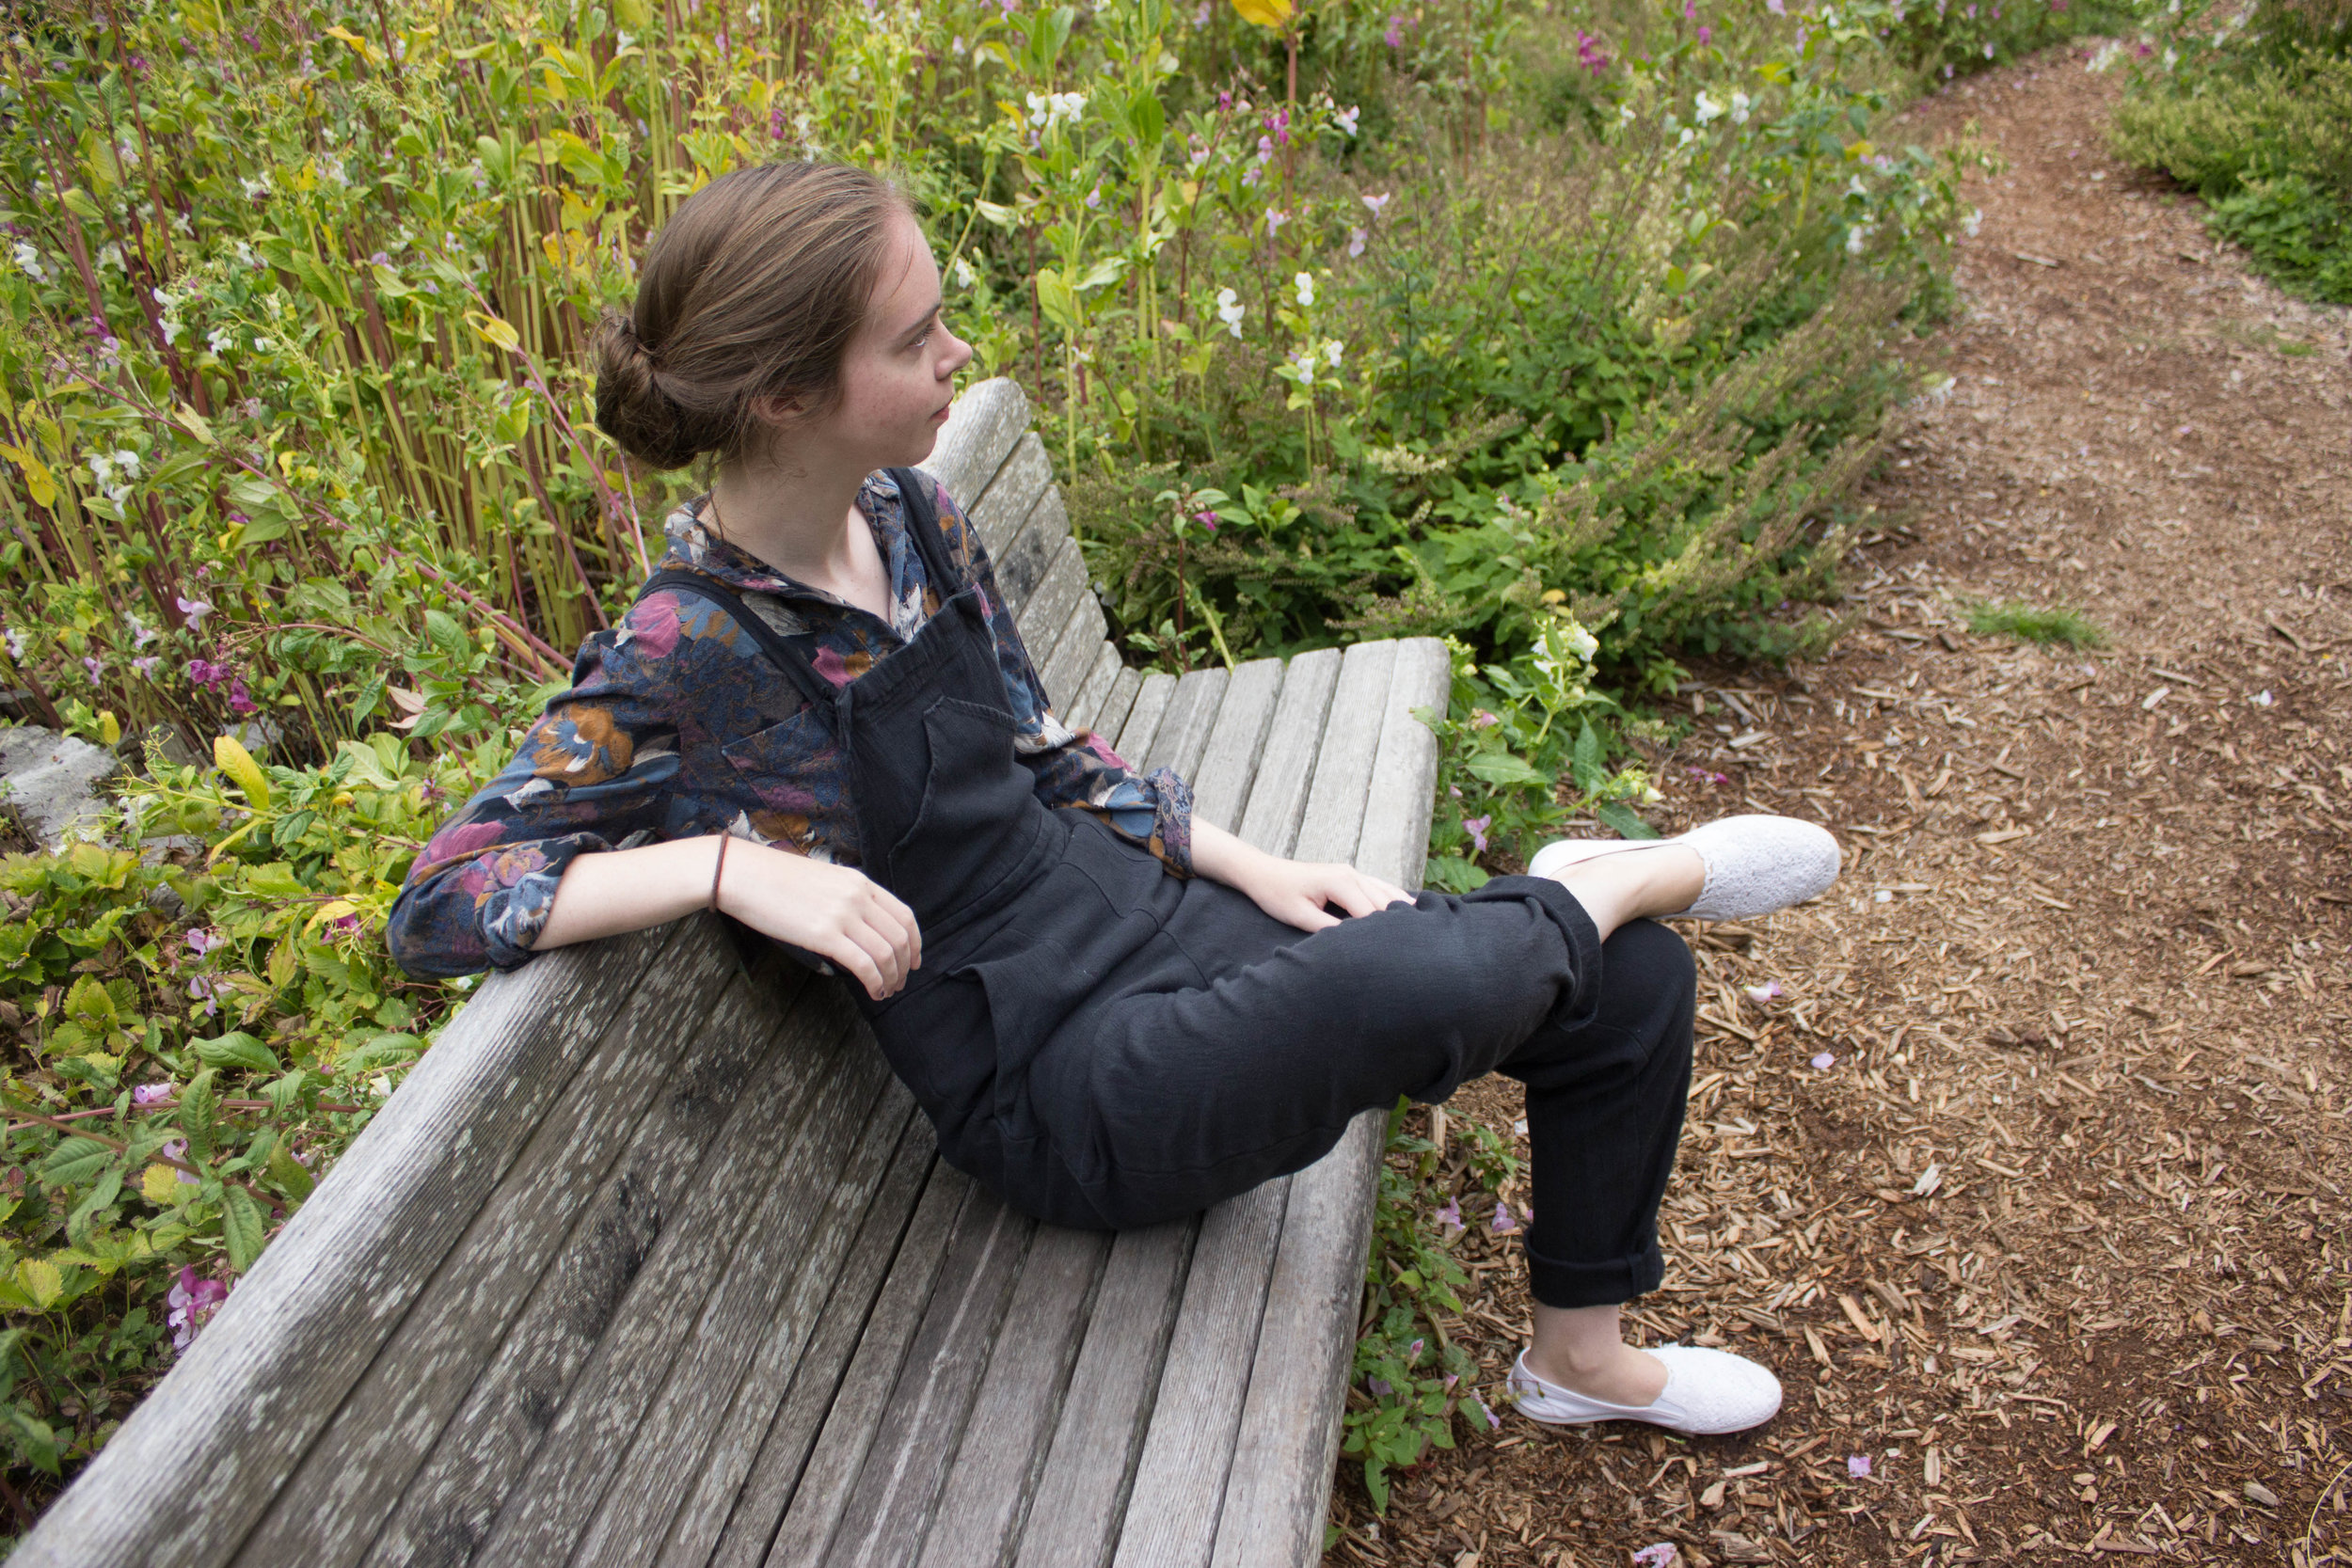
Way back in April I found out that I was going on tour for 6 weeks. I had to fit everything into a carry on case so the most capsule of capsule wardrobes had to be worked out. As a dresser on a show the dress code is all black. Long sleeves, full length trousers, as little skin as possible. Space was at a premium which meant that it wasn't worth bringing many clothes that weren't black. I ended up packing 3 pairs of black bottoms (jeans, dungarees and trousers) and I only ended up wearing the first 2. The trousers just weren't comfortable enough to be worth wearing for the long days that I was working. In terms of tops I brought 4 or 5 black tops, 2 coloured t shirts and a patterned shirt (that I am incidentally wearing in the pictures for this blog post). I brought my polar bear pjs but ended up not wearing them because sleeping on the tour bus was too hot, so I ended up grabbing some sleep shorts while I was on tour. It worked swimmingly as a capsule wardrobe because black on black automatically goes together but was extremely boring and I missed having fun with my outfit choices. Anyway, I'm finally getting round to blogging the dungarees I made for tour. 

D12.jpg

The fabric is a black bottom weight stretch cotton that the man at Leicester market found for me. I think I paid something like £8 for 2m. It's very pleasant to wear against the skin and the stretch content meant that I could be as flexible as I needed to be, especially when my work was so practically based. Cutting out was very straightforward and it sewed together beautifully.

D27.jpg

Patternwise I nabbed the bib from Closet Case Patterns Jenny Overalls and plonked it onto my self drafted trousers which you can see other versions of here and here. I wish I'd taken out the front darts because they look a bit silly on dungarees, but I think the leg proportions are perfect. I love a good rolled up hem on a trouser at the moment!

D18.jpg

Pocketswise I have the bib pocket and the front pockets which I made sure were deep enough for my phone. I ran out of time for back pockets, but I did cut them out so maybe one day. The bib pocket has stretched out a bit because I've shoved my phone in there so often so next time I'd stabilise that bit with some twill tape.

D7.jpg

I didn't use dungaree buckles to attach the bibs and the straps because they wouldn't be appropriate to wear backstage so I sewed buttons to the bib and buttonholes to the straps and they fasten that way instead. 

D20.jpg

They got washed a lot over the 6 weeks because they were pretty much 50% of what I was wearing and I love how the edges of the bib are ageing. It just gives the garment that little bit more depth. 

D19.jpg

Overall they were a tremendous success and I feel very Mamma Mia in them (which is obviously only ever a good thing). If I can find the right fabric I'd love to make some more summery ones, or go full Mamma Mia and make some navy dungarees.   

D1.jpg

Thanks very much for reading and to Ed for taking pictures in the beautiful San Fransisco botanical gardens!

Lauren xx

Closet Case Patterns Charlie Caftan

Hello all! 

For this months Minerva Crafts project I wanted to make something to combat this crazy heat that we've been having. The Charlie Caftan is as light and breezy as you can possibly get before stripping down to a bikini so this was what I decided to make! 

IMG_1369.JPG

 You can read all about the making process over on the Minerva Crafts blog here.

Thanks for reading and to Minerva Crafts for providing the supplies for this project!

Lauren xx

Exploring British Fabrics

Hello all!

IMG_2526.JPG

Following my dissertation on making an outfit from British materials I have become passionate about keeping my carbon footprint as small as possible. I like knowing exactly where my fabric has come from, and that it is ethically produced. I would like to make using British fabrics more accessible to the home sewers of today and I have made this survey to see whether there is any demand for this. 

I would be much obliged if you could take a second to fill out my survey and let me know what you think to the idea!

The link to the survey is here.

Many thanks,

Lauren xx