Silk Backless Playsuit Refashion

Hello all!

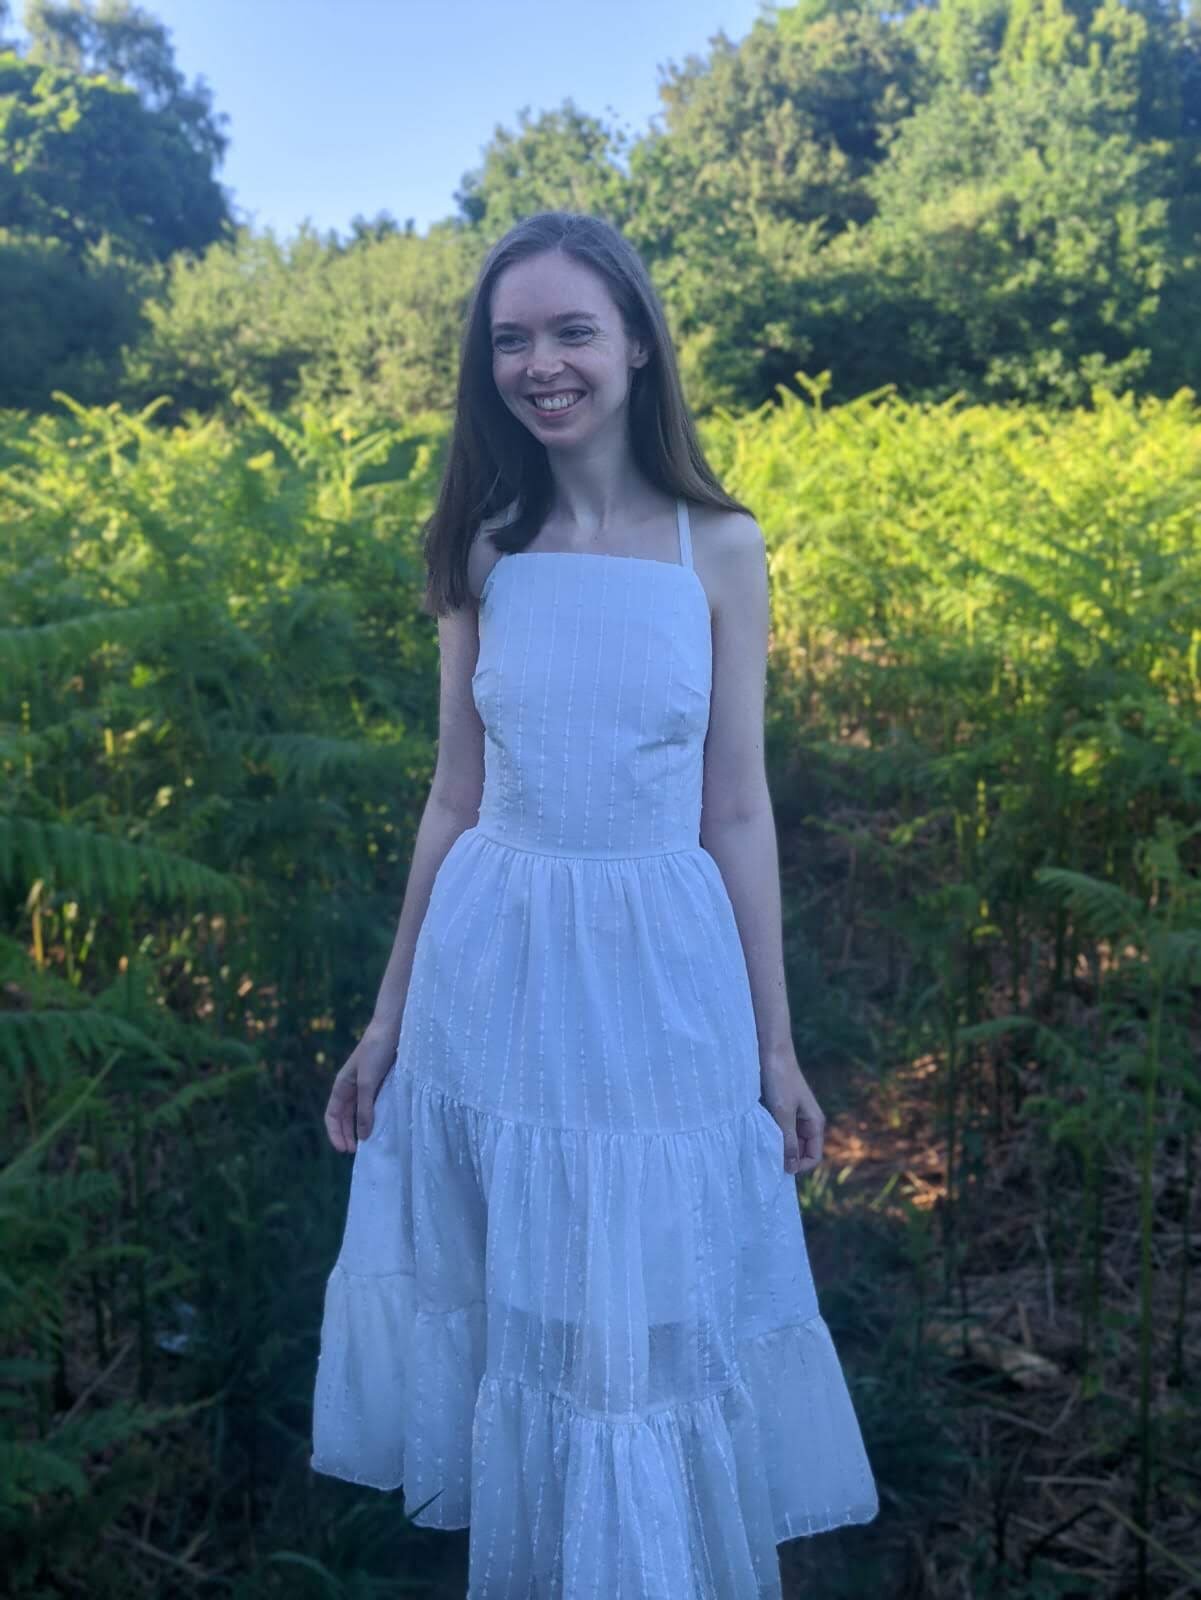
Todays one is a fun one. When Portia announced that #refashioners2020 was all about using what you have, I had a good rummage in my ‘to refashion’ box and dug out the remains of my Summer Ball Dress, sewn in 2016. (Click here to read the rather entertaining blog post I wrote about it at the time). To make things a little harder, a few years ago I decided to cut up said Summer Ball Dress and make it into something inspired by this dress. Unfortunately my version turned out rather buttock skimming and so was deemed innapropriate to wear around the house in. Then last summer I wanted to make some light silky shorts to wear to the beach, so I took my tent dress and cut some shorts out of it. So, what was I working with at this point? A pair of green shorts, the 2 triangles I used as the bodice pieces for my ball dress and the remnants of the tent dress.

IMG-20200624-WA0046.jpg

This was the action plan: Use the shorts as they were. Draft a bodice pattern with gathered underbust bits and a shaped midriff panel for the front, and just 2 narrow side back pieces attached to a shirred back panel attached to the shorts. I actually ended up designing it to be backless because I didn’t have a zip, but I did have some shirring elastic!

This ended up being what I’d call a ‘dirty’ make. It wasn’t about nicely finished insides, it was about being creative and making an idea a reality. (Think the refashioning round of the sewing bee). As a result, the insides are horrendous but I had a lot of fun troubleshooting as I went along putting it together. I managed to get my bodice front pieces out of the triangles as I’d hoped. The sleeves I had to piece several times, but I didn’t mind because it’s all in the spirit of refashioning.

IMG-20200624-WA0016.jpg

Sewing it all together went fairly smoothly. I played around with the bodice gathers a bit, and if I were to make this again I’d look at leaving the CF a bit clearer and focusing the gathers more under each breast.

IMG-20200624-WA0072.jpg

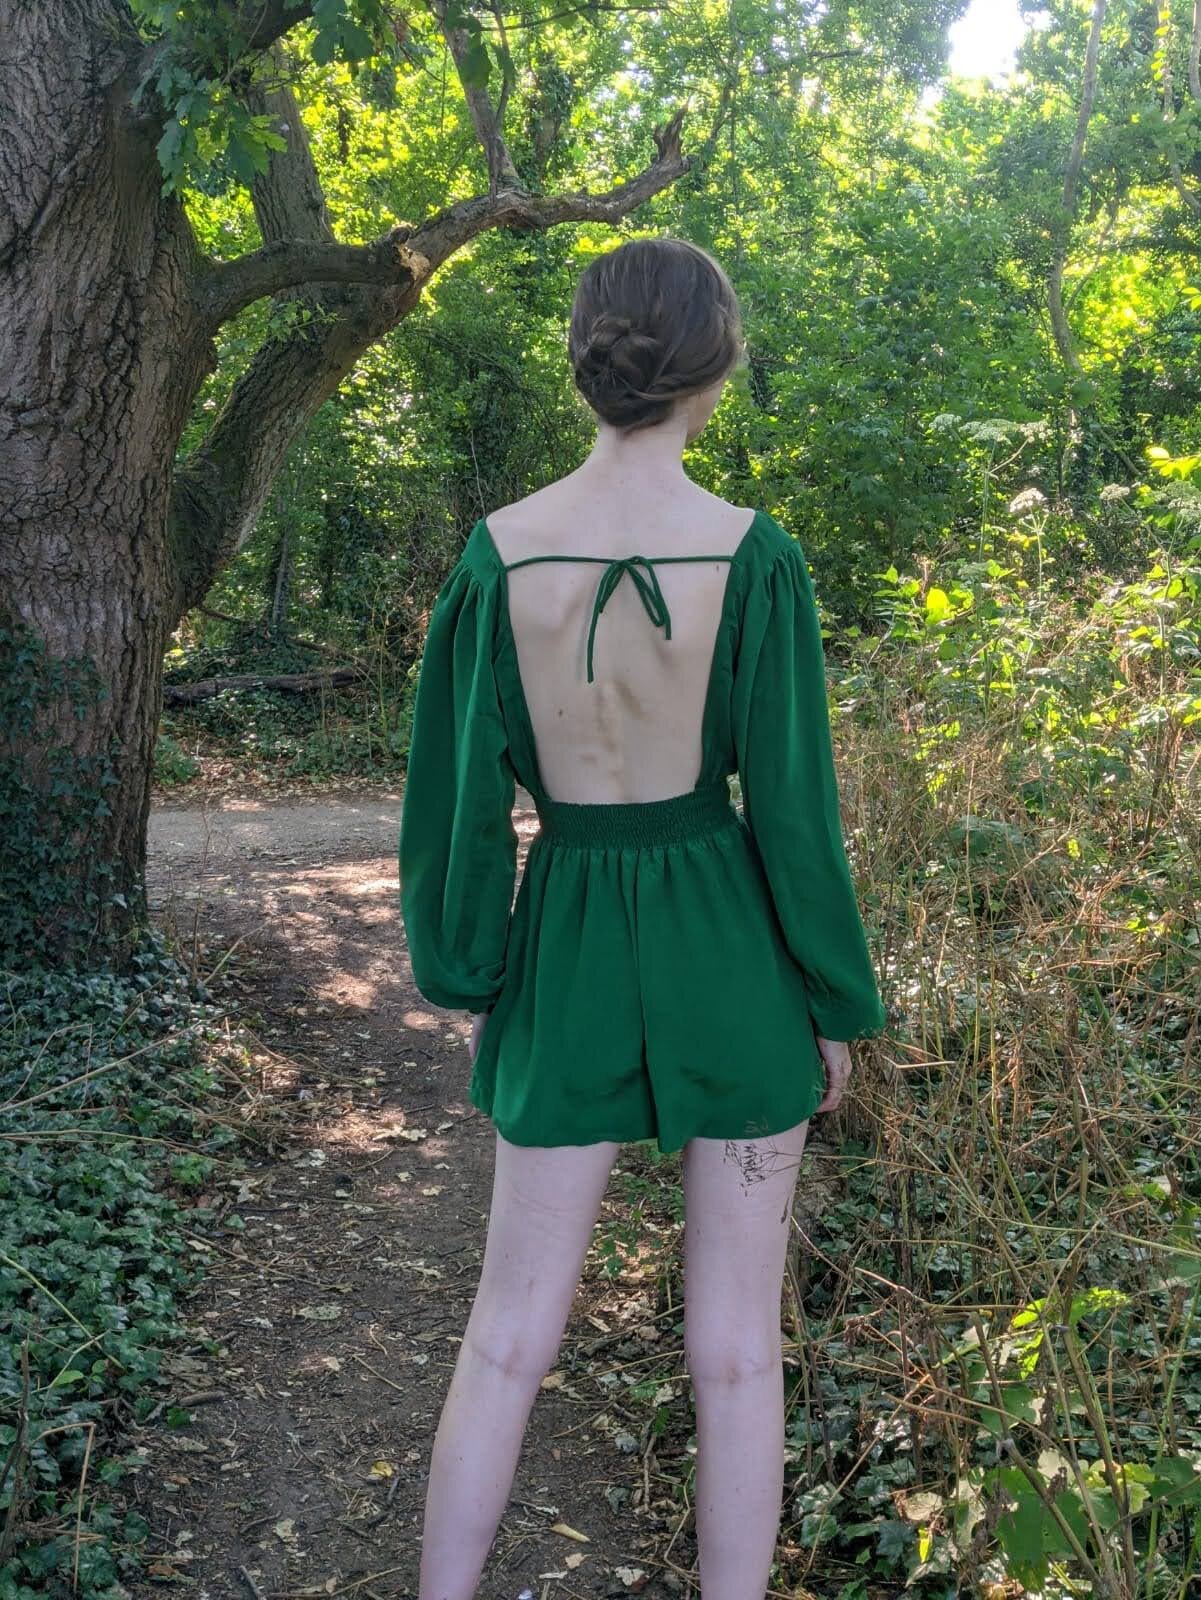
I’m having a bit of a moment with backless things at the minute and so I’m completely in love with the deep rectangular cut out. It sat absolutely fine before I sewed the sleeves in but unfortunately the weight of the sleeves pull the shoulders down, hence the annoying but really very necessary back ties. You can see some of the sleeve piecing if you look very hard at the photo below.

IMG-20200624-WA0043.jpg

It was so nice that the shorts were already hemmed so all the handfinishing that I had to do was to slipstitch the neckline binding down!

IMG-20200624-WA0025.jpg

I’ve not really got much more about this make to say really. I had a lot of fun putting it together, and it’s so comfy and breezy to wear in this heat!

IMG-20200624-WA0037.jpg

Thank you for reading!

Lauren xx

Floral Playsuit

Hello all!

Welcome to another one of my Me Made May makes. It’s quite a boring one I’m afraid, with minimal drama. The plan was to use the pattern I made for my shirred back crop top in April as a base and add some shorts on to make it a playsuit.

IMG-20200614-WA0006.jpg

The fabric is a floral viscose left over from a testing the Closet Case Patterns Fiore skirt. It’s from one of the shops on Goldhawk road and was £10 for 2 metres! Bargain. It’s actually washed and worn very well so far., considering the price.

IMG-20200614-WA0045.jpg

I used the pattern that I made for the crop top, lowering the neckline, widening the armhole and taking in the side seams. I then used my shorts pattern, adding 1.5cm to the crotch to give me a bit of wiggle room as it’s a playsuit. I slashed and spread the back waist of my shorts pattern to match the width of my pre-shirred panel so they would match nicely together. and gather up together.

IMG-20200614-WA0010.jpg

I think it took a morning to sew up, and came together pretty nicely. The neckline and armholes are finished with bias binding which is topstitched into place. The armhole binding extends into the straps which makes it nice and seamless. The viscose shirred beautifully! It’s so important to backstitch well at the end of each line so it all stays nice and gathered.

IMG-20200525-WA0016.jpg

Overall, it was a great further exploration of this pattern, and I got slightly closer to getting it just right. In fact, I’ve already made a third version which is almost perfect! Next time I think I’d put a side panel on the back bodice with the shirring in the middle because I’m not too much of a fan of seeing the shirring from the side. Although I do wonder if i’ll be able to get it on and off with the smaller panel of shirring. I guess there’s only one way to find out!

IMG-20200614-WA0013.jpg

Thank you for reading!

Lauren xx

Curtain Dress

Hello all,

Again I hope that you are all as well as you can be at this time. The past few months have been incredibly quiet for me as the theatre industry has shut down, and I’ve really tried to make the effort to do as much sewing as possible. After all, I’ve found myself saying on countless occasions, “oh, if only I had the time to make this…”, and now I do. So I’ve been trying to follow through on that, give my days a little bit of purpose and am just trying to learn as much as possible. This dress is one of the products of that time.

IMG-20200529-WA0014.jpg

My friend Millie left me a pair of sheer Ikea curtains in the room that I inherited from her and I’ve always thought that they would make a great dress. I do also like and appreciate them as curtains though, so took the opportunity to cut them ‘to size’ as they originally grazed the floor. This left me with two 120cm long curtain bottoms to work with.

IMG-20200529-WA0007.jpg

Then I had to decide what to make. Below you can see various (very rudimentary) sketches of my thoughts. I’m having a real backless phase at the moment, so decided to follow through on that idea, using the bodice pattern from a previous make, adding the changes I’d made to the last one. (You can see some of the changes listed on that scrap of pattern paper).

IMG_20200610_110558620.jpg

Most of my headscratching was about the skirt. First, I determined that each layer was going to be double the width of my previous layer (the first layer being double my waist measurement). Then after deciding on the total length of the skirt I had to work out the length of each skirt tier, and make sure that I had enough fabric! Eventually I worked out all of the maths and had all of my strips cut out. Tiers 2 and 3 were pieced to get to the correct length.

IMG-20200529-WA0034.jpg

After everything was cut out, it was a case of putting everything together. (I also quickly cut out a rectangle the same width as my first tier out of an old bedsheet for a lining, because there was no way that I was going to get away with the skirt being unlined, the fabric being as sheer as it was.) The bodice was underlined with the same sheet.

IMG-20200529-WA0008.jpg

The bodice and underlining were tacked together as one and then the darts were sewn. Then the ties were sewn and turned out and sandwiched between the bodice and the facing. The skirt was actually much quicker to gather up than anticipated. The underlining layer was gathered up with tier one at the front and a channel was made to thread the elastic through the back half of the skirt. The bodice was attached, and I did little thread loops under the bust at each side of the bodice to thread my ties through.

IMG-20200529-WA0045.jpg

Then all that was left to do was hand roll the 192” hem. I reckon it took me 2.5 hours? Definitely as long as Dawn French’s live show on netflix plus a bit more. And then it was done! Overall, love this dress. Love it. In essence, it’s exactly what I wanted it to be. However, I have a few niggles. Niggle 1: The darts are a bit weird. One explanation is that they aren’t in quite the right place? The other explanation that I have come up with is that I rotated too much excess into the darts, and now they are too full for my bust. Because I took 3.5cm out of the neckline and 1cm out of the side seam and that was all rotated out through the dart I think I’ve put more ease into the bust than I need? Is that possible? Next time I’m debating trying to fold out the excess at the neckline instead of rotating it out and seeing how it compares. Oh, also the back waist is a bit droopy because a) I guess the weight of the skirt pulls it down and b) the elastic isn’t as taut is I’d like it to be because that’s the length that I need to get the dress over my hips.

IMG-20200529-WA0036.jpg

Anyway, all in all, good dress. Especially for twirling.

IMG-20200529-WA0003.jpg

Thank you for reading!

Lauren xx

Floral Remnant Shirred-Back Crop Top

Hello all!

Surprise surprise I’ve found myself with a fair bit of time on my hands so a lot more sewing has been happening! This top was supposed to be a quick easy project between sewing scrubs but ended up taking a wee bit more time and effort than anticipated. (Don’t they all!)

00000PORTRAIT_00000_BURST20200426132705782.jpg

The design of the top was pretty much dictated by how much fabric I had. I found a remnant of this floral viscose which I reckon was about 40cm long in a John Lewis remnant bin about a year ago, loved the print and snapped it up. Originally it was going to be a cropped shirt, but after trying to imagine wearing it I decided absolutely not.

00100srPORTRAIT_00100_BURST20200426131442129_COVER.jpg

It turned out that there was only going to be enough fabric for the front and back of something, and that it was going to have to be cropped. I started looking at images of shirred crop tops but I was worried that the print would be lost if it was all shirred up. After pondering my options for a bit I decided that the best way forward would to be to do a normal darted front bodice using my block, and adapting the my back bodice block to have a shirred back so I could get it on and off again easily without adding any fastenings.

00000IMG_00000_BURST20200426132715224_COVER.jpg

I left the front bodice block pretty much as is, just squaring off the neckline with the centre front around mid armhole (I ended up changing the neckline later.) To work out how much fabric I wanted to be in the shirred back bodice I measured roughly around the shoulders to see how much ease I’d need to be able to get the top on and off over my shoulders. I then measured my front bodice (darts closed), subtracted that from my measurement, added a few cm and that was how wide my back piece needed to be. Cutting these 2 pieces out (both on the fold) used up pretty much all of the width of my fabric. I used the scraps to cut out some bias binding for the armholes and rectangles for the straps.

00000IMG_00000_BURST20200426131934439_COVER.jpg

When it came to construction I essentially finished both pieces separately and the side seams were the second to last thing to do, the last being adding the straps. First step was sewing the front darts, then finishing the armholes separately with bias binding. Then the necklines and hems were finished by turning under twice and topstitching. Then it was time to shirr the back bodice. I increased the tension and the stitch length on my machine, hand wound my bobbin with shirring elastic and then I was good to go. I made sure to reverse stitch at the beginning and end of each row so that the elastic didn’t escape when stretched. Steaming the piece at the end made all of the difference as the elastic pings back into shape and tightens everything up a bit.

00000IMG_00000_BURST20200426131738863_COVER.jpg

When the back piece was shirred it was time to sew both pieces together at the side seams, sew little rouleau loop straps, pin them on and try the top on to see how it fits. Unfortunately it wasn’t great, but I decided to persevere and try and fix it up the best I could. My main issues were as follows: The neckline was too wide, the armholes were too high and digging into my skin, the hem was too long, the straps needed lengthening and the side seams needed taking in.

00100srPORTRAIT_00100_BURST20200426131924883_COVER.jpg

The quickest things to fix were the side seams and the hem. The armholes I ended up doing a couple of times to try and get them right. First I unpicked the bias binding and brought it further towards the centre front in an effort to make the neckline less wide and to make the armhole less diggy-inny. This wasn’t the greatest fix, the armhole was still uncomfortable and I decided that the neckline would look a thousand times better if it was lightly scooped. So, I took off all of the bias binding, cut the armholes down and cut the neckline to make it slightly scooped, then rebound the edges as best I could. This was a thousand times better, although I probably could have lowered the armholes even more. I recut longer straps and pinned them on before hand stitching them down exactly where I wanted them.

00100srPORTRAIT_00100_BURST20200426132054392_COVER.jpg

I’m really glad that I took the time to make something that’s actually comfy to wear and it’s going to be super easy to make another one because now I have exactly the right measurements! My biggest change for next time would be to straighten off the top of the back bodice just below the armhole. I think that would look a lot neater. I do love the final product and I think it does a great job of making an outfit with jeans just a little more exciting.

00100srPORTRAIT_00100_BURST20200426131453692_COVER.jpg

Thank you for reading!

Lauren

Whitmoor Sweater

Hello all!

Hope you’re all as well as you can be. Today I have a fun new-ish to me hobby to share with you. I’ve recently been dressing for various operas and I realised very quickly that there were going to be long chunks of time to fill, enter knitting. I decided to make the Whitmoor Sweater pattern which was released in February by Ami of the Tailoress Studio mostly because it’s beautiful and I wanted one.

00100srPORTRAIT_00100_BURST20200415171540311_COVER.jpg

I went to Loop in Islington and their very helpful staff helped me consider the benefits of using 2 yarns together verses 1 double knit yarn. I ended up going with a DK just to keep things as simple as possible, but I choose a ‘fluffy’ one to try and retain the look of 2 yarns. It’s called Orkney Angora (50% angora 50% wool), I paid £61.25 for 5 balls and throughout the knitting process it never let me forget the fluffiness that I chose it for. The little bits of fluff got everywhere, and I’m hoping that it will gradually stop losing fluff the more I wear it. The most important part is that it’s not itchy or uncomfortable to wear against the skin at all.

IMG_20200415_171636.jpg

In terms of the knitting up, the lace part of the yoke was really good to be able to concentrate on at work and the plain knitting was perfect to accompany TV watching. I did get stuck at 2 or 3 points but Ami always replied quickly on Instagram to sort me out which I much appreciated! Once the lacey bits were done the rest came together quite quickly. I’m so proud of the lacework. It’s not something I’ve attempted before, and it worked out remarkably well. The execution may not be perfect in places but you definitely get the gist of what the pattern is supposed to look like! Whenever there a technique came up that I wasn’t completely sure about I’d pop over to youtube which would tell me exactly how to go about things.

00100srPORTRAIT_00100_BURST20200415165710471_COVER.jpg

Measurements wise, my bust is a couple inches smaller than the smallest size in the pattern but I wasn’t comfortable with the concept of grading down a knitting pattern so figured I’d just go for baggy. I started the ribbing 20” down from the armhole which makes it slightly shorter than specified. I wish I’d gone slightly shorter so it would work better with dresses and skirts. The sleeves I did between the length of the tapered and bell sleeves because I didn’t want them to be too baggy.

00000IMG_00000_BURST20200415165427547_COVER (2).jpg

When I was looking for a jumper to knit my number one criteria was quite a tight neckline. The reason I didn’t really wear the jumper I made for my dissertation was because the neckline was too wide and it just didn’t look good with t-shirts worn underneath. I found it quite hard to find jumpers with narrower necklines and whilst this one is depicted with a narrower neckline mine is slightly wider than I would like. My theory is that my cast on is too stretchy so the neckline doesn’t keep it’s stretch as well?

00000IMG_00000_BURST20200415165418372_COVER.jpg

All in all I consider it a humongous triumph. I’ve just had a lot of fun dyeing some yarn with natural dyes over the last few weeks so I’m excited to knit that up into all sorts of fun stuff. Let me know if the dyeing process is of interest to any of you!

00100srPORTRAIT_00100_BURST20200415164913897_COVER (2).jpg

Thanks for reading!

Lauren xx