Velvet Two-Piece Refashion

Hello all! This ensemble was conceived in August 2018, inspired by the Refashioners challenge hosted by Portia. However, the months passed and so did the challenge, but finally the work Christmas party provided me with enough motivation to hunker down and get the job done.

SCV04326.jpg

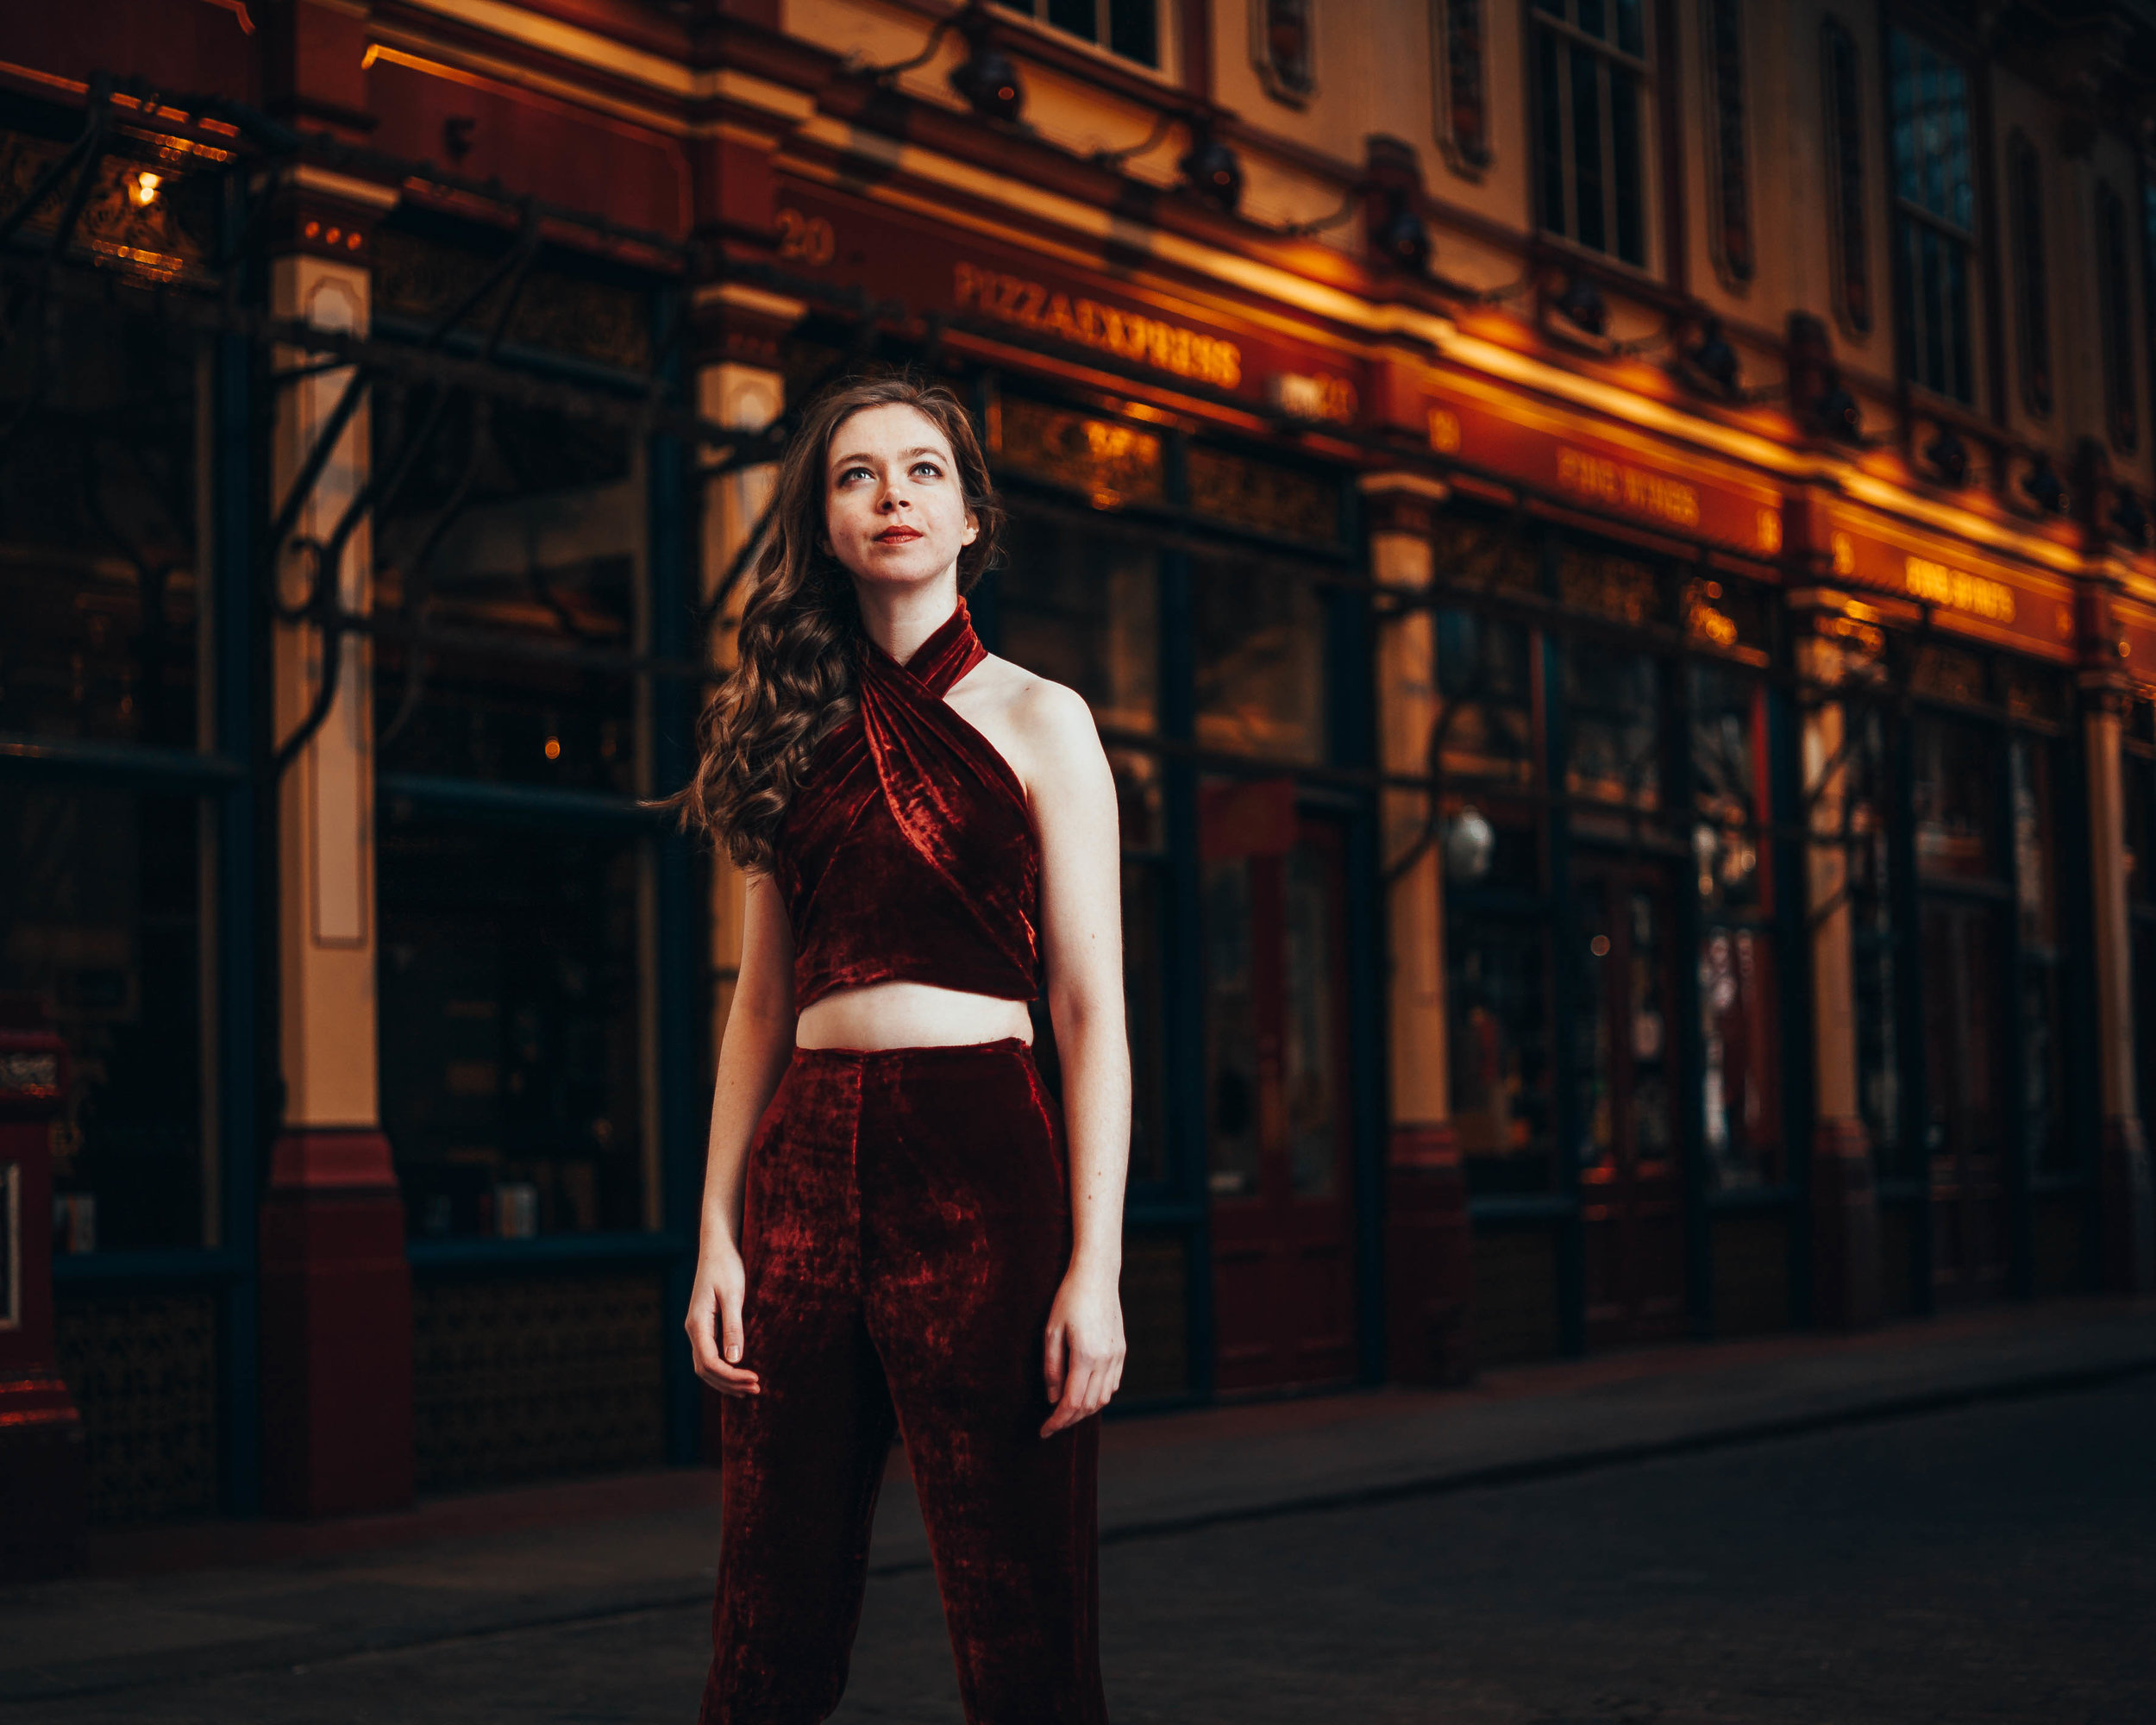
The image below was my starting point. Inherited from my Grandma, this burgundy velvet two piece ensemble consisted of a wide necked top with a dropped waist, grown on sleeves and a hem band that tied into a bow. The trousers were wide legged, with a waistband and an invisible zip down the side seam. My original plan was to leave the top half fairly undisrupted but an unfortunate Christmas tree applique (for a christmas jumper day, now removed) had left a lovely Christmas tree shaped outline bang in the centre front of the top. Either I could embrace the tree or avoid it. I chose to avoid it. This drastically reduced the fabric I had to work with, which meant that I ended up with a much tighter garment than I had initially anticipated.

IMG_20180909_153508_424.jpg

The neckline is a design detail that I’ve been playing with for a while now. I love the definition the gathering gives as the fabric is twisted around the throat. I unpicked the ties from the hem of the top and that long rectangle gave me the base for my twist. Unfortunately it is not the most practical of necklines, giving that I kept the twist in one piece. I essentially popped a square of velvet in the middle to fill in the gap and pinned the twist to the insert until I had the triangular shape that I wanted. This was all then hand sewn together.

SCV04359.jpg

The top just fastens in a knot in the centre back, which I don’t like too much because a) it causes bulk and b) if anyone is feeling particuarly cheeky, one tug will reveal everything to the masses. If I wear this top again I’ll get rid of the ties and replace with hooks and bars for a smoother back line.

SCV04414.jpg

This two piece set was originally going to be a jumpsuit, but I think keeping them separate did give me slightly more freedom of movement. The trousers were less fun than the top because the velvet was very very shifty. I used my trouser block as a base but took them in again and again for a more fitted look. I wish I’d cropped them just a couple inches shorter as well. I ended off leaving the waistband but maybe it would have looked better with slightly less tummy on show.

SCV04404.jpg

All in all, it’s always good fun to be limited by making something from an already existing garment (or two). It forces you to be creative in ways that you might not be otherwise. I can’t quite decide how I feel about this outfit. I think perhaps the top would look better with a gold toned full skirt. I don’t know. Anyway, it all got worn to the Christmas party and who knows, maybe at least one of these two pieces will see the light of day again, although paired with what I cannot say.

SCV04335.jpg

Thank you so much for reading and to Sam Chapman for the photos!

Lauren xx

Phoenix Costume

Hello all! I’ve got a special one to share with you today. It’s become a tradition in my house that we hold a fancy dress party to celebrate everyone’s birthdays in December and January. You have to come dressed as something beginning with the first letters of each of our names, so for us this was M, K, P, J, R or L (for me). I decided that I wanted to be a phoenix mostly because I loved the metaphor of rising from the ashes into a new year.

SCV04253.jpg

The base of this costume is a leotard in two halves. For the top half (waist and above) I used a nude illusion tulle because I wanted it to be as invisible as possible. For the bottom half I used a nude powermesh which was more substantial and had more stretch to it. I chose to use yellow, orange and red feathers to make a fun gradient. Two metres of feather trim in each colour formed the ‘skirt’ and I had 20 feathers of each colour to form the bodice. I did also buy gems in fiery colours but ended up deciding that I liked the costume without.

IMG_20190118_200513192.jpg

I wanted to minimise how much of the illusion mesh was on my torso (and I also needed to be able to get in and out of the thing) so I made the bodice a backless halterneck. I did want it to be dartless but because there wasn’t so much stretch in the tulle I had to put bust darts in to fix the gapey sides. It didn’t matter too much in the end because that party was covered by feathers anyway. For practical reasons I put snaps on the crotch which was a lifesaver in an alcohol fueled party situation.

SCV04275.jpg

So, I had six metres worth of feather trim to attach to the bottom half of my leotard. The biggest issue was that the fabric needed to stretch, but the feather trim did not. I dealt with this by getting my friend MK to pin on each layer of feathers at the centre front, side seams and centre back and then zigzagging 3/4 of the way around the circumference of the leotard. The 1/4 of the lycra that was left free then had enough give for me to wriggle in and out of it. The 1/4 of feather trim was that not sewn down was then poppered to meet the beginning of the trim at the centre back. Zig-zagging the feather trim on got quite sticky and my machine needle got quite gunked up so that needed cleaning regularly.

SCV04281.jpg

Then it was time to sort the bodice feathers out. I first tried sewing them on, but it just looked absolutely rubbish so I ripped them all off and decided that glue was the answer. I didn’t have a mannequin and so I improvised by wrapping myself in clingfilm, putting the leotard on and gluing the feathers directly to me. When I was done, I got my housemates to cut me out of the clingfilm and I gently eased it off the back of the illusion tulle.

SCV04269.jpg

Now let’s talk about the crown! I made it with a strip of crin which was pinned to a headblock where I wanted it. I glued some stiffer feathers to the crin first which gave the floppier ones in front something to stick on to. I wasn’t too happy with the spread of the crown when I first tried it on so I slashed and spread the crin at intervals about 3/4 down the width of the crin just to give more of a halo effect. This was then just bobby pinned into my hair.

Phoenix Close 1.jpg

And that’s it! I had the best time figuring out this project, and the best time at the party. Many thanks to Sam Chapman for the photos.

Lauren xx

Charlie Caftan: Corduroy Edition

Hello all!

This dress is directly inspired by the one that Heather Lou made in her tutorial here. I liked the concept of a winter style smock dress, however I’m not quite sure that it’s working for me. You can read all about the sewing process over on the Minerva Crafts blog.

49790844_322808055109354_5250477913110740992_n.jpg

Thanks very much for reading, to Drew for taking the photos and to Minerva Crafts for the kit to make this dress with!

Lauren xx

Teal Lingerie Set

Hello all!

Today I’ve got some lingerie to show you that I made eons ago, but never managed to get photos of til now. Better late than never, eh? Patternwise I used the Madalynne X Simplicity 8228 halterneck bralette as a base for the bra and hacked a pattern I’d previously made of a well fitting existing pair of pants for the bottom half of the set.

DSC_0890.JPG

I decided to change the halterneck of the pattern because I don’t like the pressure that halternecks put on the back of the neck. A younger and more naive me decided that if I just added straps from the shoulders down to the back band of the bra it would be fine. However, it was not quite that simple, because if you move a strap that’s supposed to be at your neck to the mid shoulder it will tighten the centre front line and create gaping at the side boob area exactly where you don’t want this. At the time I fixed this issue by just ripping out the elastic and re-doing it, stretching very tightly as I sewed. In the photo below you can see the ripples in the fabric where the elastic has almost gathered the lace.

DSC_0930 (2).JPG

Fabric wise I got the lace, powermesh and all of the matching notions from Sewing Chest which is a UK based lingerie supply company. I just checked and they actually still have this exact lace in stock. For the main pant fabric I used a silk jersey that I bought from the Man outside Sainsburys in Walthamstow.

DSC_0913.JPG

Pants-wise I just extended the back pattern piece over to the front a bit for a cute little crossover. I did use jersey under the lace at the back because I couldn’t quite get my head around using just lace.

DSC_0918 (2).JPG

Shape-wise the bra doesn’t do a whole lot, but that’s not it’s purpose. Its purpose is just to be pretty. I do love a good scalloped edging and teal is one of my favourite colours in the world.

DSC_0898 (2).JPG

Construction wise I think was very straightforward and didn’t take too long at all.

DSC_0937.JPG

Next I think that I want to experiment more with wired bras, looking more at lift and shape.

DSC_0875.JPG

Thank you so much for reading!

Lauren xx