Pajama Bottoms

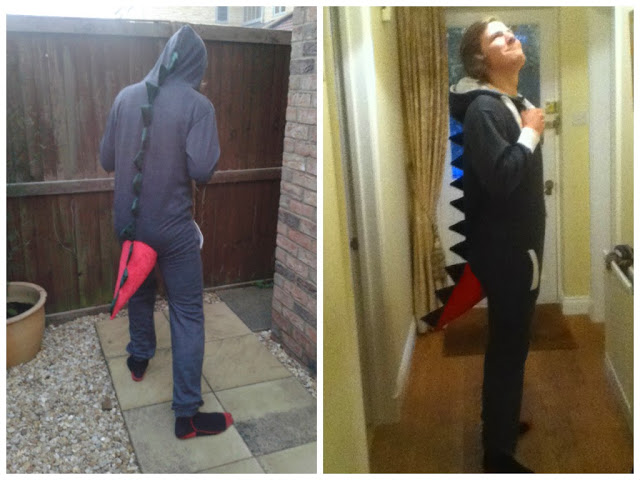
You may recognise this fabric from a previous make of mine (the plaid pinafore dress). As pajama day was approaching I set my heart on using the left overs for some really really comfy flannel pajama bottoms.
However, after I traced the smallest size of my pajama bottom pattern and laid it on the fabric, I didn't have quite enough.

As I said, I had to have pj bottoms out of this fabric so it was back to the drawing board for me.
My thoughts drifted to Lekala.co which is a pattern company that you give your measurements to and they send you a pdf 24 hours later with a pattern that fits your measurements exactly thus eliminating the need for a muslin. Did i mention that the pattern for these pj bottoms only cost $2.50?!
Because my measurements were smaller than drafted for in the too big pattern that I used this new pattern fit just fine widthways accross the fabric. However, lengthways was an issue.
To solve this problem I rummaged around to find the smaller scraps and painstakingly matched them to the top of the fabric already lying on the floor. When those scraps had given me enough length I slip stitched them to the original fabric and cut the pattern pieces out then sewed them as instructed in the patterns instructions. The slipstitching wasn't strong enough and ripped when I attempted to try them on so I zigzaged them on instead with my machine. I then attached the elastic to the waistband and gave them a tiny hem and my pj trousers were done.
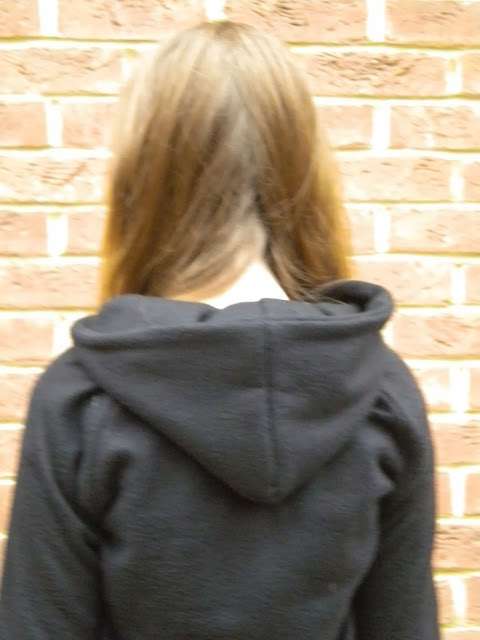
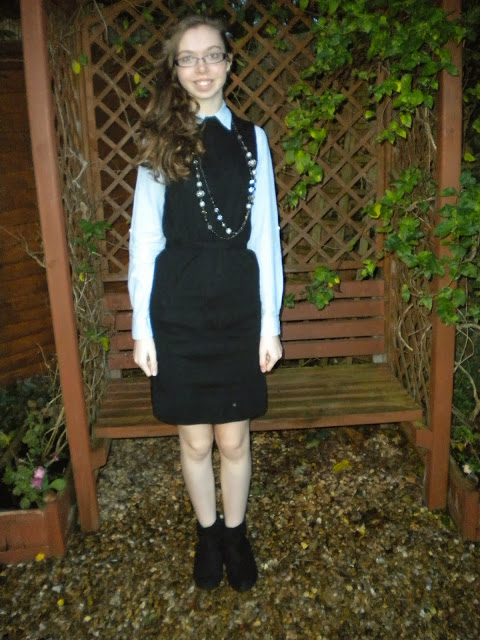
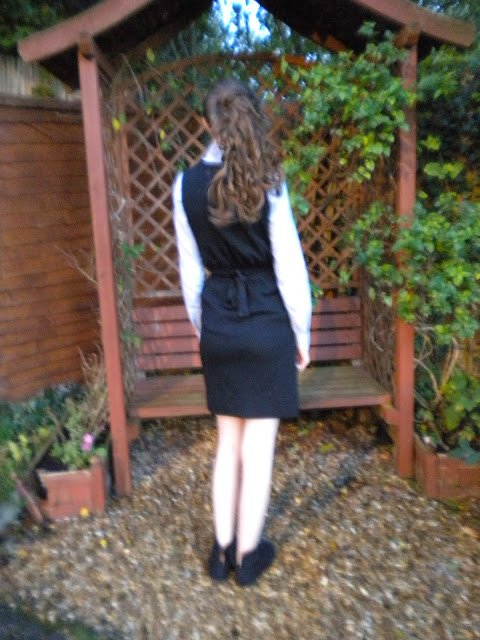
My pattern matching was considerably better on the front than on the back so I'll just give you a pic of the front so you don't have a heart attack looking at the back. It was hidden by my tee-shirt on the day so it was fine anyway!
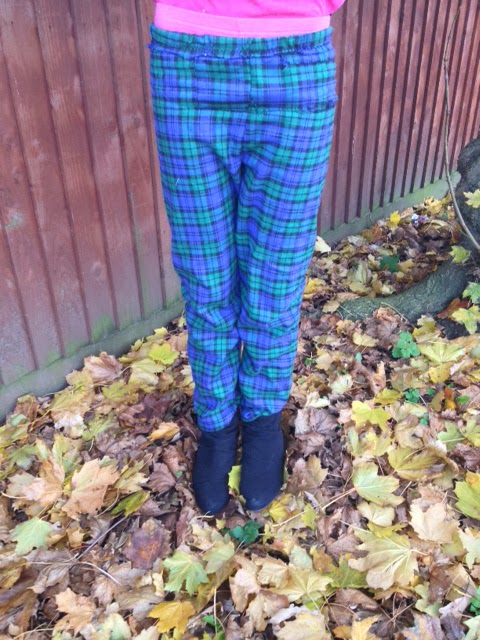
Is it obvious that the top of them consists of about 7 different scraps pieced together?
Also, excuse the thermals. England is cold. Plus, if one of the seams split, it's fine because my bum is already covered :P

The whole process was done the night before and the morning of. Apologies to my family, who were rudely awoken by the sound of my sewing machine at 6.30am. It won't happen again. Well, not for a while anyway.

Thanks so much for reading!
Lauren x

Cropped Hoodie

It was pyjama day at school on Friday and there was no way on earth that I was going to turn up in my oh-so-comfy but oh-so-ugly pink fluffy dressing gown. This is where the hoody comes in. 
I already had a pattern in my Sew U Home Stretch book by Wendy Mullin so all I needed to do was purchase some fleece. I found mine at cheapfabrics.co.uk. It says in the book 2 metres fleece, 1/2 metre ribbing. I only used 1 metre and 1/4 roughly of each so I have 1 metre fleece left over. What can you do with fleece besides making a hoody?
Showing off the ribbing and the cuffs
I chose size XS automatically but next time I would size up a far bit. I had to make it cropped because I only had an 18" hoody zip (no idea what the correct terminology for that is) instead of the 20" zip required. The zip was handpicked because I didn't trust myself to do a lapped one right the first time round without any unpicking and I needed to wear it the next day.
I cut out 4 pieces for the hood instead of two so I could line it and have a clean finish. I actually used the wrong side of the fleece because I just preferred the texture to the right side.
Just let me show you my ribbing again before you go!
Well that's all I've got to say for now, oh hang on. I do want to sew presents for family and friends for Christmas, but I haven't got a clue what to sew. Any ideas? Okay, now I'm done.
Thanks for reading!
Lauren x

My Halloween Costume!

Every halloween I invite a bunch of friends over for some good food and a couple of films (We watched The Birds and Dark Shadows).  This year after a lot of humming and harr-ing and about a thousand different ideas I decided that I was going to be a vampire. This was what I came up with.  
The pattern I used for the bodice was Style 3794. It consists of an elasticated neck and huge puff sleeves which are also elasticated. A zip is supposed to go in the back but that was omitted due to the fact that I am much smaller than a size 10 so it wasn't needed. I also omitted the bust darts because I didn't have time to fit them properly and the bodice was going to be tucked in anyway. I held the front pattern piece to the mannequin so see how much to take out of the centre fold. This ended up being about 2 inches. My skirt fabric wasn't wide enough for the pattern pieces of this pattern so I used the pattern that I used for the skirt of my prom dress instead.
Fabricwise I used taffeta for both the main bodice, sleeves and skirt. The wine coloured taffeta I found in a remnant bin for 2 pounds! Bargain! I didn't have enough of that for the skirt as well so I found some black/blue taffeta at Leicester market which was also a bargain at 15 pounds for 3 metres. I used some black lace also found at Leicester market. Sadly there was only enough for the neck ruffle and not the sleeve ruffle but luckily there was enough left for a belt.
This is what it looks like untucked. I didn't have time to hem it or the ruffle actually but they're both okay because the top is tucked in anyway, and the lace won't fray so IT'S FINE.
My friend Meghan and I had great fun making all the food. Amusingly we only got pics of pudding. I guess carrot soup isn't that photogenic anyways. 
The ghost and mummy cake pops
They were orange and purple inside!
Skeleton gingerbread men. (I found the coolest gingerbread cutter at John Lewis)

Green cupcakes with halloweeny sprinkles
Cobweb chocolate orange cupcakes (I even did the cobwebs myself!)

I'll leave you with the most vampiric pic of me..
Argghh NOOO THE LIGHT IS KILLING ME but I really need to show you how voluminous my skirt is!

Thanks so much for reading! I hope you had a great Halloween!
Lauren xx

Black Knit Pinafore

 Hello! I was digging around in my UFOs (unfinished objects) box the other day trying for something I could quickly finish to wear to London the next day (because you have to look your best when going to London) and this only required the sleeves edges and the hem to be finished. That's manageable I thought. It wasn't, I wore my Plaid Pinafore Dress instead which has become a firm favourite,  but I finished it later on because it's a great winter staple to go over shirts and the like.
Argghhh necklace why can't you stay central!
The pattern I used was from Sew U Home Stretch by Wendy Mullin which I use as a base for all of my knit projects. The line drawing below is the original pattern which I extended to make into a dress which only works because I have no hips (well noticeable ones anyway) This is the same pattern that I used for my dotty knit dress. but this time I omitted the sleeves.
It's funny because I started the construction of this waaay back in march, april time when I'd only been learning to sew for a couple of months. When I looked at it when finishing it off there was so much that I'd do differently, which just goes to show how far my sewing skills have come.

 The fabric is actually a double knit which came in a tube which was new to me, but fine to work with. The neckline is finished with turned over elastic and the hem and armholes were just turned over and slipstitched.
Oh necklace, what have I ever done to you? And by the way, this is my "ooh something interesting seems to be going on over there" face. In case you were wondering.
All in all I like this dress, but I'm not sure whether the proportions are wrong, because I have a long body. Would lowering the neckline help that? Not sure. It might just look better if I remove the elastic and then cut and sew a shift dress out of it instead. Hmm.
Anyway, thanks so much for reading! I'm just waiting for pics of a couple of halloween costumes I've made this year so stay tuned!
Lauren x

A DIY Dinosaur/ Dragon Costume

This is the first of two costumes I have been commissioned to make for Halloween this year! I asked Jake (my commisioner) to find me a onesie to save time and then I got cracking. I think it would work equally well with an old T-Shirt and jeans if you can't find a onesie. The onesie wasn't cut into once during this process so if you get bored of being a Dinosaur you can just unpick the slipstitching. Carry on for the full "how-to"!

What you will need:

  • Fabric. I used two contrasting colours of velvet because I didn't have enough of the green for the tail as well. I did have to be extra careful when cutting out because of the nap. Fleece would work just as well.
  • Interfacing. I think I used around 1 metre for an adult sized costume. This stabilized the velvet and made it stiffer so the spikes stood on their own.
  • Stuffing, enough to fill the tail.
  • Onesie (I bought one to save time but feel free to make one if you have a pattern lying around)
  • Paper scissors for cutting out the interfacing because I didn't want the glue on it to mess up my fabric scissors
  • Fabric scissors for cutting out the velvet.
  • Triangle templates for the tail and the spikes. Don't forget to add seam allowances.


1. Cut out triangles

You will need 4 triangles for each spike
- 2 velvet
- 2 interfacing
6 triangles are needed for the tail
- 3 velvet
- 3 interfacing
 (I tried four triangles for the tail, but ended up unpicking one of them because 3 looked a lot better)
I cut out 54 triangles in total!
On your left are the interfacing triangles that I cut out for the spikes and on the right is my template for the tail triangles.

2) Sew the Triangles Together

You should have from the top facing you, interfacing, wrong side velvet, right side velvet, interfacing for the green triangles. Another way to look at is putting the velvet triangles right sides together and then putting an interfacing triangle on either side. Making sense?
When all of the little bundles are all pinned and ready sew 2 sides of them (leaving the other so you can turn them the right side out) and clip near the point, so you do get a point when you turn them right side out.


For the tail triangles you want to sew both sides of the middle triangle right sides together to the other 2 triangles so you end up with a very wide triangle (see pic above).

3. The Tail

Pin and stitch the spikes facing inwards down the raw edge of the 3 triangles so they stay put. When that's done put right sides together and stitch down the side. Turn out the right way.


Stuff the tail until full. Do a running stitch around the edge of the opening and pull to gather. This gets rid of the raw edges. Pin the tail to the onesie (I placed mine just above the beginning of the trouser seam).


4. Attach the Spikes

Measure and chalk a line down the middle of the back of the onesie. Fold the raw edges of the green triangle inwards so you have a clean edge. Pin to secure. Place on line drawn and pin down like you did with the tail. Repeat with all of the other triangles/spikes. Stitch on when happy that they are all where you want them to be.


AND YOU'RE FINISHED!!!!!


I think the only thing I would change about this costume is the colour of the tail as it stands out a bit too much. It would have looked better if it was green, like the spikes.

Thanks so much to Jake for the idea, the commision and the modeling!

Thanks so much to you dear reader, for reading!
Lauren x