Stripey Tee

Hello all! For this months Minerva Make I found this interesting crochet type fabric and thought that the crochet texture would be perfect for a more interesting version of the slouchy tee. Plus, I always love a good navy and white stripe. 

30705730_1670861966326110_5730865942129278976_n.jpg

You can read all of the details over at the Minerva blog here.

Thanks for reading and to Minerva Crafts for supplying the materials for this project!

Lauren xx

A British Oufit: The Whole Ensemble

Hello all! This is it, my British bra, pants, shirt, trousers and shoes are finished. The process has been quite a huge learning curve and I'm so pleased that I've had the time and the opportunity to explore local fabrics, natural dyeing, learn how to knit and to make shoes amongst many other things for my dissertation. 

IMG_2571.JPG

The silk shirt really is the wardrobe staple that I wanted it to be, it's only major drawback being that the fabric is slightly sheer. There are a couple of niggles with my self drafted pattern and those would be that the cuffs are too tight, the sleeves are slightly too short and the hem is slightly too long. I'm really pleased with the insides of the shirt which are pretty much all french seamed. 

IMG_2515.JPG

The buttons work super well, and I love the rustic element that they give to the shirt. Next time I'll love to make some Dorset buttons with a wire ring base and thread wound around it. 

IMG_2532.JPG
IMG_2519.JPG
IMG_2522.JPG

Working downwards, the trousers are possibly my favourite part of the whole ensemble. I love the amount of ease in the leg, and the high waistline. Khaki green is a really versatile colour in my wardrobe and I wear them all the time. I like the slightly cropped length, and I think it works well with the clogs. 

IMG_2526.JPG

I would make the trouser pockets slightly deeper next time just to give me a bit more room. A friend pointed out that they look quite empty at the back, and I agree that some welt pockets would work well.

IMG_2534.JPG

I'm very pleasantly surprised at how beautiful the clogs look, but I think they will need a bit of breaking in so my feet don't get torn to shreds. I'd love to learn how to do shoe-making 'properly'.

IMG_2591.JPG

And finally, the jumper! I'm so proud of this jumper. This is the first thing I've ever knitted and I would hope that you wouldn't be able to tell. I do wish that it was just a bit longer, and that the neckline was less open so the shirt wouldn't look so silly when worn underneath it. I think that the neckline has stretched since I started knitting it so I need to research how to prevent that in the future. The neckline does look wonderfully elegant when worn on it's own, but it just looks silly when layered. 

IMG_2598.JPG

I love how the colour scheme of the outfit has worked out. The different colours in the jumper add another dimension and I think it works really well with the khaki of the trousers. The neutral shirt and shoes are really versatile and blend in seamlessly with the two stronger colours in the outfit. 

IMG_2559.JPG

So there it is, my complete British outfit. To learn about the making process you can find all of the relevant blog posts here. Thank you so much for following along with the whole process, to everyone at college who helped me out and to Nicki from This is Moonlight for giving me the inspiration for this project. It's been a lot of fun. 

Lauren xx

A British Outfit: Making the Trousers

Hello all, today is the final 'making of' post before the final reveal! I had my weld dyed wool and silk lining and it was time to get cracking with the trousers. As I didn't have a zip at my disposal (not British metal) I had to come up with another type of fastening. I looked at a couple of options, and found the technique that Megan Nielsen uses in her Flint trousers pattern with a concealed pocket opening to be my favourite.

30652608_1671552282923745_7728981824554139648_n.jpg

First I needed a basic trouser pattern which I found in Winnie Aldrich's basic pattern cutting book. This I drafted to my measurements, cut out and sewed up in calico for a fitting. It turned out rather too tight at the hips (illustrated by the drag lines around that area) and a little gapey at the centre back (excess pinned out). 

trouserfitting1.jpg

The next step was to take them off, give myself some more room in the hips and pop them back on again. When this fit issue was remedied I moved on to the width of the legs. The width of the left leg was pinned closer to the leg than the right one and I decided that I liked the slightly looser leg. I also sat down in them just to be sure that they were comfortable to sit in. 

trouserfitting2.jpg

The shaded area below is how much I shaved off the width of the leg. 

IMG_20171205_170608025.jpg

In the holidays I ended up using this pattern to construct my checked trousers and to give it a bit of a trial run before I committed to my very expensive fabric. I ended up taking in the crotch slightly which I did in my final pair, and I also slimmed down the legs a bit. I left the legs as they were before this alteration for the final pair though. I think they hang much better in a weightier fabric. 

checked trousers.jpg

After the holidays I was then ready to get cracking on the real thing. The outer and the lining pieces were all cut out and put together. I french seamed the pockets with the lining so I wouldn't have wool rubbing against my skin. I made leather buttons from some of the leather scraps left over from making my clogs. They are actually quite irritating against the skin, so next time I would find something else to substitute them with. The buttons are only seen on the inside because they only thread I had available to me was the white silk thread that I used for my shirt, which would have been a logistical nightmare to dye. 

30653162_1671552376257069_5952287822818836480_n.jpg

In the picture below you can see how the fastening works in practice. I ended up adding the ties at the last minute as a fix to stop the pocket from gaping slightly and I love the little design feature it brings to some very classic trousers. 

IMG_1764.JPG

It feels very luxurious to have a pair of silk lined trousers, and next time I would find a slightly heavier weight silk as the wool can sometimes still feel a little prickly through the lining. First both the lining and the outer hems were attached to the cuffs but that was a bad idea because it resulted in them hanging very oddly. Now the lining and outer are hemmed seperately and are joined with swing tacks at the side seam and inseam. 

30652422_1671552449590395_6209788257723482112_n.jpg

I had slight issues with the trouser cuffs, and realised after sewing them that they really needed a bit of negative ease to look any good, so out they came, width adjusted and in they went again. 

30652608_1671552282923745_7728981824554139648_n.jpg

That's the last element of my outfit completed! Next you get to see the final ensemble worn so you can see how everything fits and looks together. 

Thanks for reading,

Lauren xx

A British Outfit: Dyeing the wool (trousers)

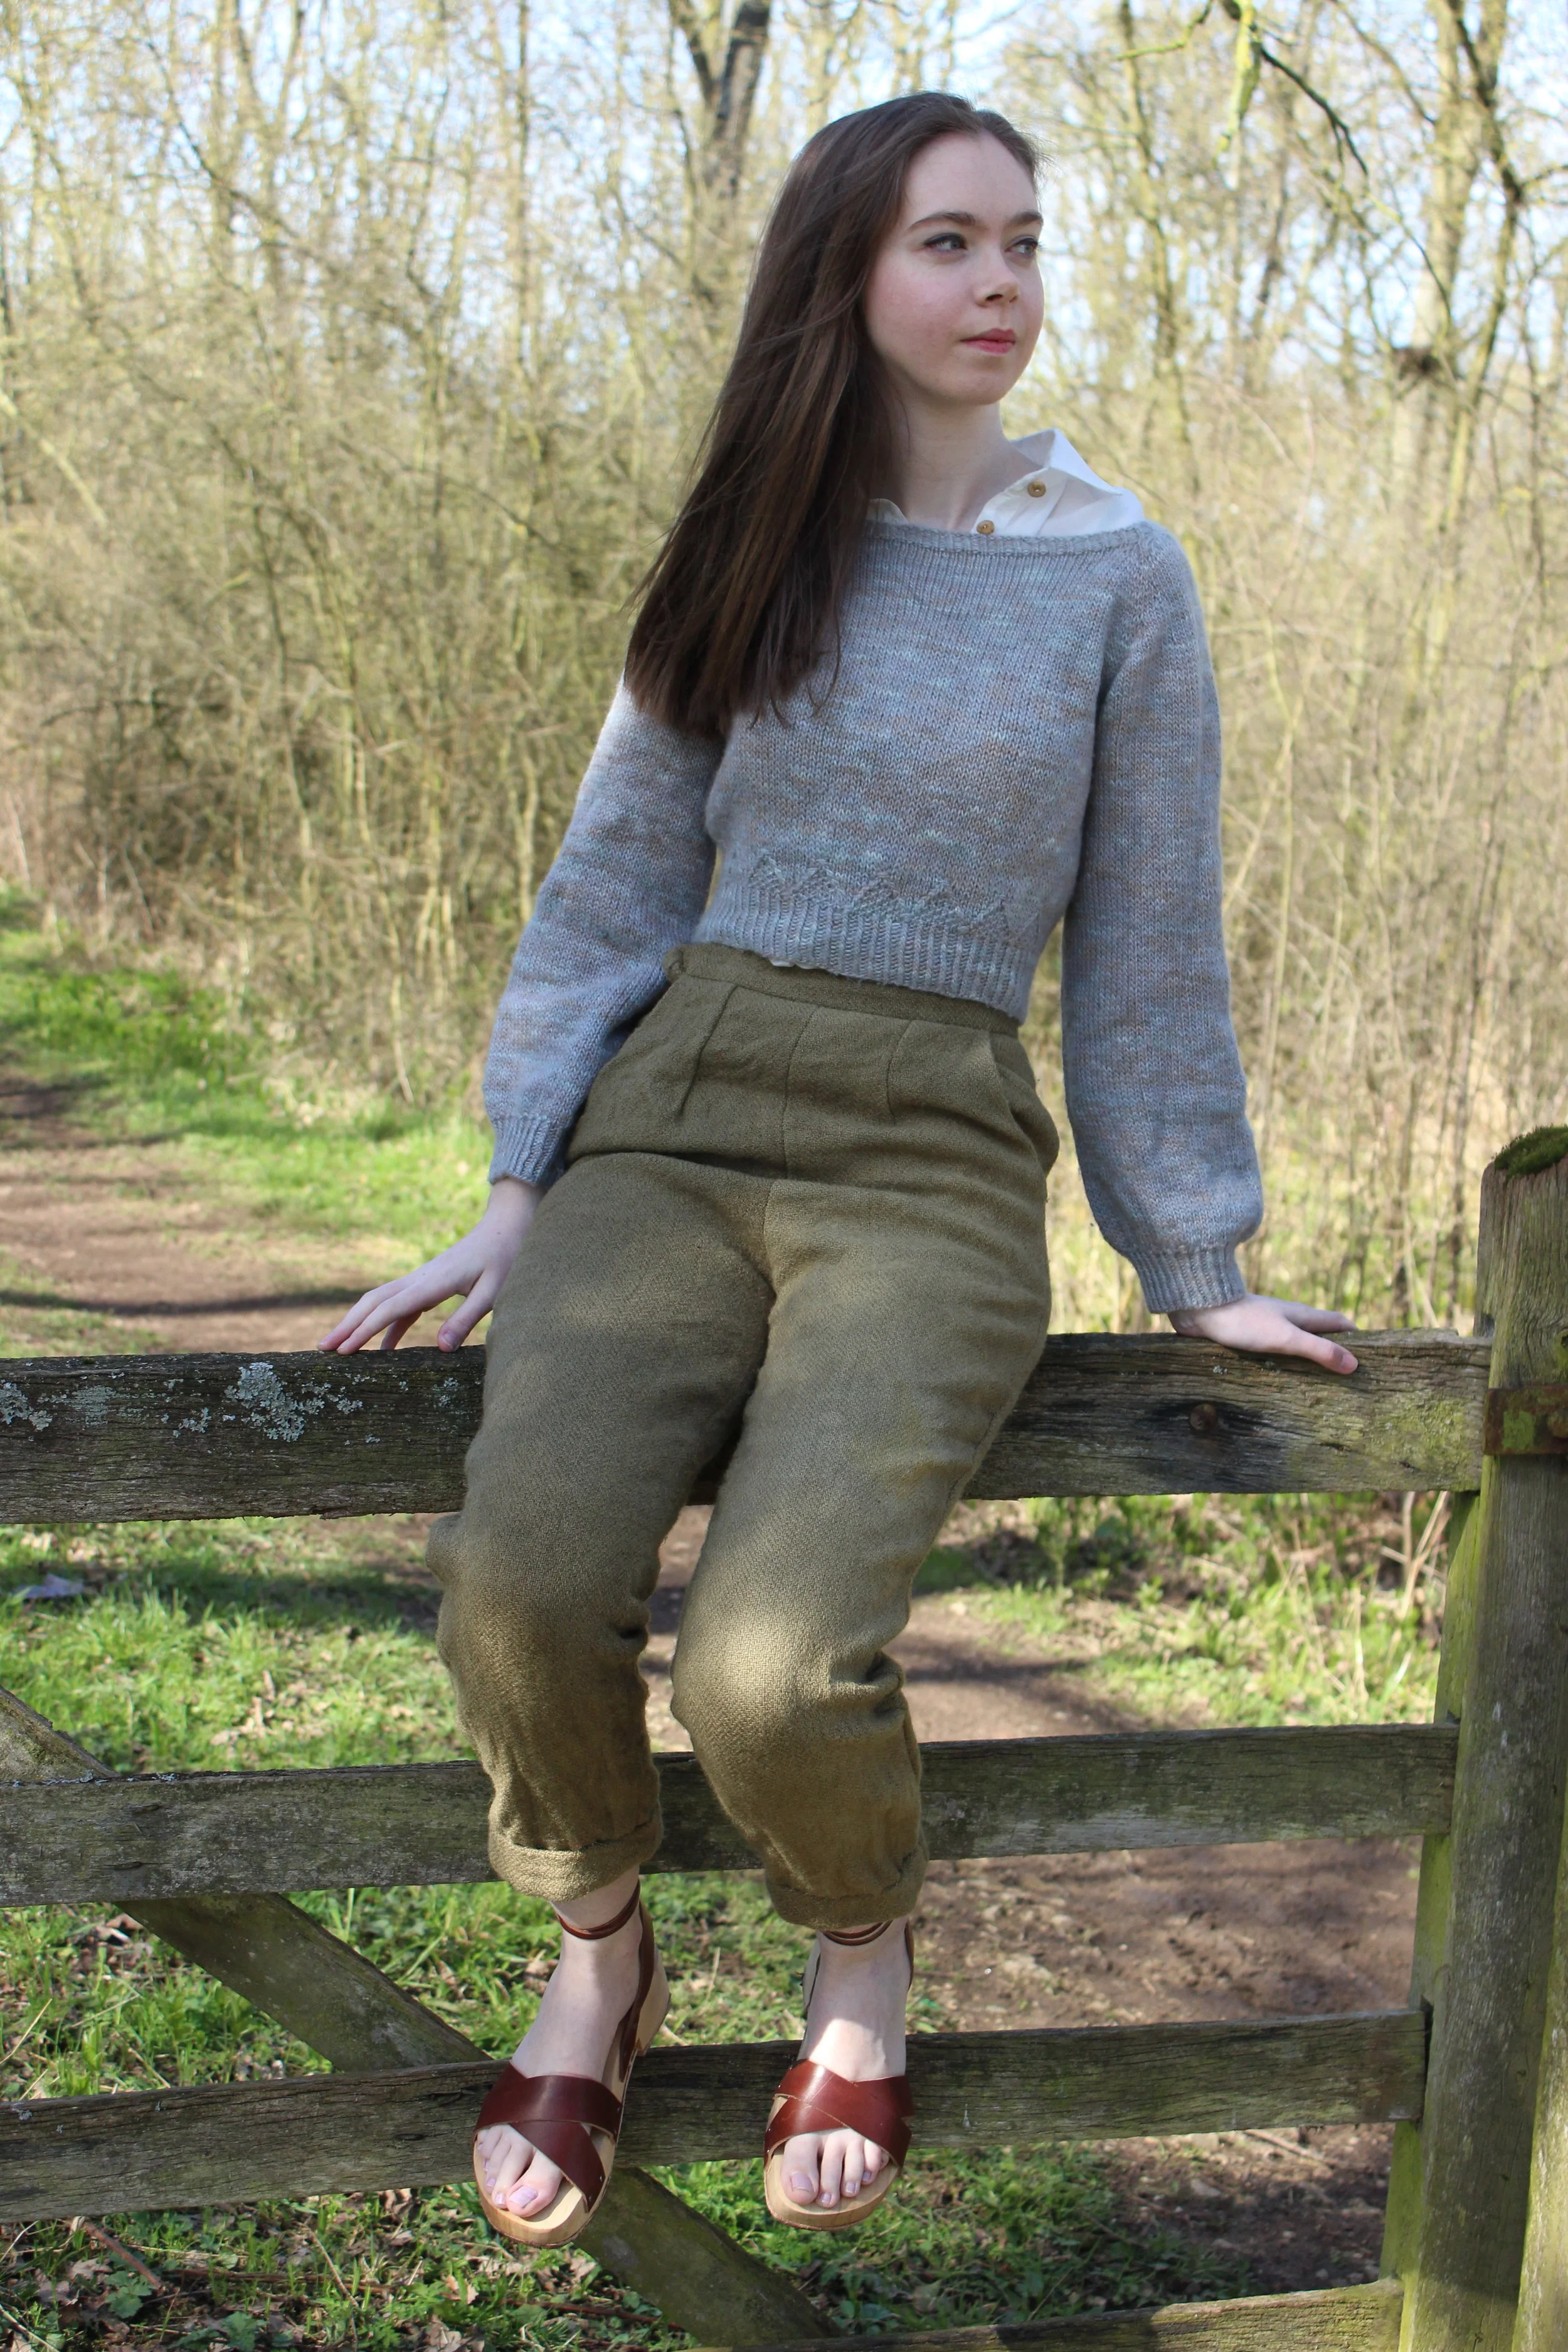
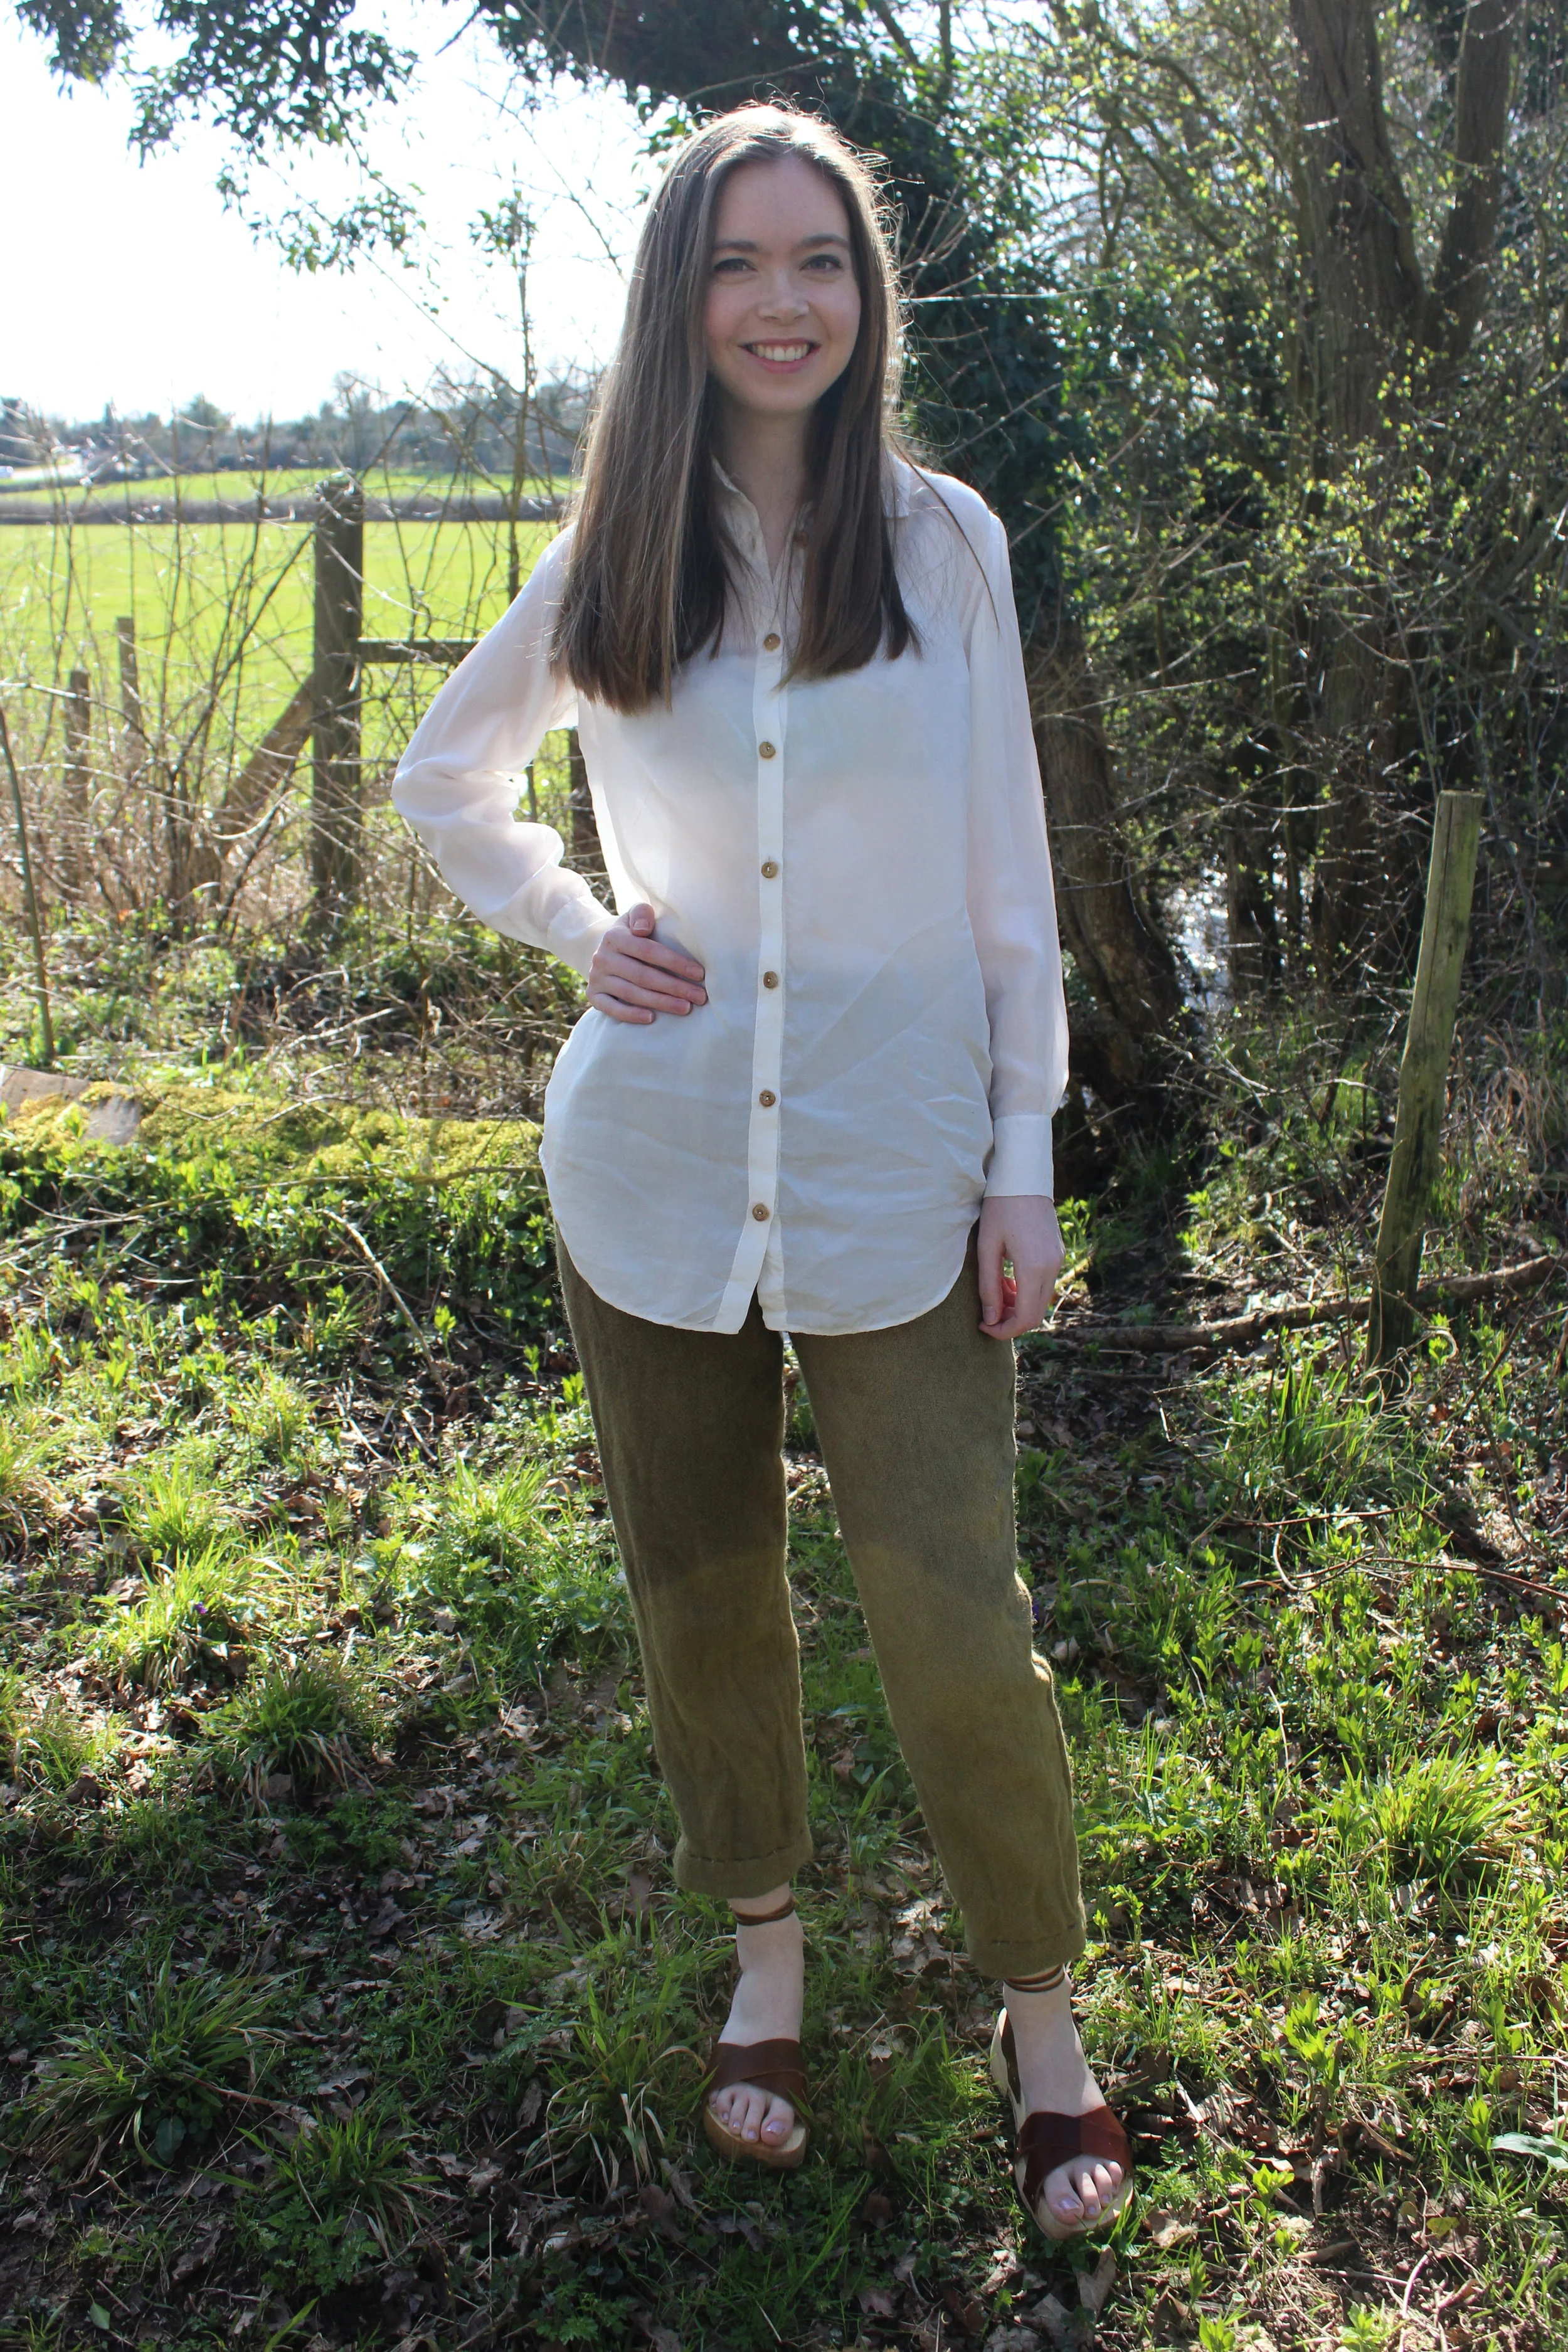
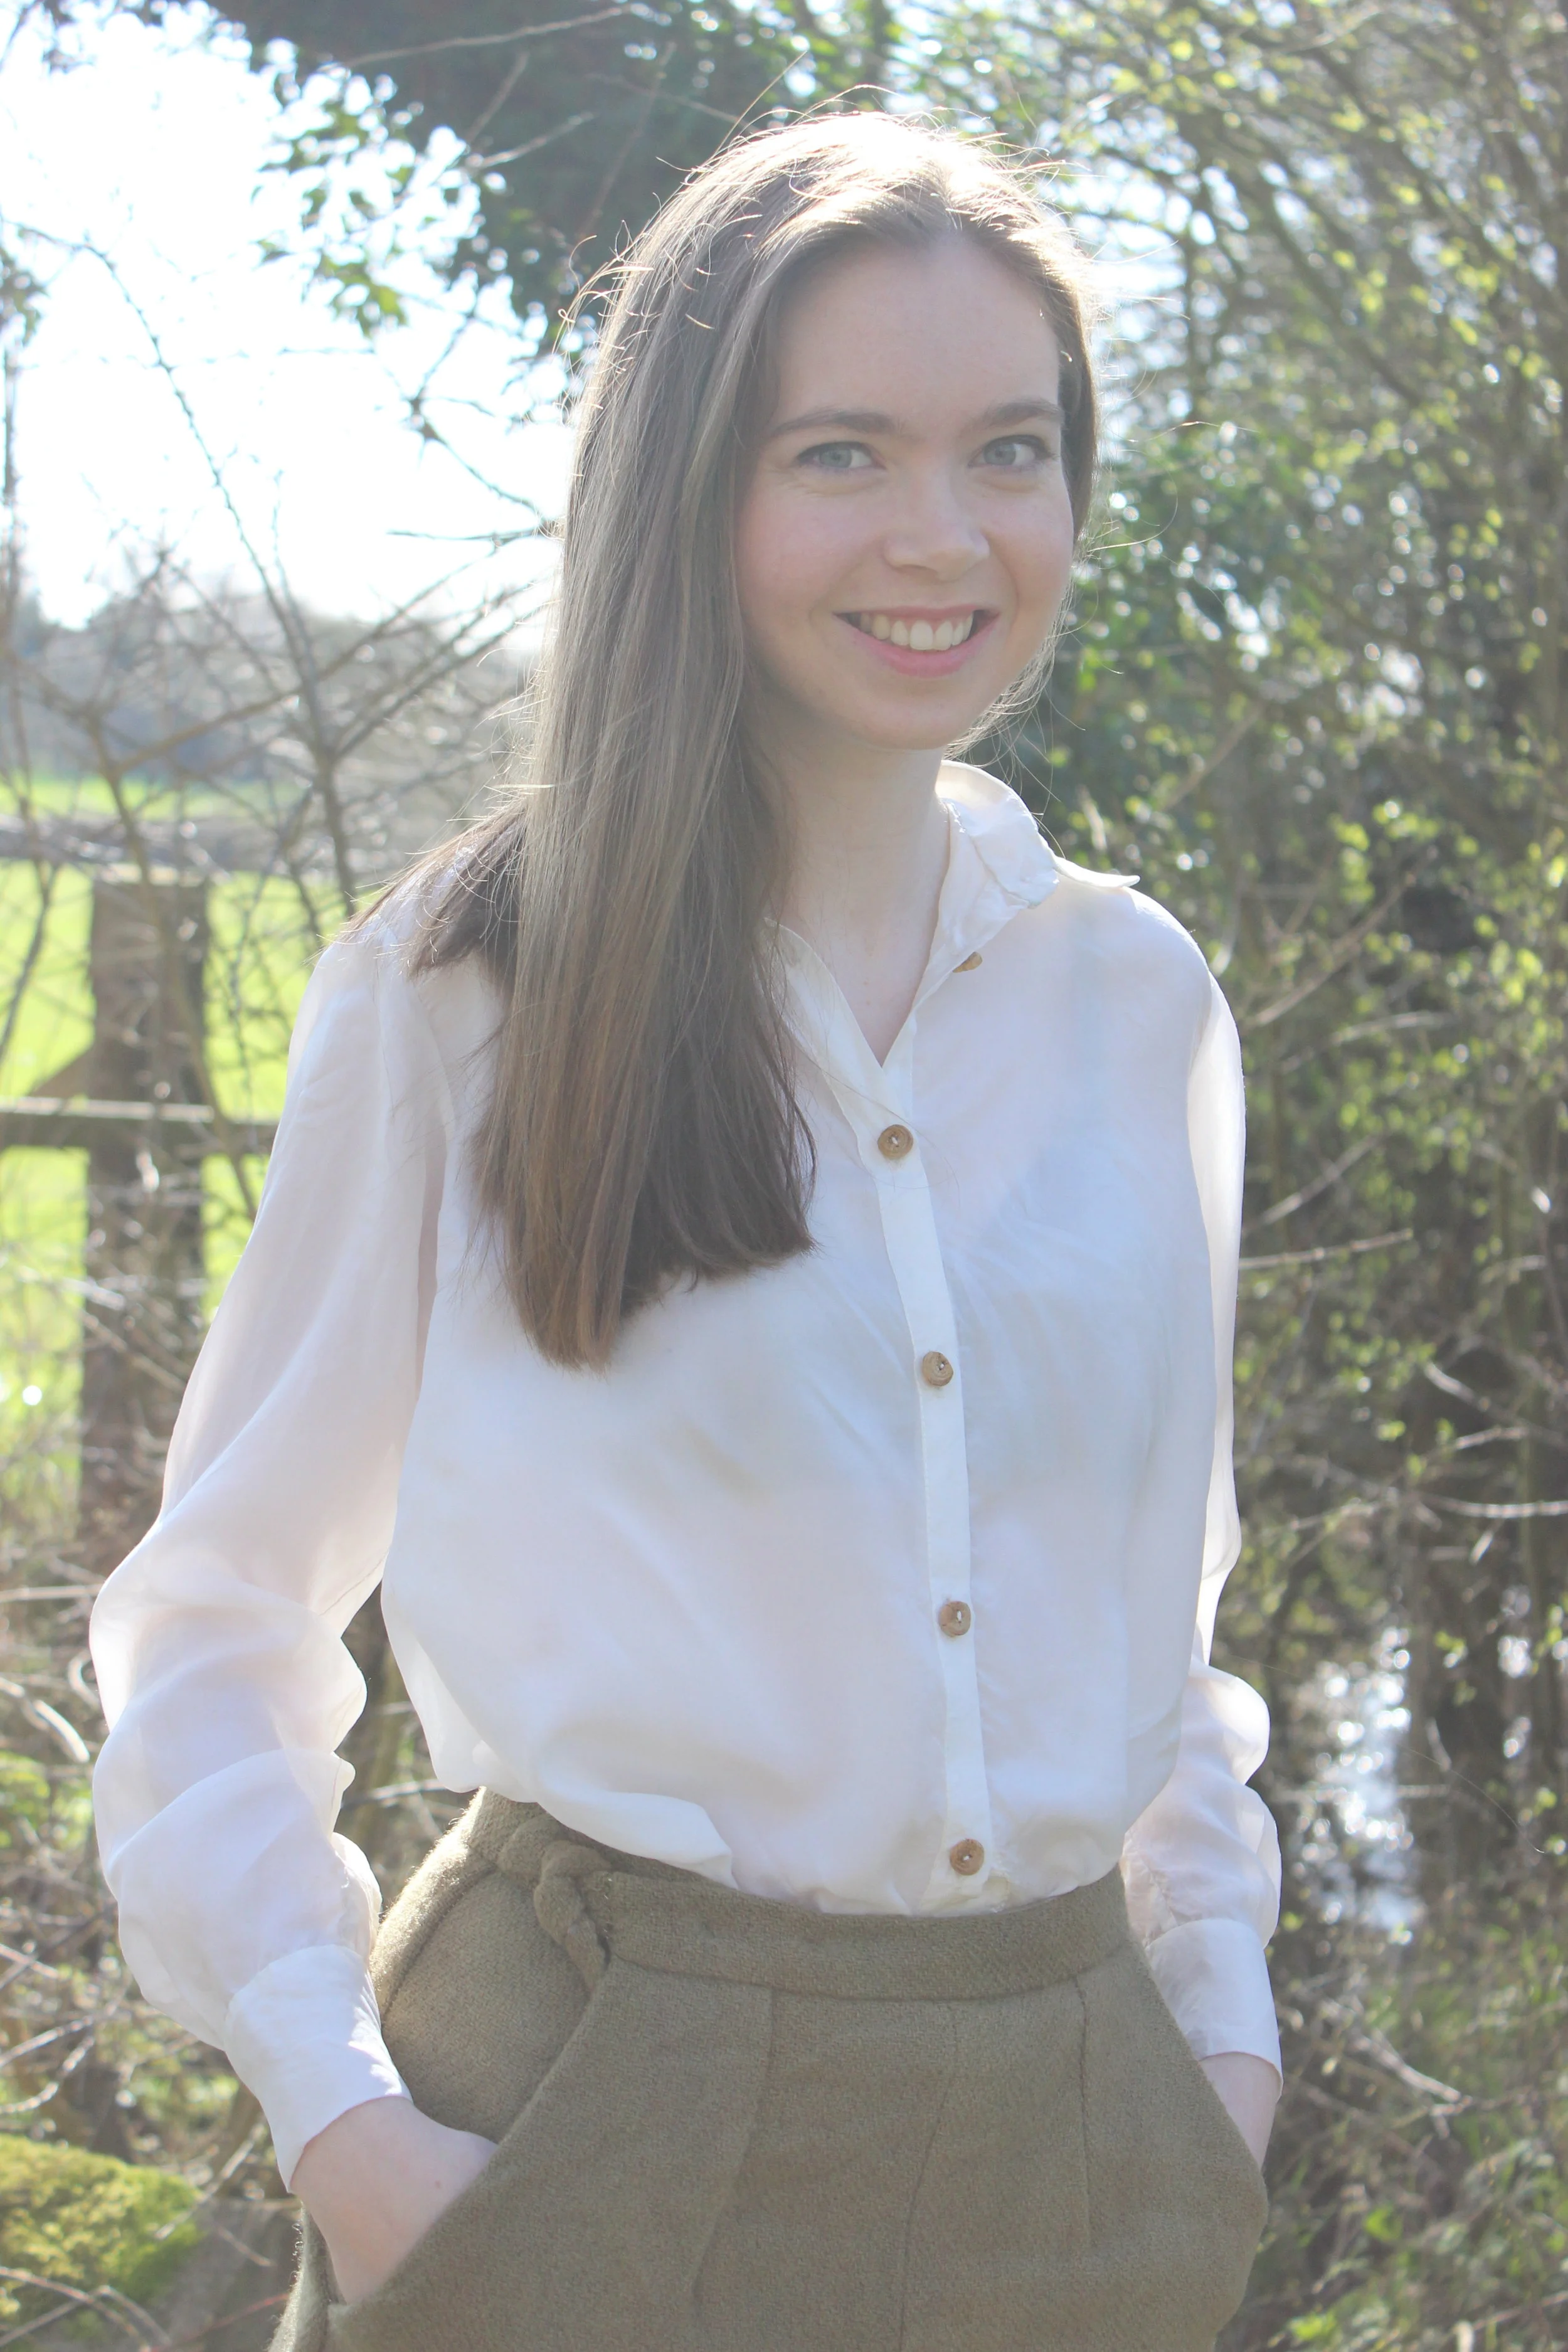
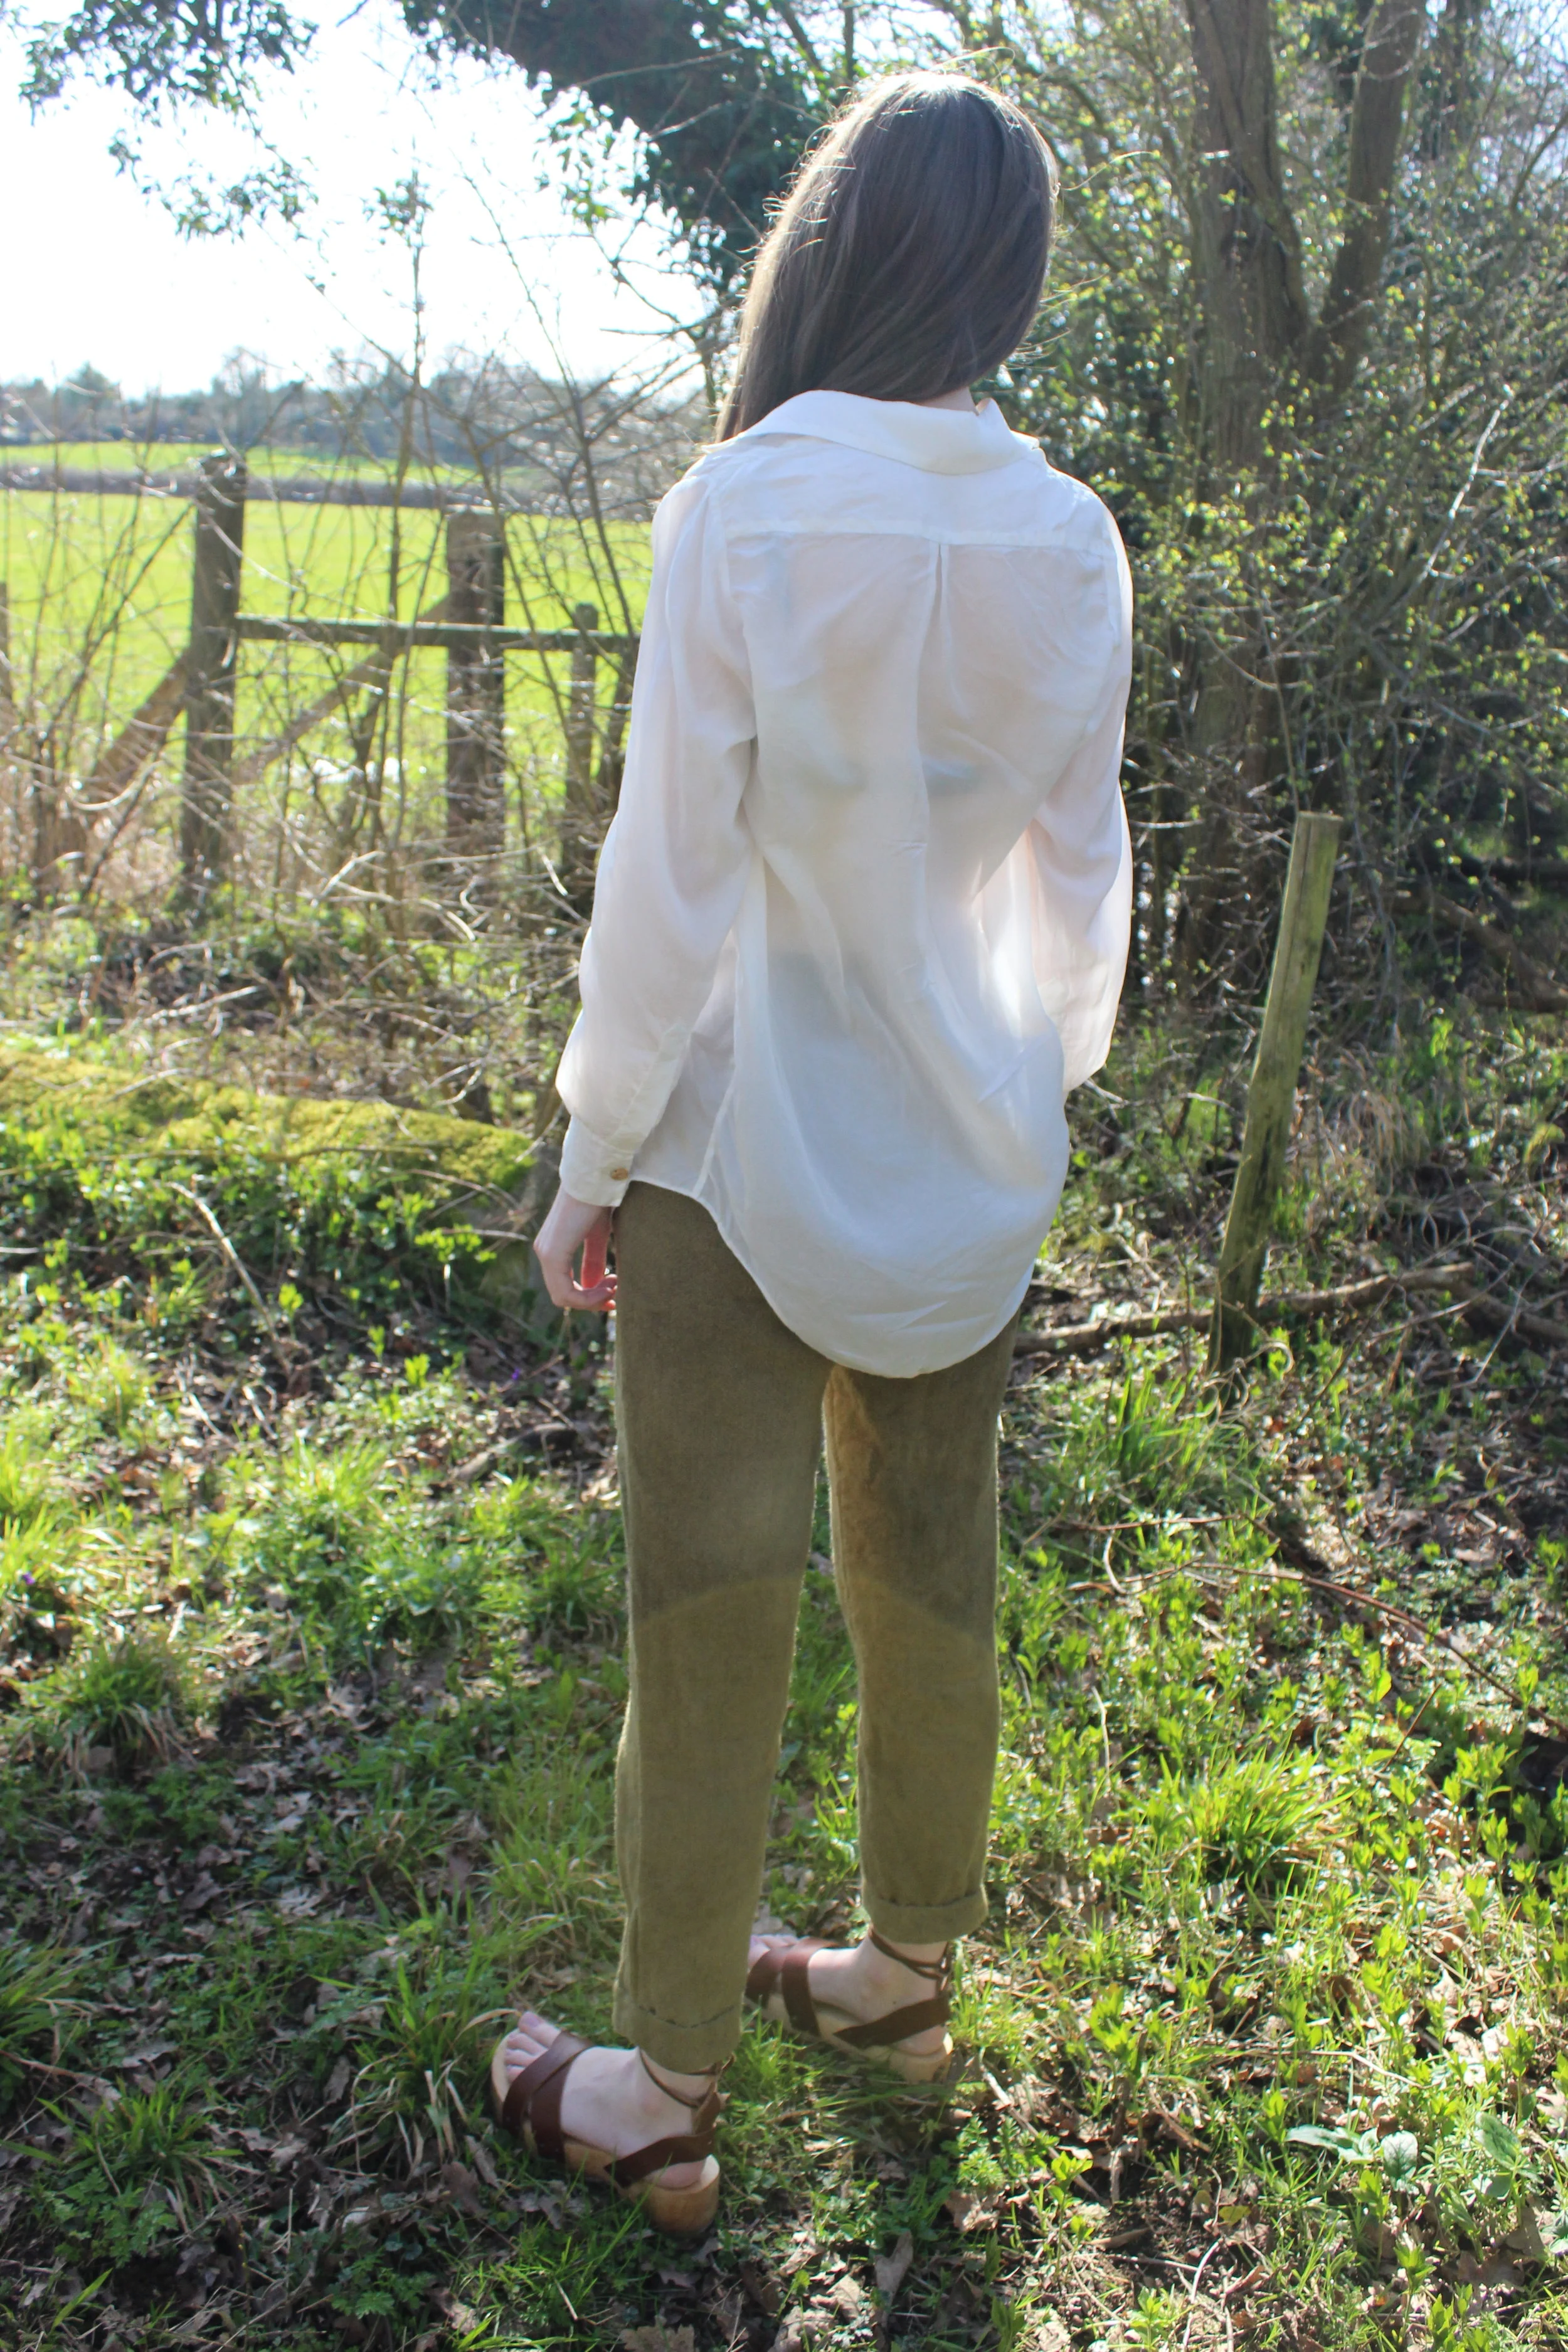
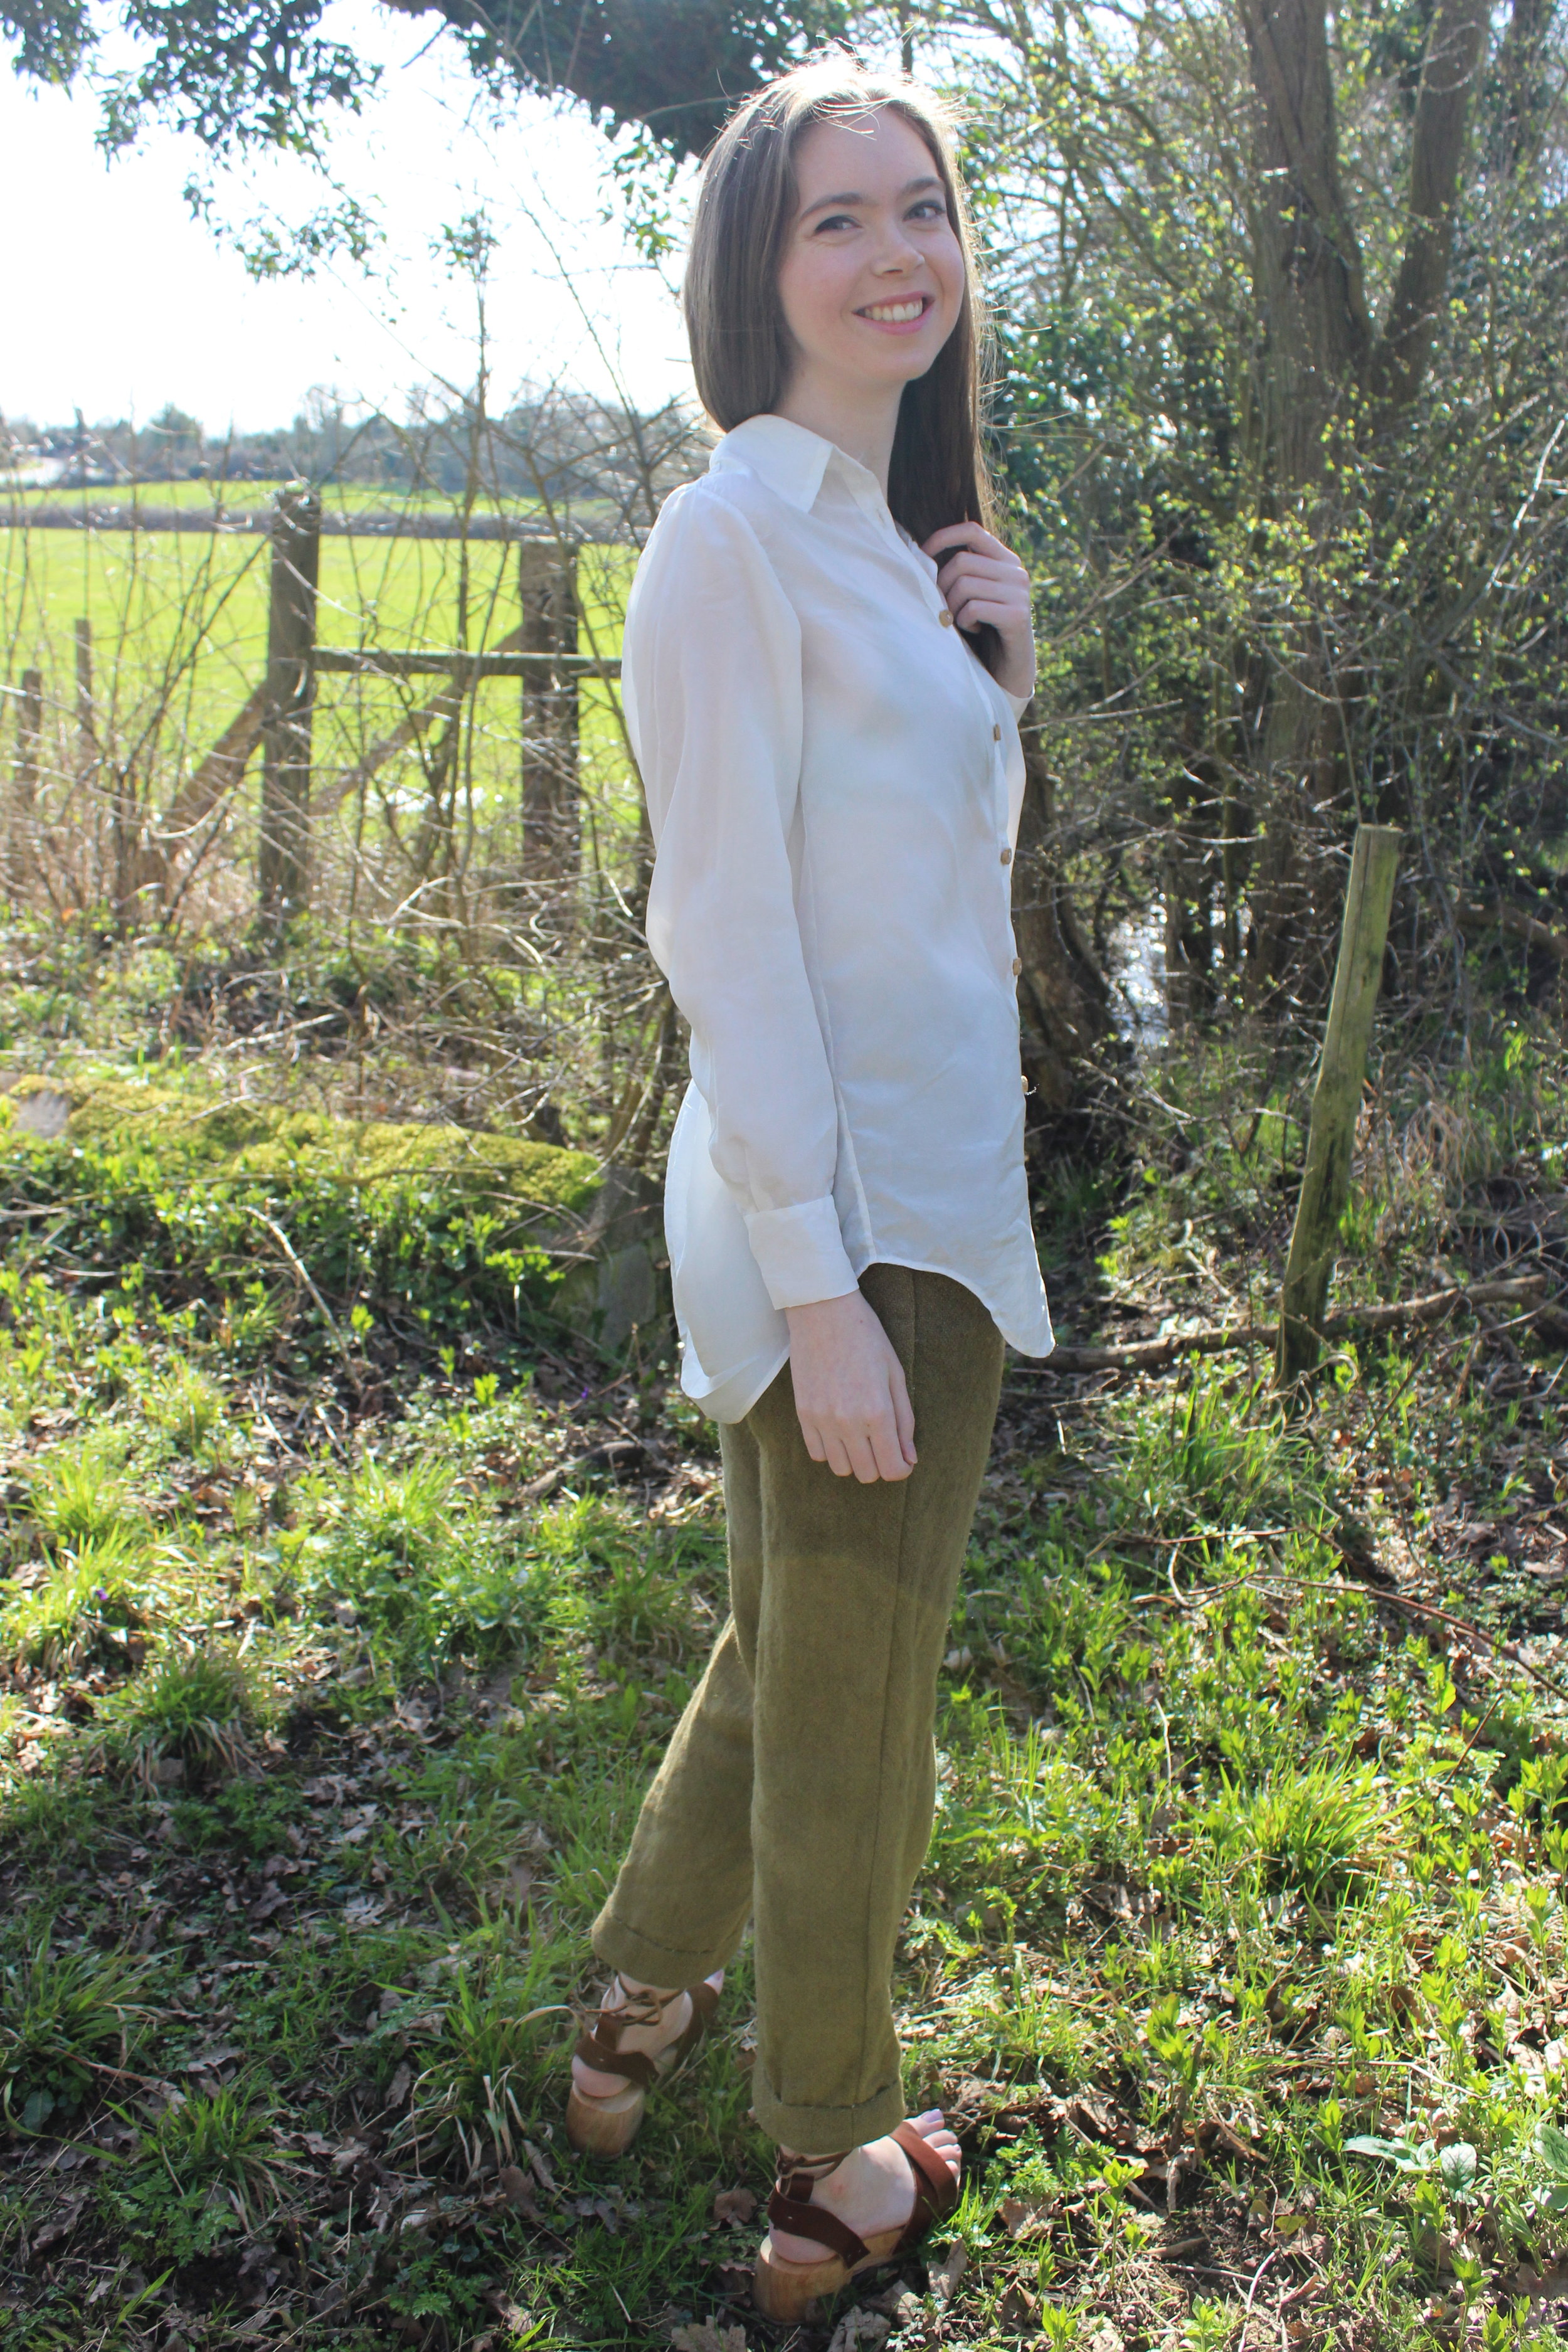
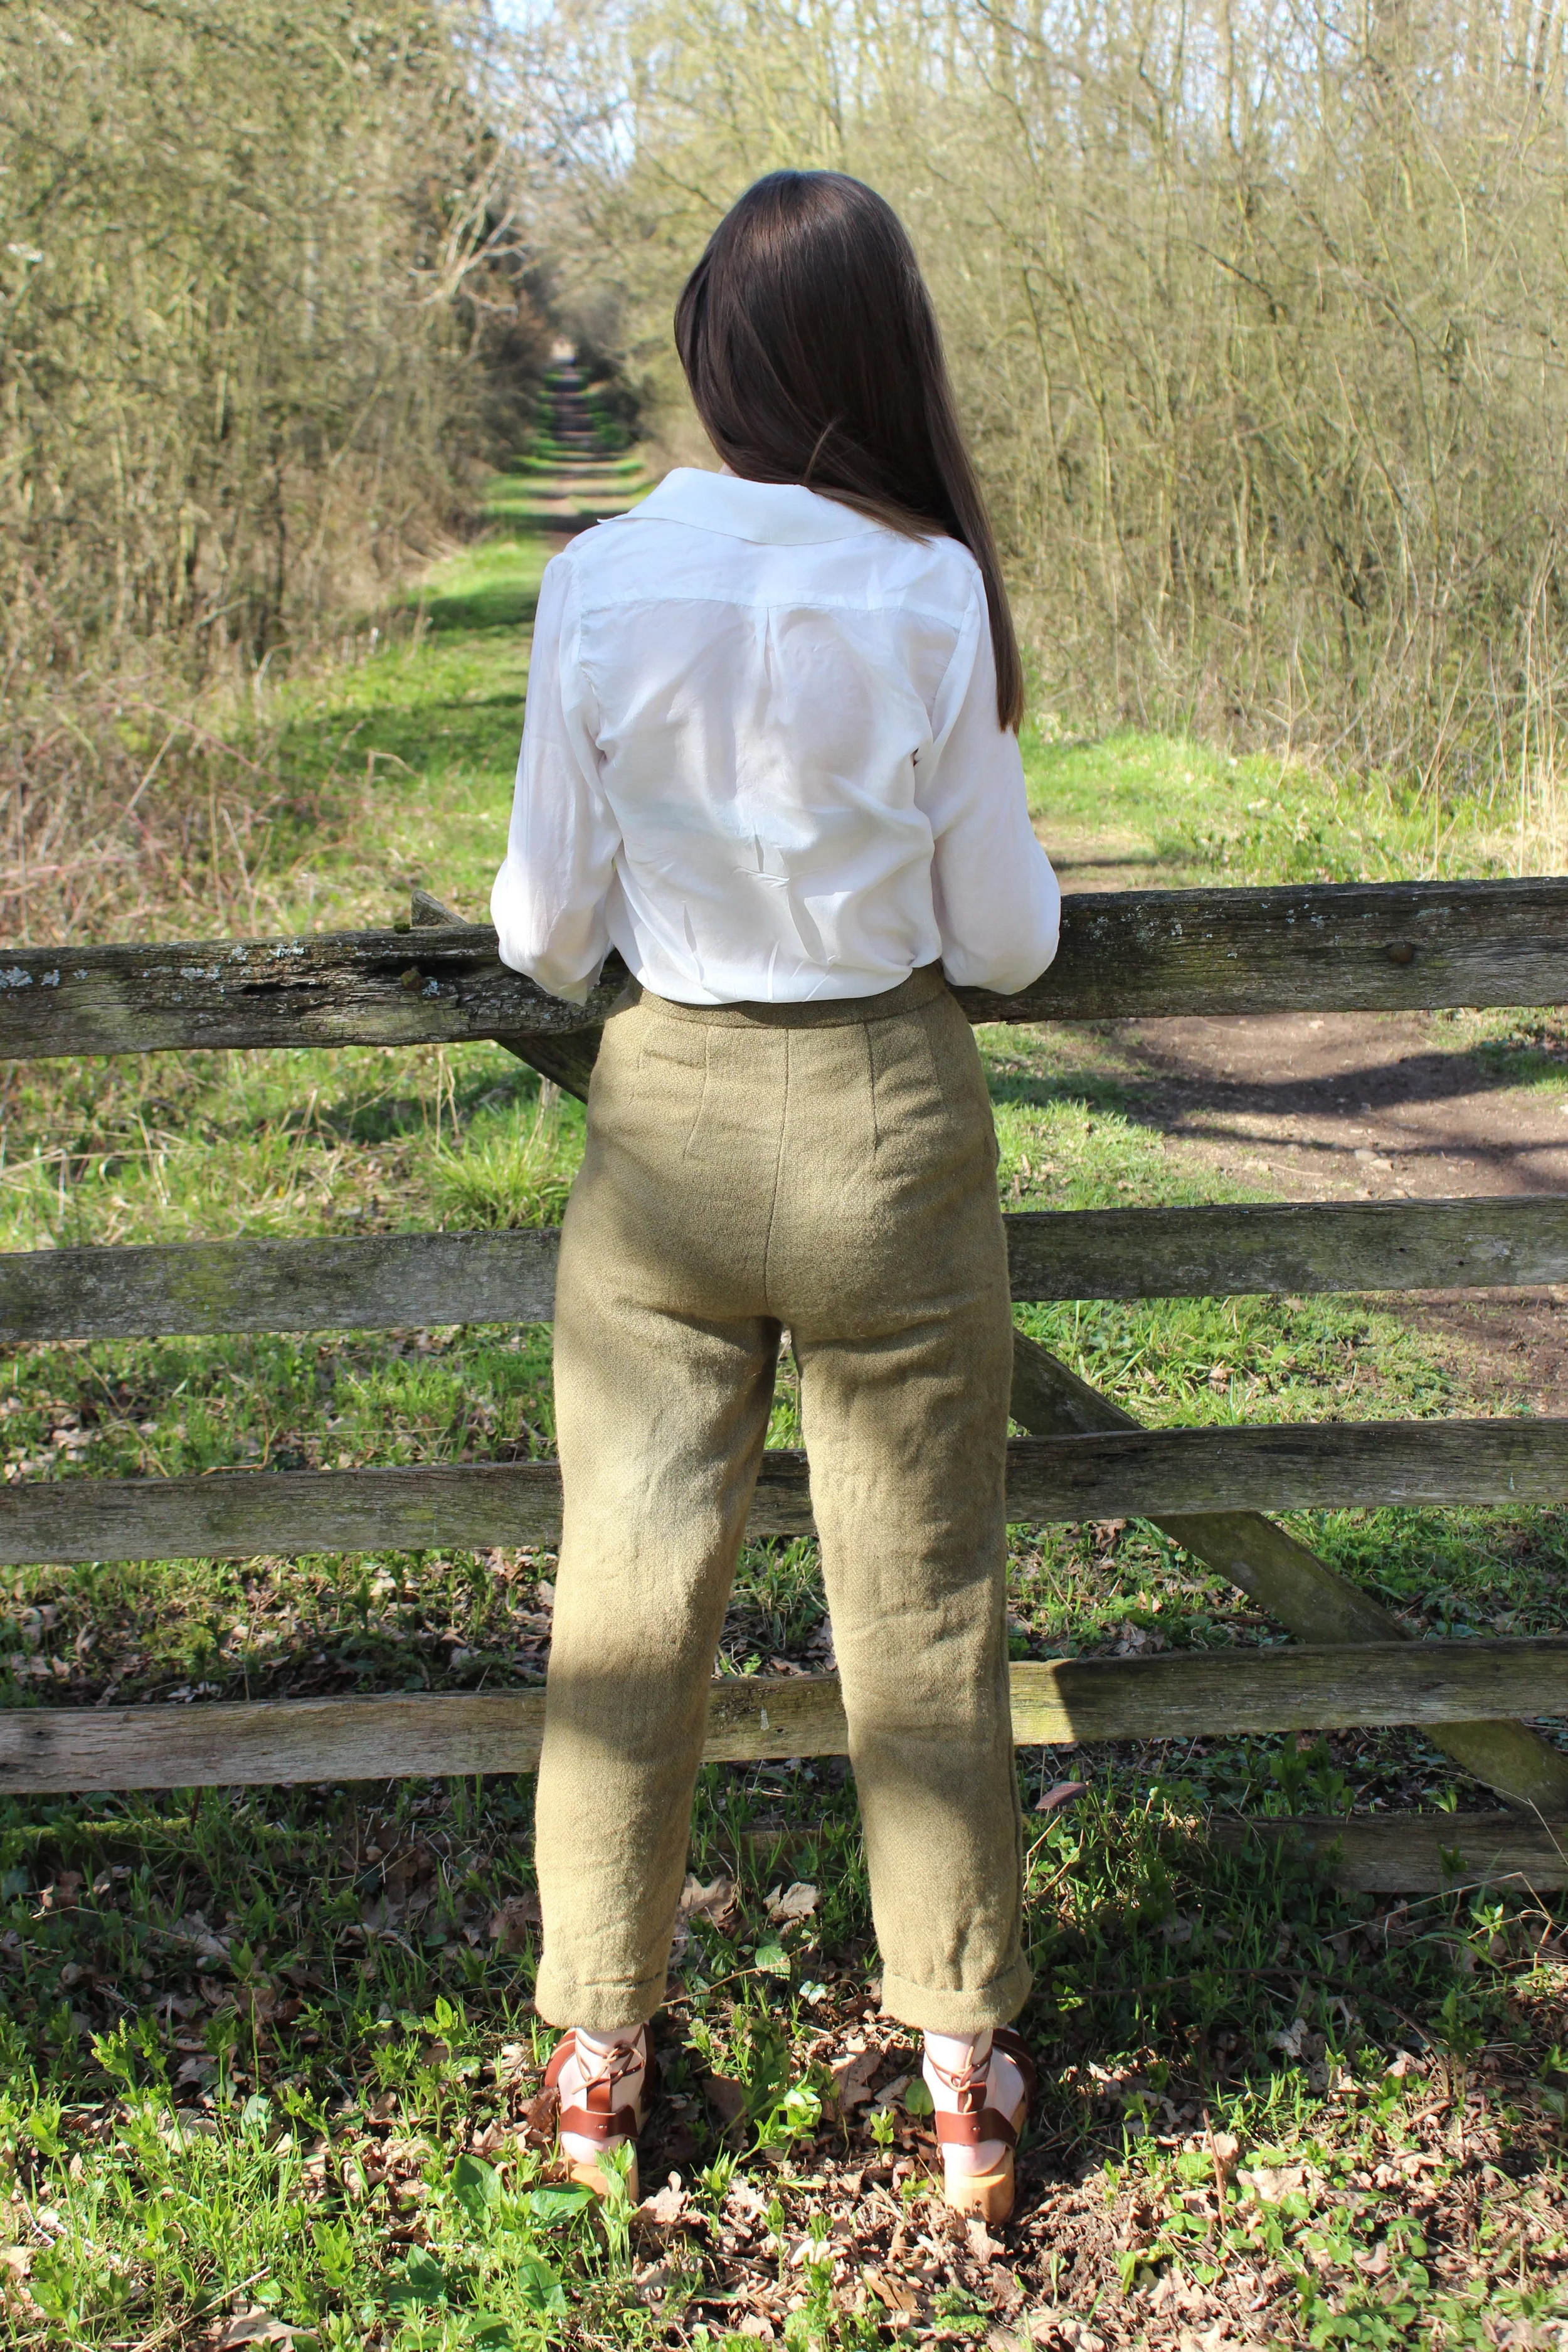
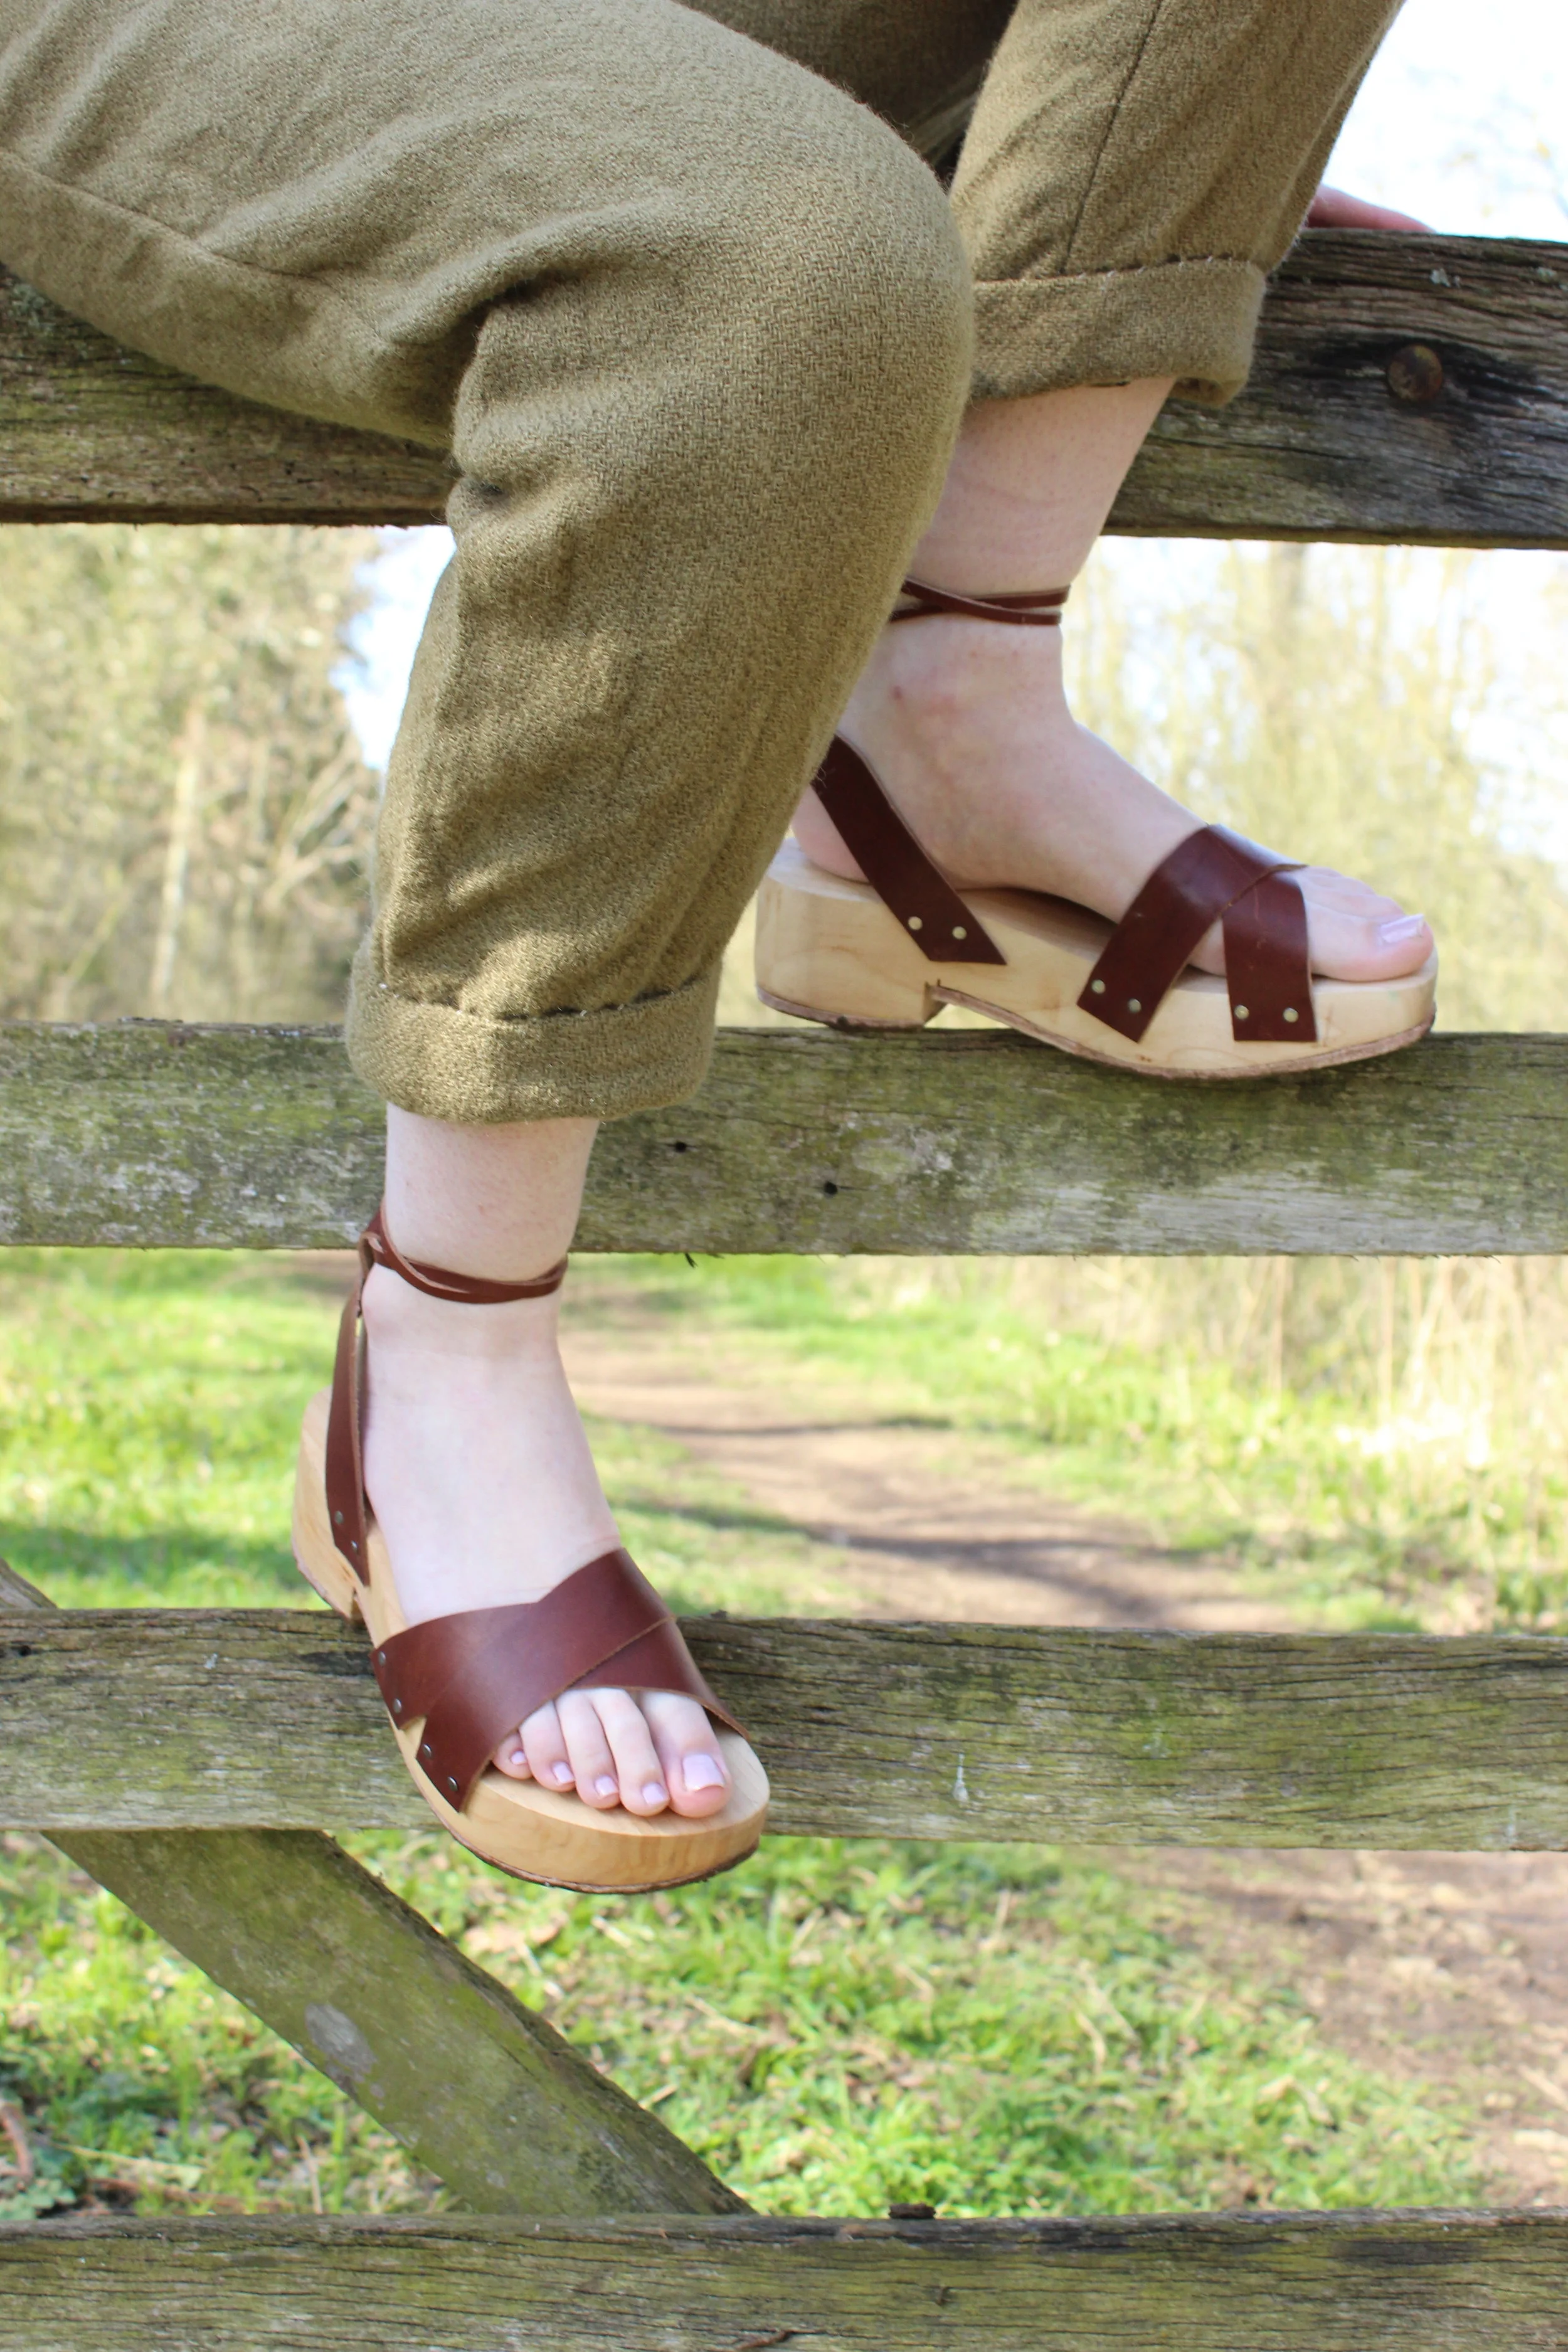
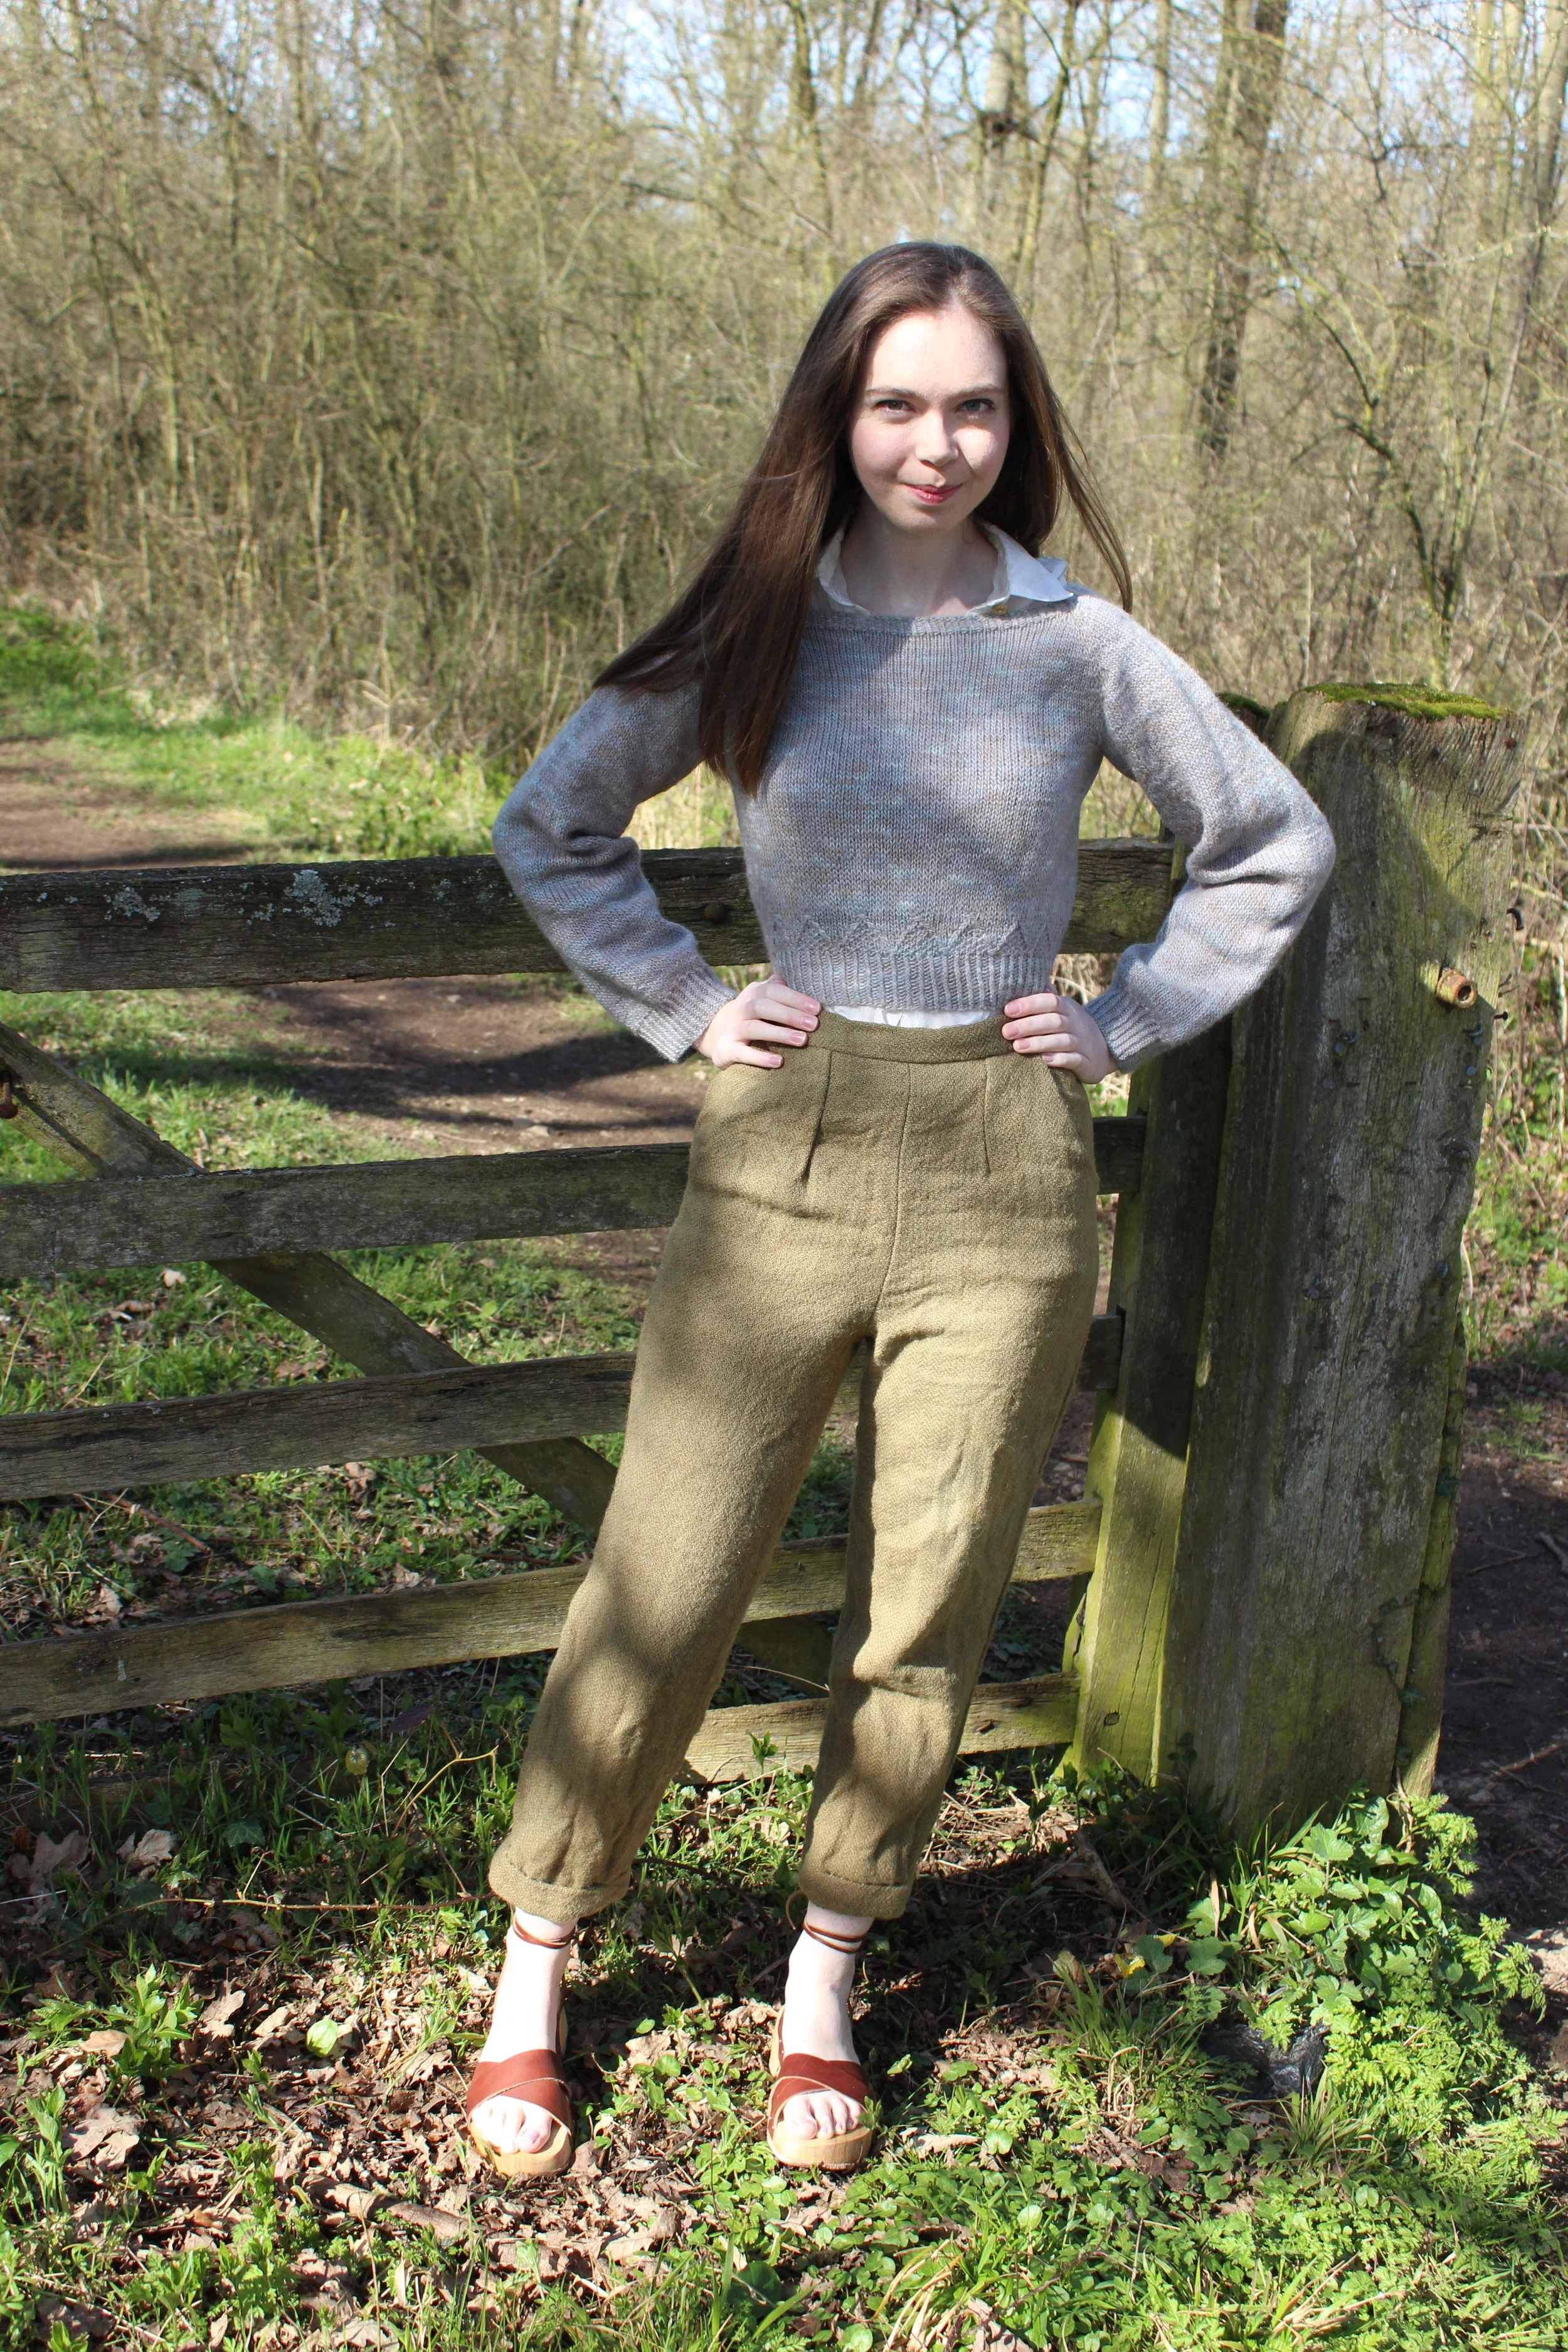
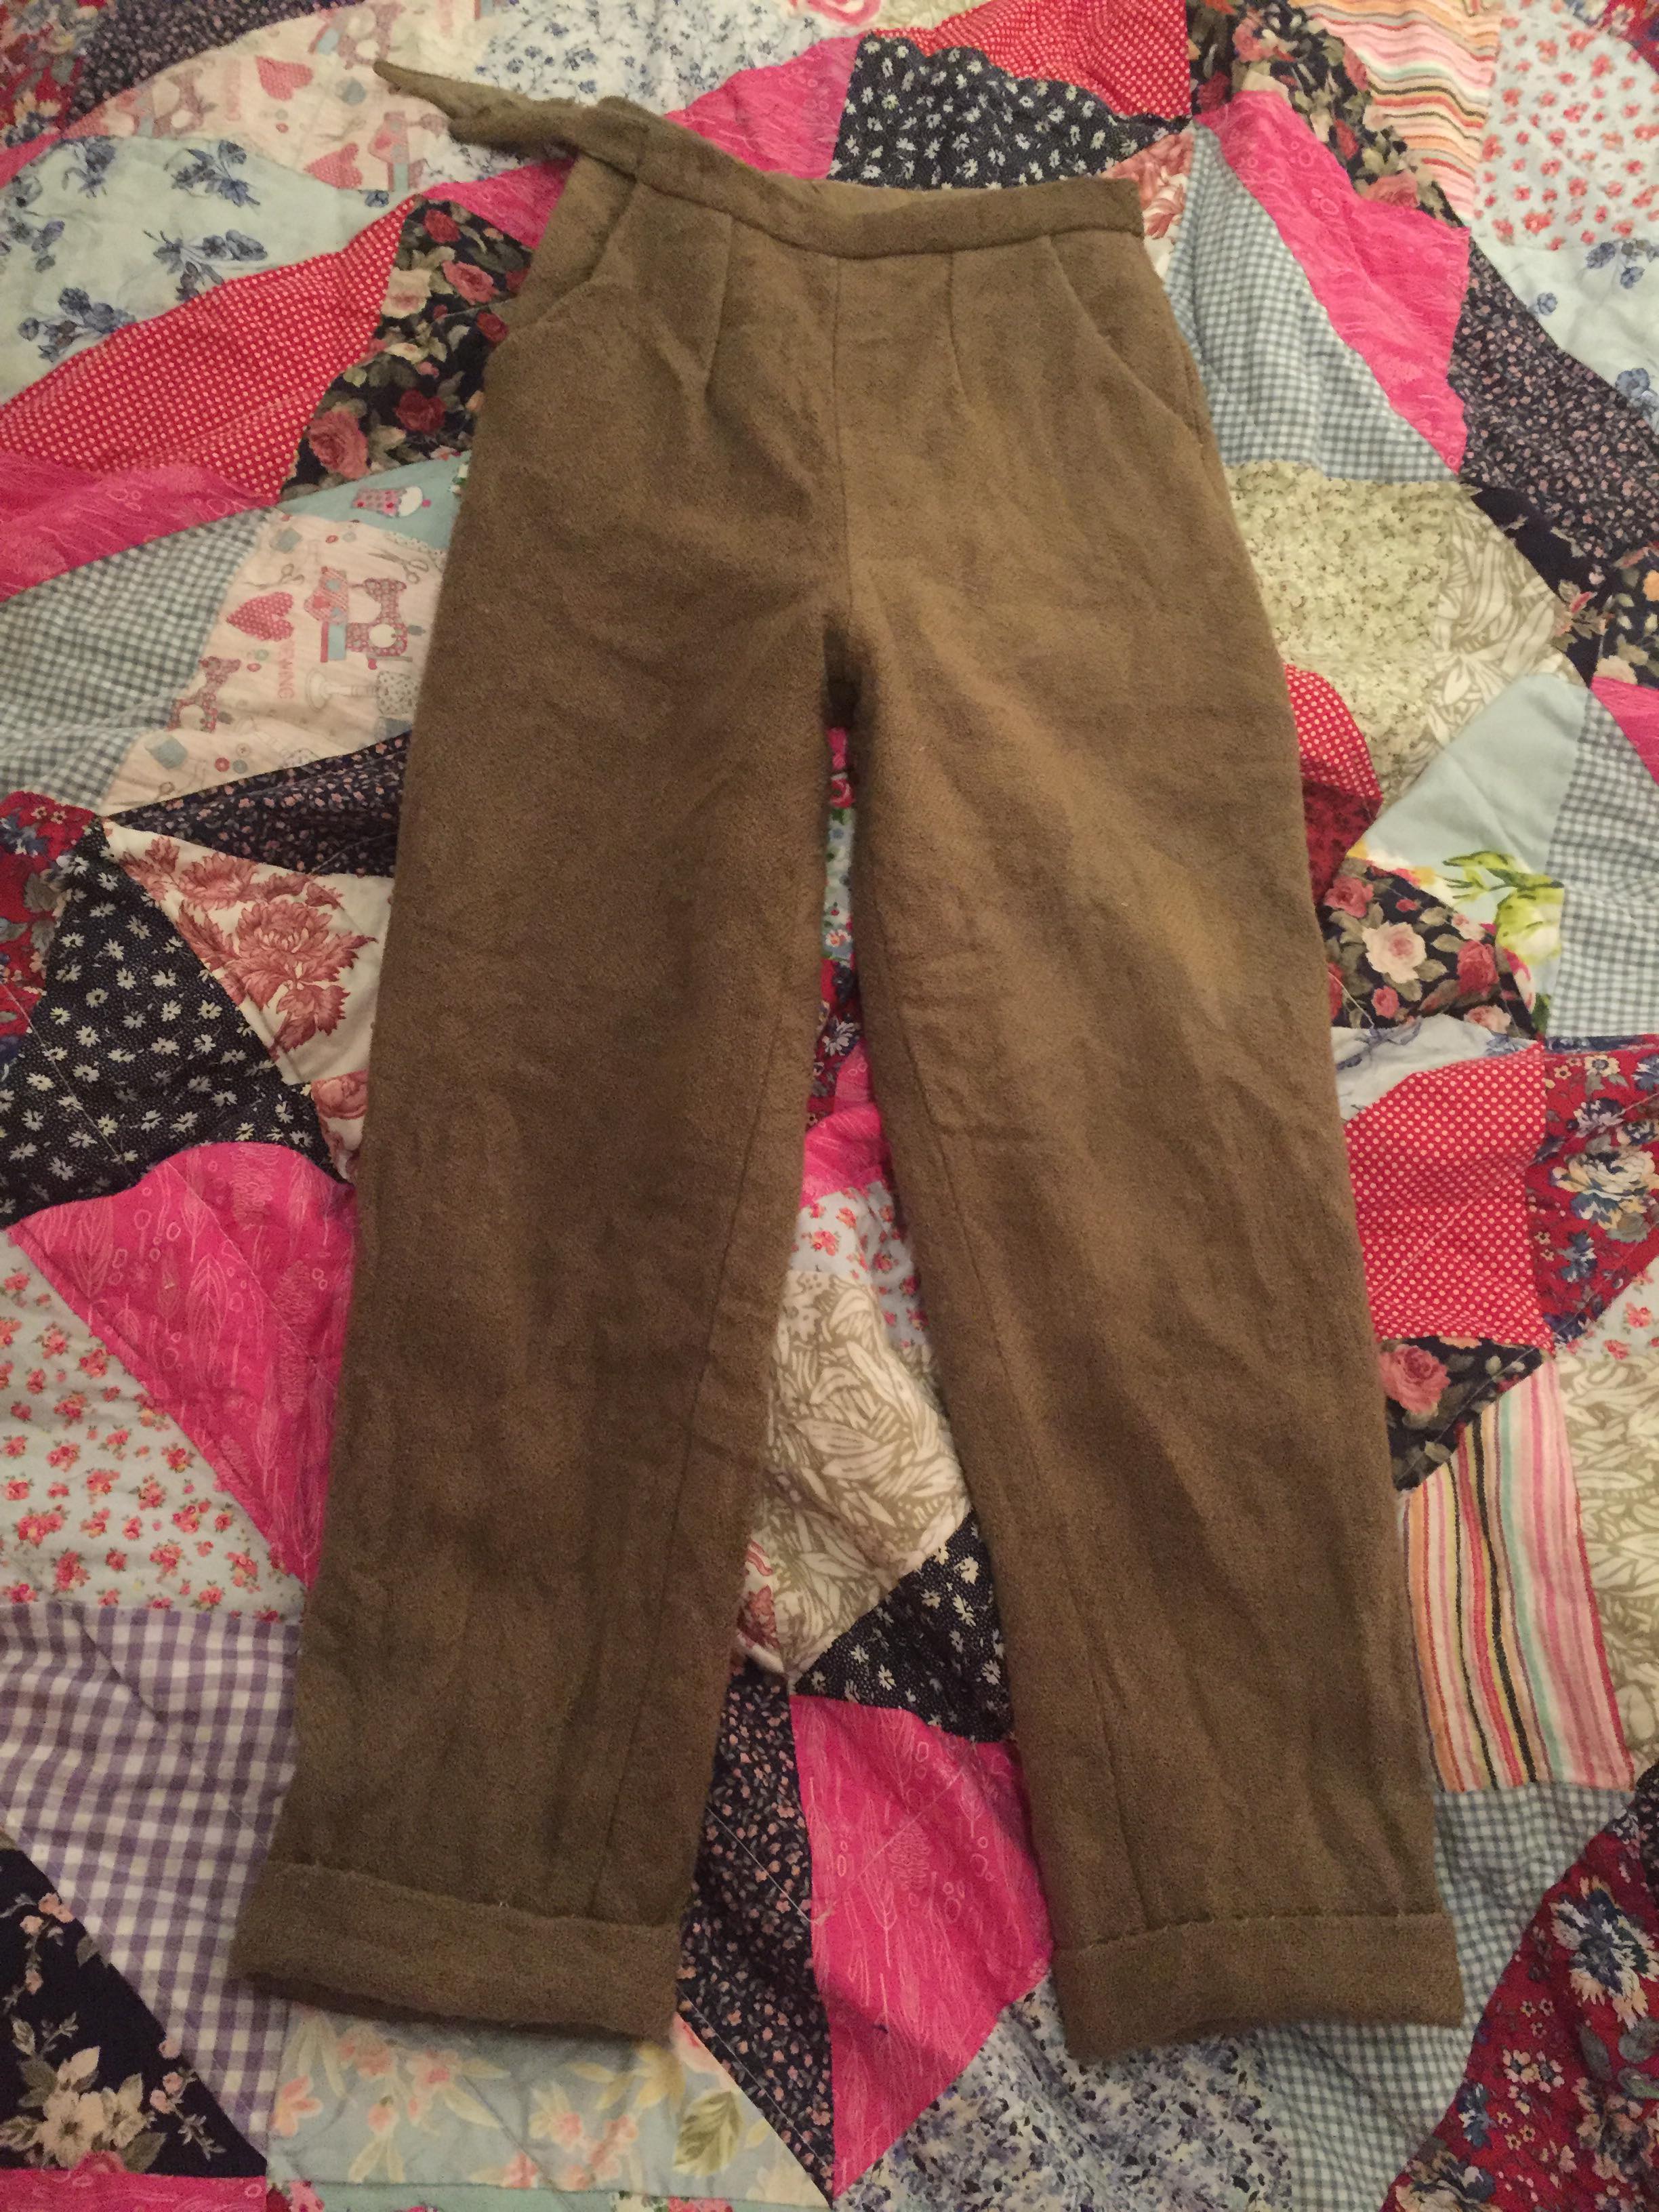
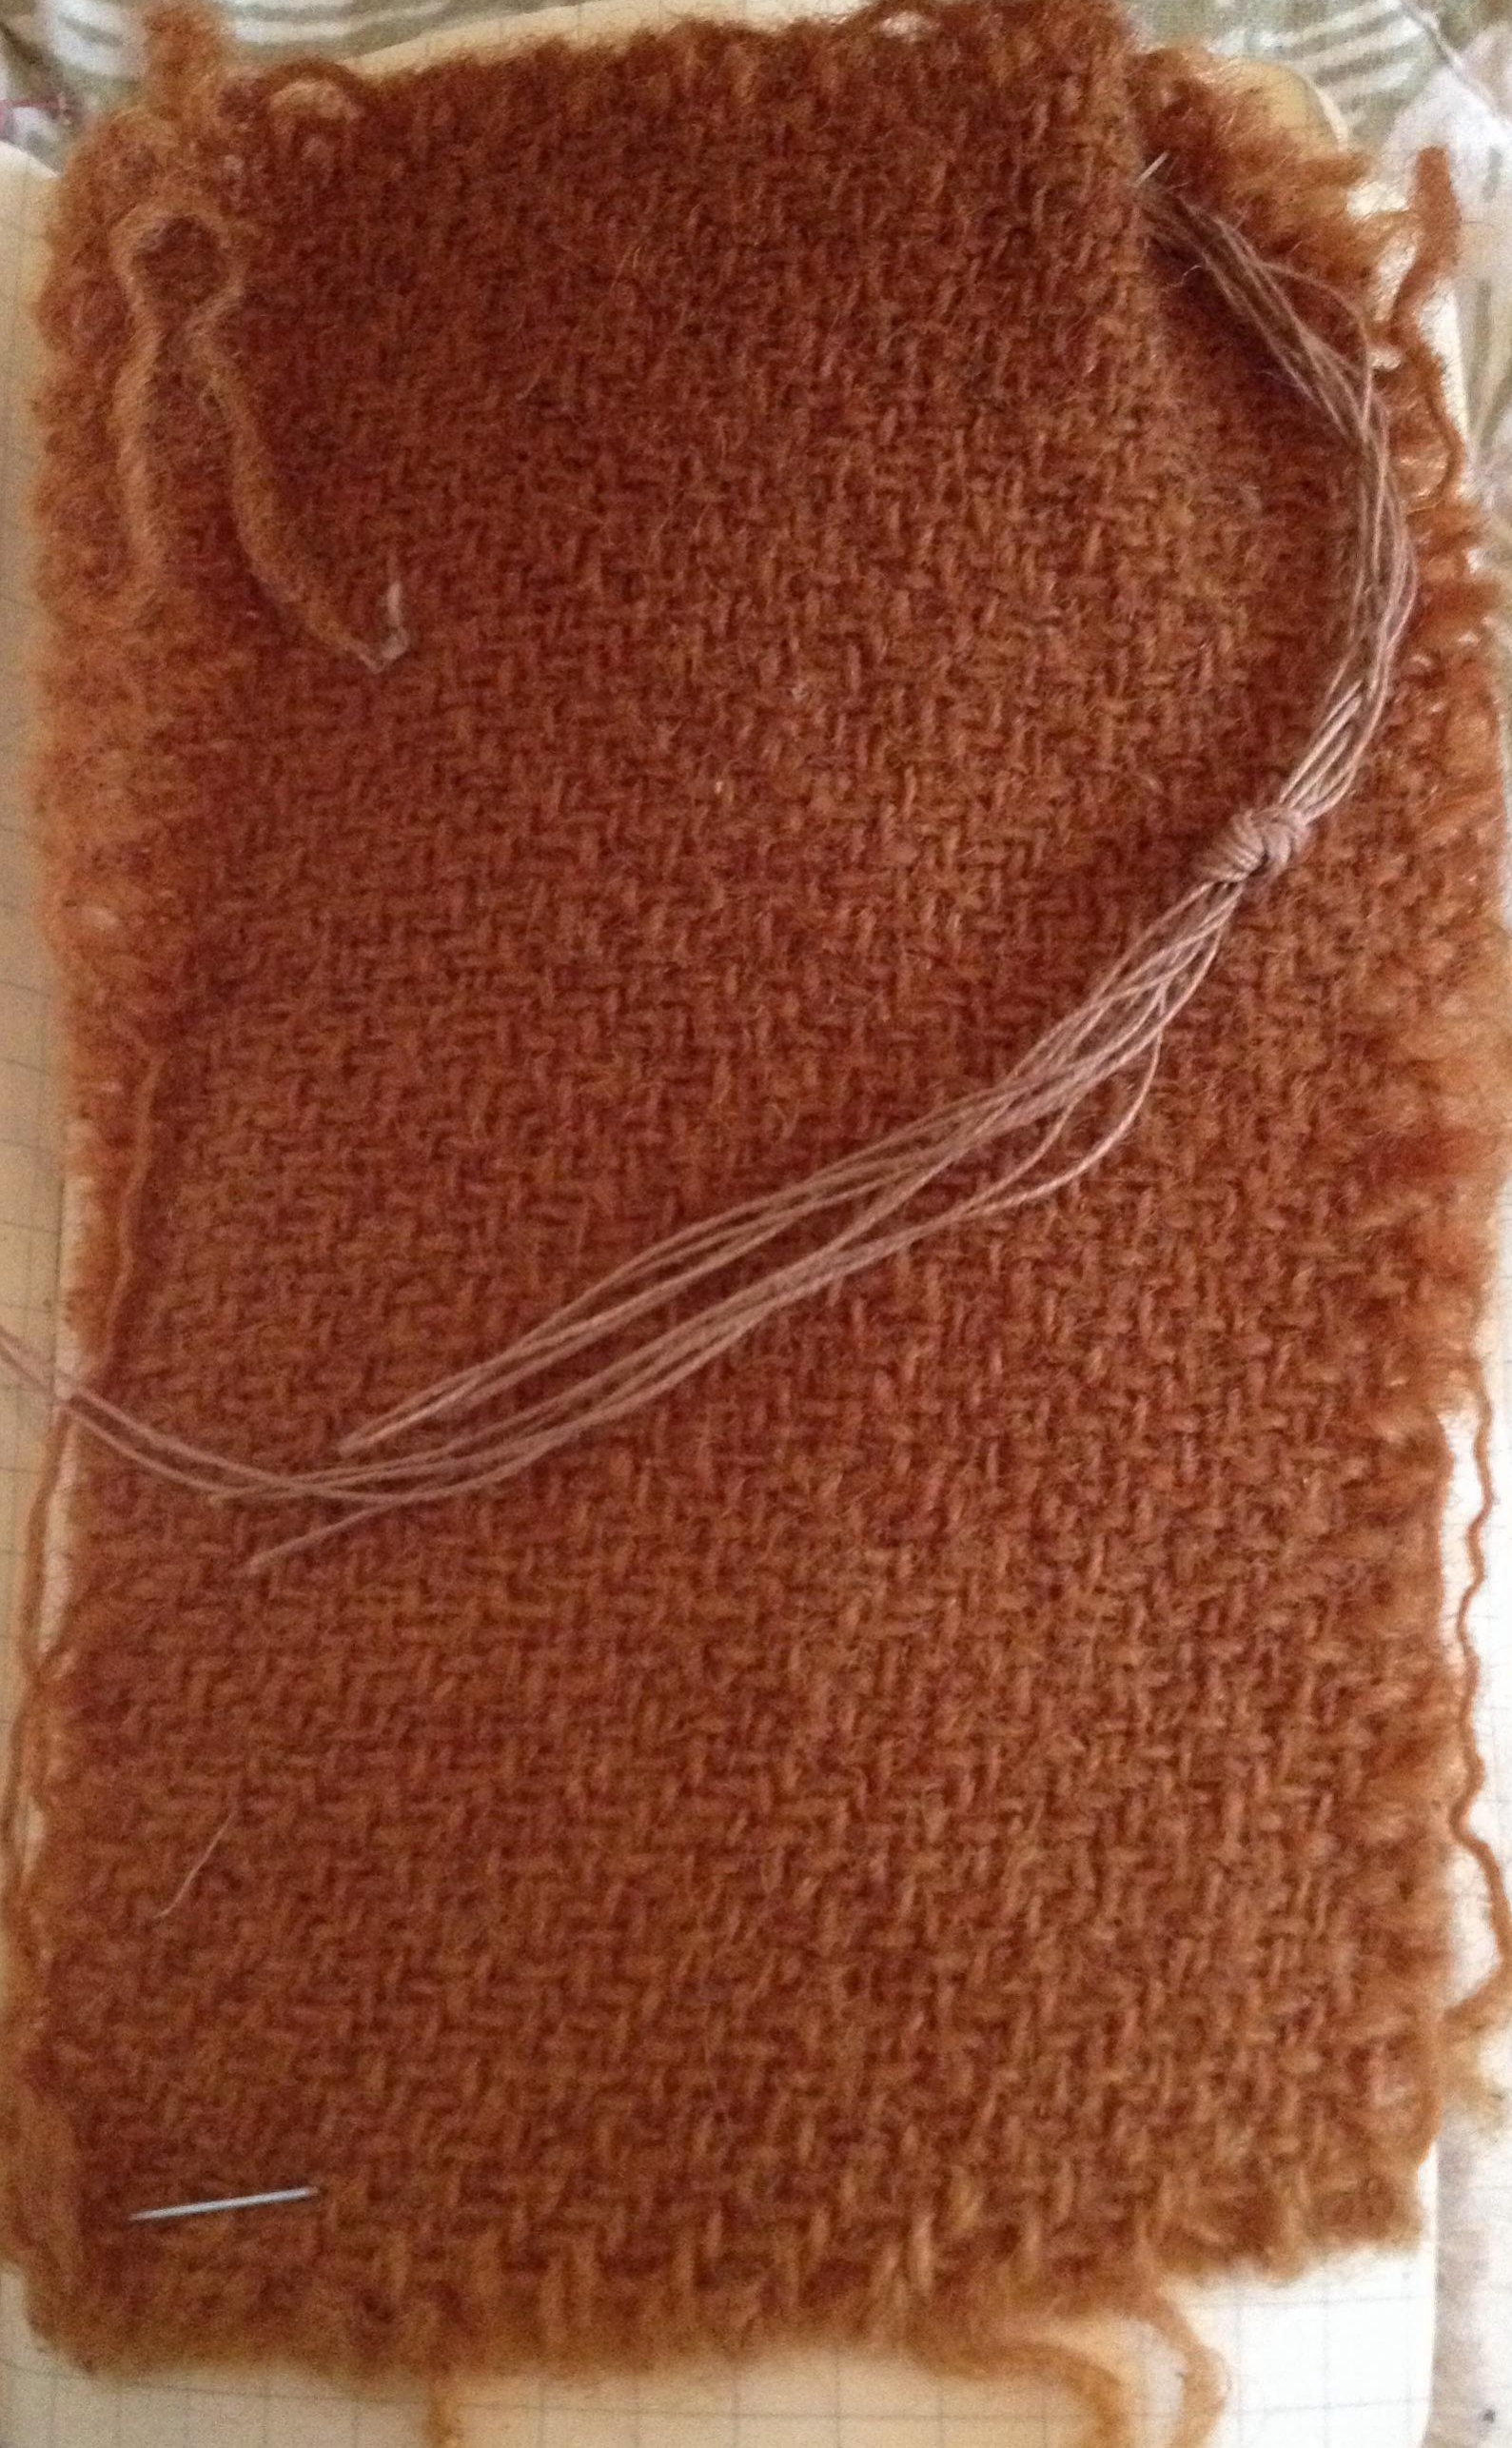
Hello all! It's time to document the final element of my British Outfit; the trousers. I sourced my wool from Middle Campscott Farm in Devon for £30.50 per metre. The natural colour of the wool is a pale cream and I knew immediately that I would have to dye it, partially for aesthetic reasons and partially because cream trousers are practically an open invitation for stains. I looked at lots of different options for dyeing my wool, including onion skins, oak galls, leaf printing and woad. The red onion skins gave a lovely rust colour when I tested them but that was to a ratio of 8 onions per 10cm square of fabric. However, I was not up for the peeling, or eating of that many onions. Oak galls would have given me the dark black colour that I was after, but by the time I was hunting for them they had just gone out of season and the only supplier I found sourced them from Germany. Leaf printing did not work very well, perhaps due to the texture of the wool, the leaves used or my inexperience. Woad would have given me a lovely blue but would have cost me £40 for the shade of blue that I wanted for 2m of wool and involved chemicals that I did not want to use. 

Red onion dye sample

Red onion dye sample

This left me with one option: weld. I had first counted weld out of the equation as it is primarily a yellow dye, however theoretically I could use iron to make it more of a khaki green colour. I bought 500g of it from woad-inc to match my 500g of fabric and got going! Before I did anything with the weld I had to make my own iron water as I hadn't found any iron oxide that was produced in the UK. This meant that I had to make my own. Later on I discovered that you can buy some from The Outside Dyer on Etsy. I popped down to the scenic department at uni and procured some rusty nails which I stuck in water for a week or two until the water was a gold-y brown colour. 

ironwater.jpg

I added the fabric to a pot of water, strained in the iron water and simmered for 10 minutes. Next time I'd add the iron water before the fabric because I felt that the iron concentrated on certain parts of the fabric so the dye was not as even as it could have been. I had silk fabric in there with the wool as that was going to be the lining for my trousers which I wanted to be the same colour. 

mordanting.jpg

Next it was time to start the weld dyeing process. First the woad was bundled into muslin and placed into boiling water to simmer for 1 hour and left overnight. You can see the colour difference of the water in the pictures below.

weld bundle.jpg

In the morning I removed my bundle and replaced it with the fabric to be dyed. This was then simmered for 1 hour. 

IMG_20180201_095133612.jpg

Then I rinsed all of the excess dye out of the fabric and hung it to dry. I ended up putting the wool on the spin cycle in the washing machine because otherwise it would quite frankly have been a slip hazard with all of the dripping that was going on. I was really quite pleasantly surprised with the experiment, considering I had done no trial run I was really pleased with the colour achieved. 

IMG_20180201_103323546.jpg

Next up, the making of the trousers!

Thanks for reading,

Lauren xx

A British Outfit: Knitting the Jumper

Hello all! Today I'm going to share the process of knitting my first thing ever. I've dabbled in knitting before, but never more than a few rows of something or other. I remember thinking when I was little and had learned to french knit, that it was all I needed to know, and then I could just sew each row together to magically make a jumper. Obviously it's easier to just learn how to knit, and that's why I included a knitted jumper as part of the British Made outfit I'm making for my dissertation. This way I had to learn how to knit, with no opting out. 

IMG_20180219_135401428.jpg

When I first decided that I wanted to knit a jumper, I wanted to make this fancy (obviously machine knitted) crossover jumper found on pinterest. When I started looking for a pattern I soon realised that as a first project I needed to keep it simple if I had any hope of completing it. I then decided to go for a cropped jumper with long sleeves. Easy, right? Apparently not. The closest pattern I found was the Netherton Pullover from Issue 1 of the PomPom mag. It's very simple, knitted in the round with ribbed cuffs, neckband and hem. I did briefly research drafting my own knitting pattern but soon found that it would be a complicated process that I did not have the time or expertise for, unfortunately. This is something I would like to explore in the future though. 

I used 500g Bluefaced Leicester wool which I had already dyed with elderberries. This cost me the pricely sum of £45.48. The first step was to take the hanks that had been dyed and wind them into balls. Thanks to all of the friends that helped me with this step. Below you can see Paul and Liam winding like pros. 

IMG_20171005_133140299.jpg

I started the jumper in November and finished it in January, so in total it took 3 months of knitting in the evenings and travelling. I did do a lot of ripping out and starting again though, so I reckon without that it would have taken 2 months. As a novice knitter, I did have a fair few difficulties. This sweater starts with the neckline ribbing which was fun, and fairly painless to do. Next was short rows, and I did not have fun with them. I had many difficulties with making one left, and so did a lot of making one right instead, which made the raglan seam a bit messy as a result. Looking back at the picture below, the neckline has stretched out a fair bit since the picture was taken, and I wonder what I could have done to prevent that. 

uho.jpg

As I was trying to keep the project as simple as possible I thought that I would skip the zigzag detailing at the bottom of the body, just knit down as far as I wanted, and the ribbing and then the body would be done. This didn't work out at all well for me because I didn't realise that the decreases for the ribbing were in the last row of the zigzag stitch pattern. So I had to unrip all the way to where the zigzags started and just knuckle down and figure out the stitch pattern. I'm really glad that I did work out the zigzag because it looks really pretty and I'm actually quite proud of it. 

IMG_20171221_171720473.jpg

When the body was done it was time to get cracking on the sleeves. The sleeves on the pattern are 3/4 length and I wanted full length so I just kept going until I thought it was time to stop. Unfortunately I completely miscalculated this length and so had to rip back to before the rib started, add some more length and then finish off the sleeves again. I didn't do the zigzags for these as was indicated on the pattern because I wanted to see if I could add the decreases in without the stitch pattern, and I managed it so that worked out well. 

IMG_20180119_140532567.jpg

When I tried on the jumper after it was finished I had 2 main issues. The first being that the wide neckline looked silly over the collar shirt that I needed to wear underneath it. The second was that it was too short in the body. I couldn't see any way past the first hurdle, but I could try and lengthen the body by blocking the jumper so that's what I did. I washed my jumper and pinned it to a towel, stretching out the body as much as I could. The issue I had was that the towel was not stable enough to keep the jumper flat, and foam would have been a better material to have pinned the jumper to, offering more resistance. I managed to add 4cm in length to the body and 5cm to the sleeves which I wanted to give a bit of extra length to. Since wearing the jumper I still found it too short and so I washed and blocked it again, managing to add another 4cm to the length of the body. 

IMG_20180303_121334079.jpg

Overall I'm really proud of this jumper. I do like that when knitting if a mistake is made it is never irreparable. It just takes a lot of time, patience and energy to go back and do it right. I think I have just enough yarn left over to make some matching socks. 

IMG_20180219_135401428.jpg

Thanks for reading, and to everyone who helped me on this incredibly out of my depth project!

Lauren xx