Elephant Onesie

Hello all! For the entirety of my (admittedly short) life I have coveted a soft snuggly onesie to curl up on the sofa in. Luckily Minerva Crafts had the perfect fabric to make the snuggly onesie of dreams, so that's what I chose for my February make. 

IMG_1716.JPG

You can read all about the making process on the Minerva Crafts blog here.

Thanks for reading, to Bethan for taking the pictures, to MK for trimming all of my loose threads and to Minerva Crafts for supplying the kit for this make!

Lauren xx

A British Outfit: Making the Pants

When the bra was finished it was time for the other half of the underwear. The main challenge here was again not being able to use elastic. I wasn't worried about fastenings because I could easily make a self fabric drawstring to hold them up. I used British grown silk again, but this time from a different supplier. The plan was to use the rest of the dyed fabric that I made the bra from, but I severely underestimated how much I needed and as a result didn't have enough. I chose to dye my fabric with red cabbage and you can read all about that process here.

I drafted the French knicker pattern from Pattern cutting for Lingerie, Beachwear and Leisurewear by Anne Haggar. From the get go I dropped the waist 10cm and lowered the side seam hem by 1inch. I then drew in the design lines that I was after and cut them out of Calico for a first fitting.

IMG_20171128_141325230.jpg

For the first fitting I topstitched cotton tape on the waistband point of the panties to thread a drawstring through. The only alteration I made was to pin the excess out at each buttock.

shorts first fitting.jpg

I adapted the pattern and made the second toile out of a drapier fabric to get a truer idea of how the panties would look in the final fabric. Truth be told, I probably should have started in a drapier fabric and skipped the Calico all together. I pinched yet more excess out of the buttock in this fitting and also took some ease out of the buttock to make them more slim fitting.

shorts second fitting.jpg

I cut out and tacked together the panties out of the final fabric for the last fitting. I tacked them together by hand because I didn't want to leave machine holes when I unpicked the garment to sew it again for real. There were no changes this time so then I got on with putting these together for real.

pants 3rd fitting.jpg

As with my bra, neat finishing was very high on the agenda. The centre front seam was pressed open and each SA was finished individually so that I'd be able to thread a drawstring through the waistband later. The centre back and side seams were french seamed and the inserts were hand flat felled. The leg holes were bias bound. 

Flatfelling in progress on the left and a finished french seam on the right. 

Flatfelling in progress on the left and a finished french seam on the right. 

When all of the seams were finished I folded down the waist twice to make a channel for the drawstring.  I top stitched it down by hand because I was very wary of distorting the delicate fabric with the sewing machine (especially as these were cut on the bias.)

IMG_20171201_141233915.jpg

The final step was to make a little gusset which was tacked onto the crotch area of the pants. Ideally I would have used a cotton jersey, but that wasn't an option so I just went for matching silk. 

gusset.jpg

And my pants are finished! I'm so proud of the insides. I tried to make them as delicate as possible and I think I succeeded. 

finished outside and inside.jpg

Thank you for reading, the next post in the series will be talking about the shirt portion of the outfit!

Lauren xx

Checked Trousers

Hello all! Today I have some new trousers to show you. I bought this fabric at the same time as I bought my Padme fabric. It's a double sided wool coating that I found a remnant of sitting on the side of the longest (and narrowest) fabric shop ever. It's quite thick, but I couldn't get it out of my head that it would make great trousers, especially for my fast approaching trip to chilly Vienna. The fabric is also incredibly soft and cosy, not at all itchy or scratchy like you would expect wool to be. It was £30 in all, which is a lot for me to spend on fabric, but the quality was there and I know that I'd be paying much more than that for some wool trousers on the high street. 

checkedtrousers6.jpg


 I used the high waisted trouser pattern that I had drafted for my dissertation as a bit of a test run. I ended up taking out a bit of width from the legs to make them more slim fitted. I'll be honest, the fit of the trousers in these photos is how they look on the 3rd wear, so they've bagged out a bit at this point. Straight out of the wash they are more fitted.

checkedtrouserssm2.jpg

Obviously the big challenge about this fabric is the check matching, which I'm actually pretty proud of. The only thing that isn't completely matched is the waistband, which can't be done because of the darts in the front and back of the trousers.

checkedtrouserssm8.jpg

 There's a metal zip handpicked into the side seam and a giant popper keeping the waist band together. I tacked the side seam shut, sewed in the zip and unpicked the side seam afterwards, and yet the zip is still perfectly visible. I wonder if I should overlap next time, in expectation that the fabric will pull away from the zip a bit. The waistband is far too thick for a buttonhole which is why I went for a popper, which I haven't had any issues with while wearing it. It might be better to replace it with a hook and bar though.

checked trouserssm7.jpg

 I cut each piece separately so I could make each front and back completely identical and to make pattern-matching as easy as possible..

checkedtrousers9.jpg

 I haven't quite decided what to do about the length. Currently they work with shoes and boots, but I think they would work better with boots if they were cropped slightly. I've considered cuffs, but the fabric would be really too bulky. Pockets would be fab, but I think the steamlined look just suits this fabric better. I think I'll add pockets to my next pair though.

checkedtrouserssm3.jpg

Thanks for reading!

Lauren xx

A British Outfit: Cabbage Dyeing

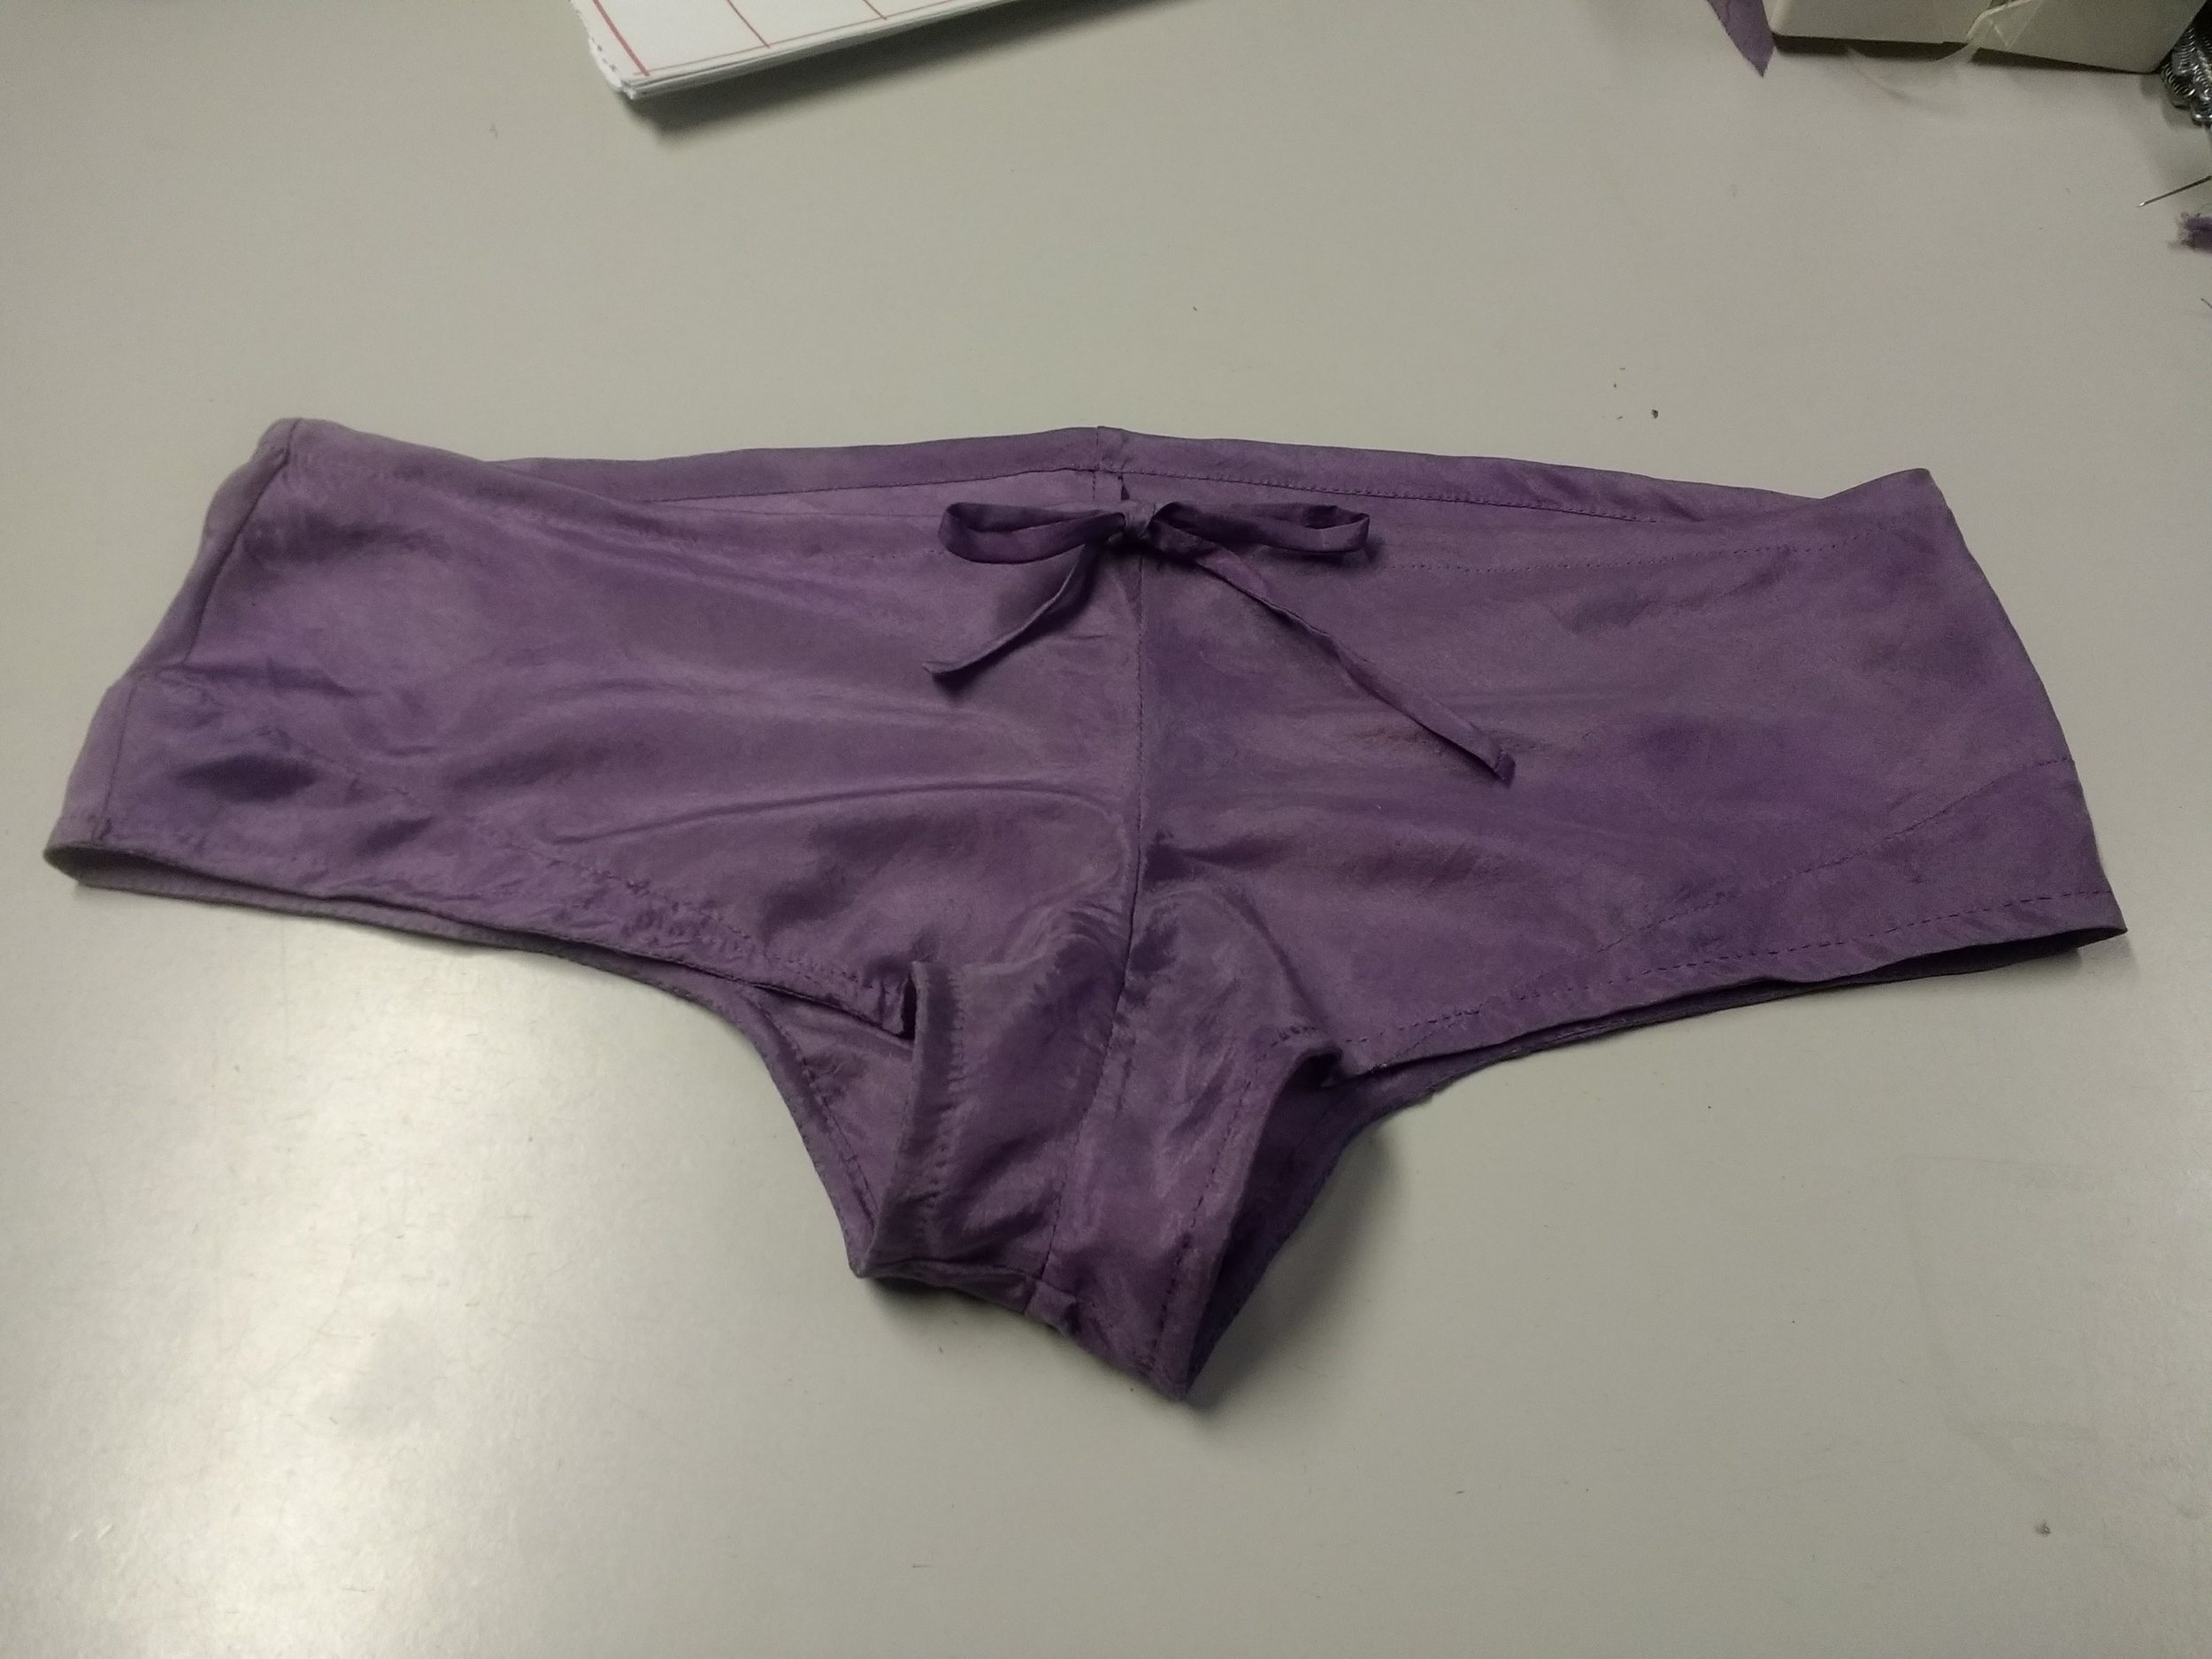
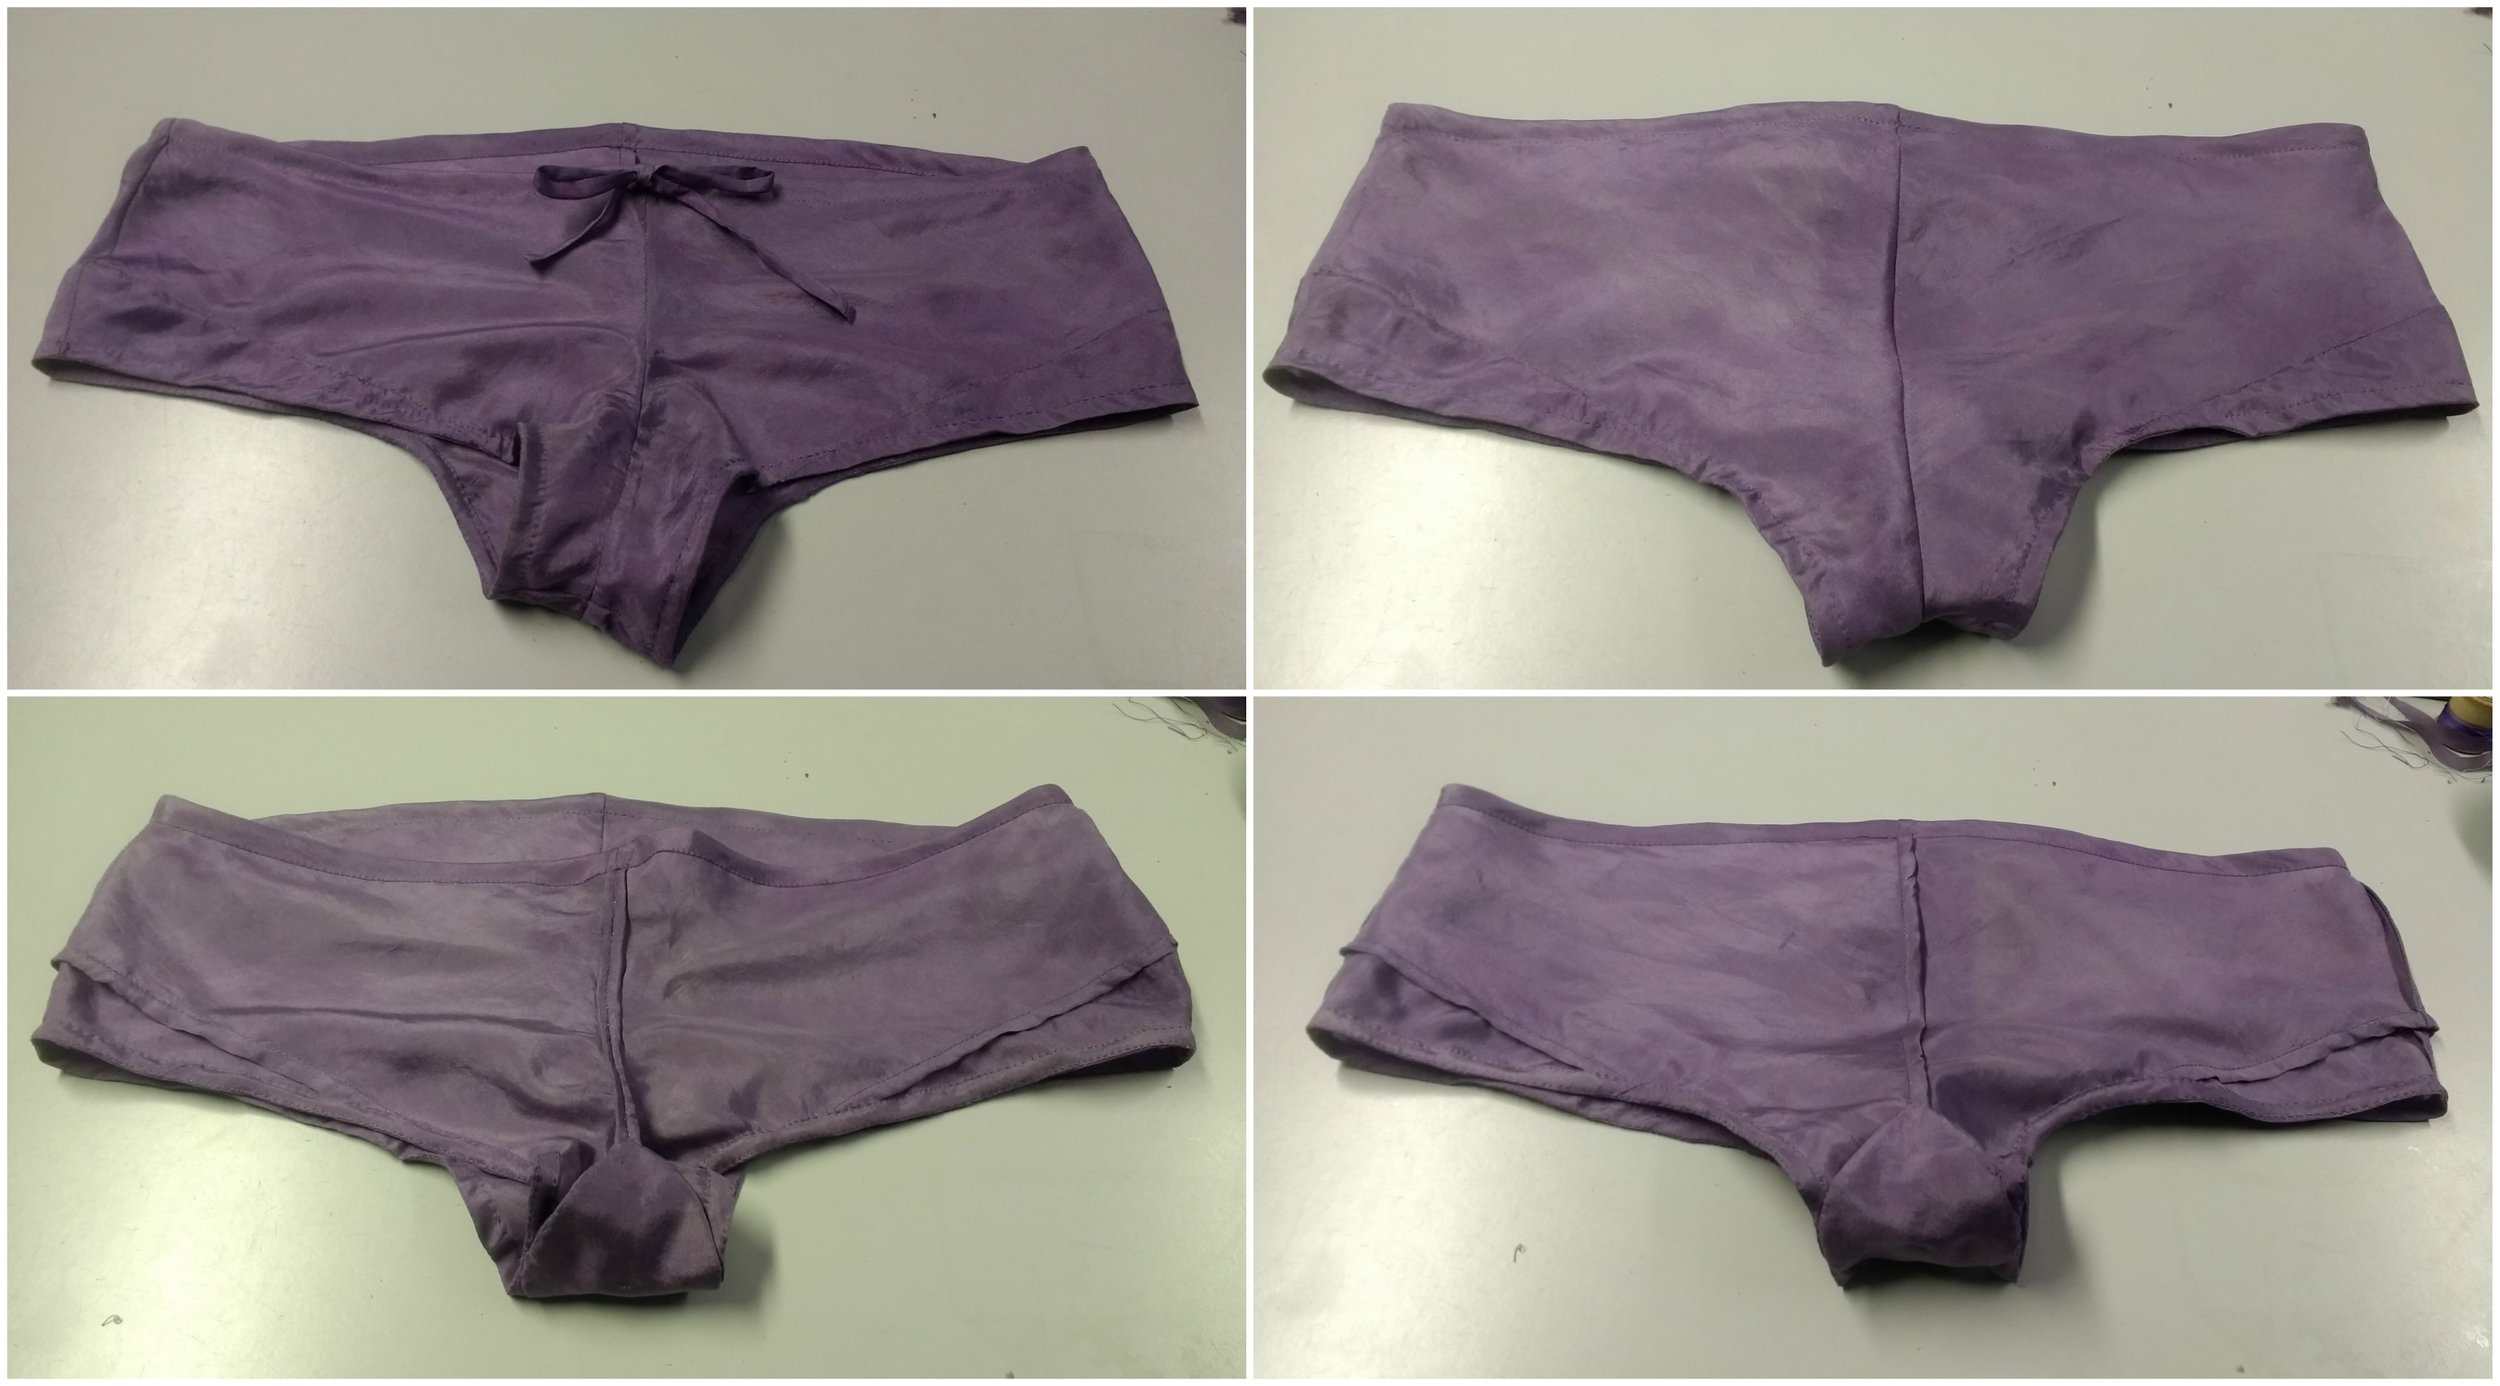
Hello all! I'm back to talking about my dissertation today. After I made my bra, it turned out that I didn't have enough of the dyed fabric for knickers as well. I wasn't overly keen on white knickers so I got the dye pot out again. If I'd anticipated this I would have chucked the fabric in with the wool that I dyed with elderberries over the summer to get a beautiful purple. However, this was not anticipated so I decided to experiment with red cabbage for the foremost reason that it was readily available to me in Morrisons supermarket and also very cheap at 80p per cabbage. I thought that I'd have a hard time finding red cabbage that was specifically labelled as grown in the UK so first looked around all the grocers, market stalls and home food shops. They had no idea where their cabbage was from, and when I got to Morrisons I was pleasantly surprised so find their cabbage labelled 'Lincolnshire red cabbage, grown by George Read'. I've popped a picture below of the final product, and then I'll take you through the process. 

IMG_20171128_142900408.jpg

I used the basic recipe for natural dyeing from Seamwork magazine which consisted of simmering the plant matter in a pot to extract the dye for 1 hour. Remove the plant matter, add the fabric which has been pre-soaked in water for 1 hour and simmer for another hour. I ended up simmering the fabric in the dye for 3 hours and left it in the pot overnight so that it would absorb as much dye as possible. I found that it was best to put just enough water in the pot to cover the veg, because the less water there is in there, the stronger the dye will be. 

cabbage1.jpg

 This was the cabbage after it had simmered in the pot for an hour and the dye had been extracted from it. I didn't use a mordant for this process, because I'm intrigued as to how well the colour is going to hold up after repeated washing in comparison to the other fabrics that I have dyed with a mordant.

cabbage2.jpg

 You can see how the colour of the fabric changes throughout the dyeing process. The first picture is straight after being dunked in the dye, the second after 3 hours of simmering and the 3rd after being left overnight.

BeFunky Collage.jpg

 Below I've included a picture of how the sample (right) and final fabric (left) compare. I used a ratio of 1 cabbage to 15cm square of fabric for the sample and a ratio of 4 cabbages to 40x140cm piece of fabric. It's funny that the final fabric is darker, because there's less cabbage to go around the larger piece of fabric. The sample is also more pink toned.

cabbage4.jpg

Thanks for reading! Next time I'll be writing about the making of the knickers.

Lauren xx

Brocade Birthday Dress

Hello all! This month's Minerva make is a bit fancy. It was my 21st birthday last week and I wanted to make something special to wear. I love black and gold as a colour combo so I chose this metallic brocade to make my dress with. When it arrived however, I was a bit stumped as to what to do with it, as the scale of the print was much larger than I expected. From then on the design consisted of breaking up the print as little as possible. You can read all about the making process on the Minerva Crafts Blog here.


Thanks for reading, to Bethan for the photos and to Minerva Crafts for providing the supplies for this project!
Lauren xx