Harriet Bra and Pants

Hello all! Today I have a new underwear set to share with you. I'm going to call this my first 'proper bra' because I've only previously made bralettes and this is my first time making an underwired bra. 

28500875_2029815497035297_1688680905_o (3).jpg

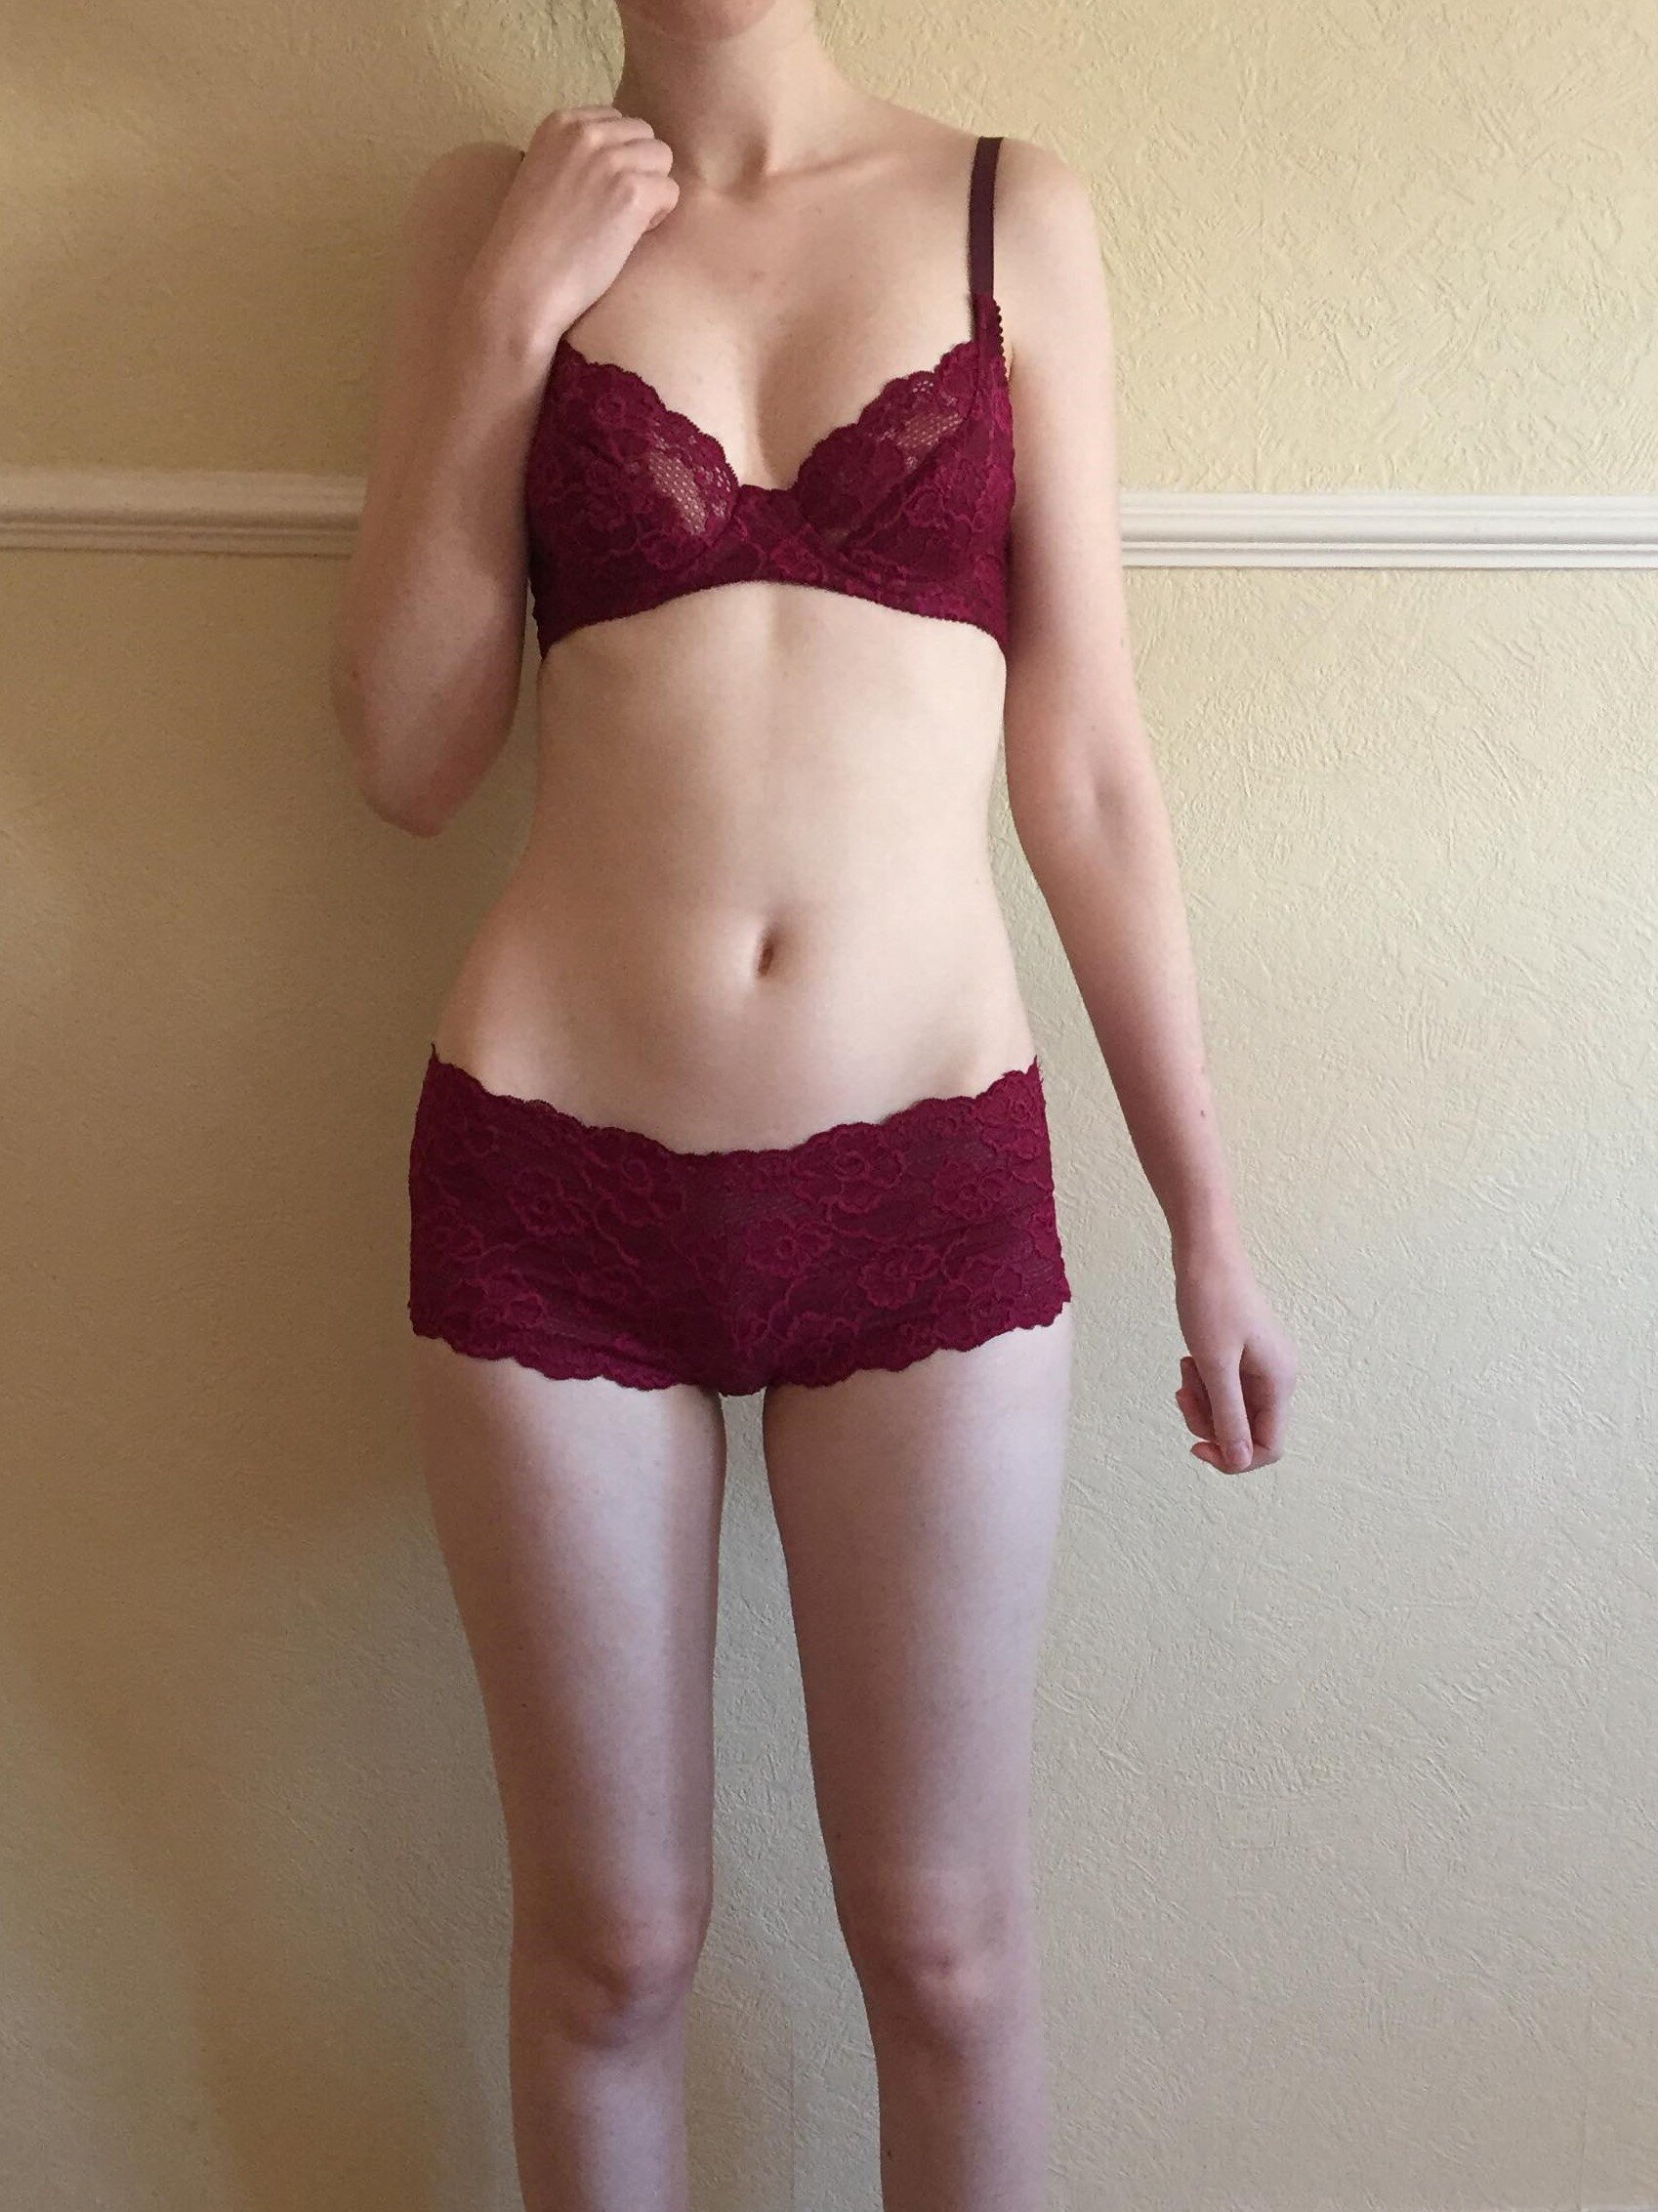
I went to Amsterdam in September, and a big motivator behind the trip was getting to go to the lingerie fabric shop there. I ended up walking about an hour and a half out of the city centre to get there and almost got blown away by the wind but it was worth it when I found the shop and the treasures it contained within. I spent a long time looking through all of the fabrics for 'the one' and this dark pink-purple stretch lace was the winner. It was however, very hard to match everything else. The straps were the closest match that I could find, and a purple powermesh was the best match for the lining and band. 

28460492_2029816180368562_926660972_o.jpg

I was given the Cloth Habit Harriet Bra pattern for my birthday so there was no excuse but to start making! I measured myself as a 28B (which is my regular size) and got cracking. I quickly established that the bra cups were too small, remeasured and cut out the 28D cups. I left the band as it was to save fabric, but next time I'd cut out the 28D all round. I'm not going to lie, it was very exciting to have to size up to a D cup and I told all of my friends. 

28547617_2029816017035245_1062308027_o.jpg

After I cut out the larger cup size everything went together swimmingly. Below you can see the insides. I love how neat the finish is, but I wish I'd bought matching channeling in Amsterdam. I did buy rings and sliders while I was there, but I can't find them now so just sewed the straps straight onto the bra. I might add some metal rings and sliders later. The only alteration I made to the pattern was to cut the back band out in laces as well, as I wanted the entire bra to be lace. 

28460913_1621508824594758_1062069881_o.jpg

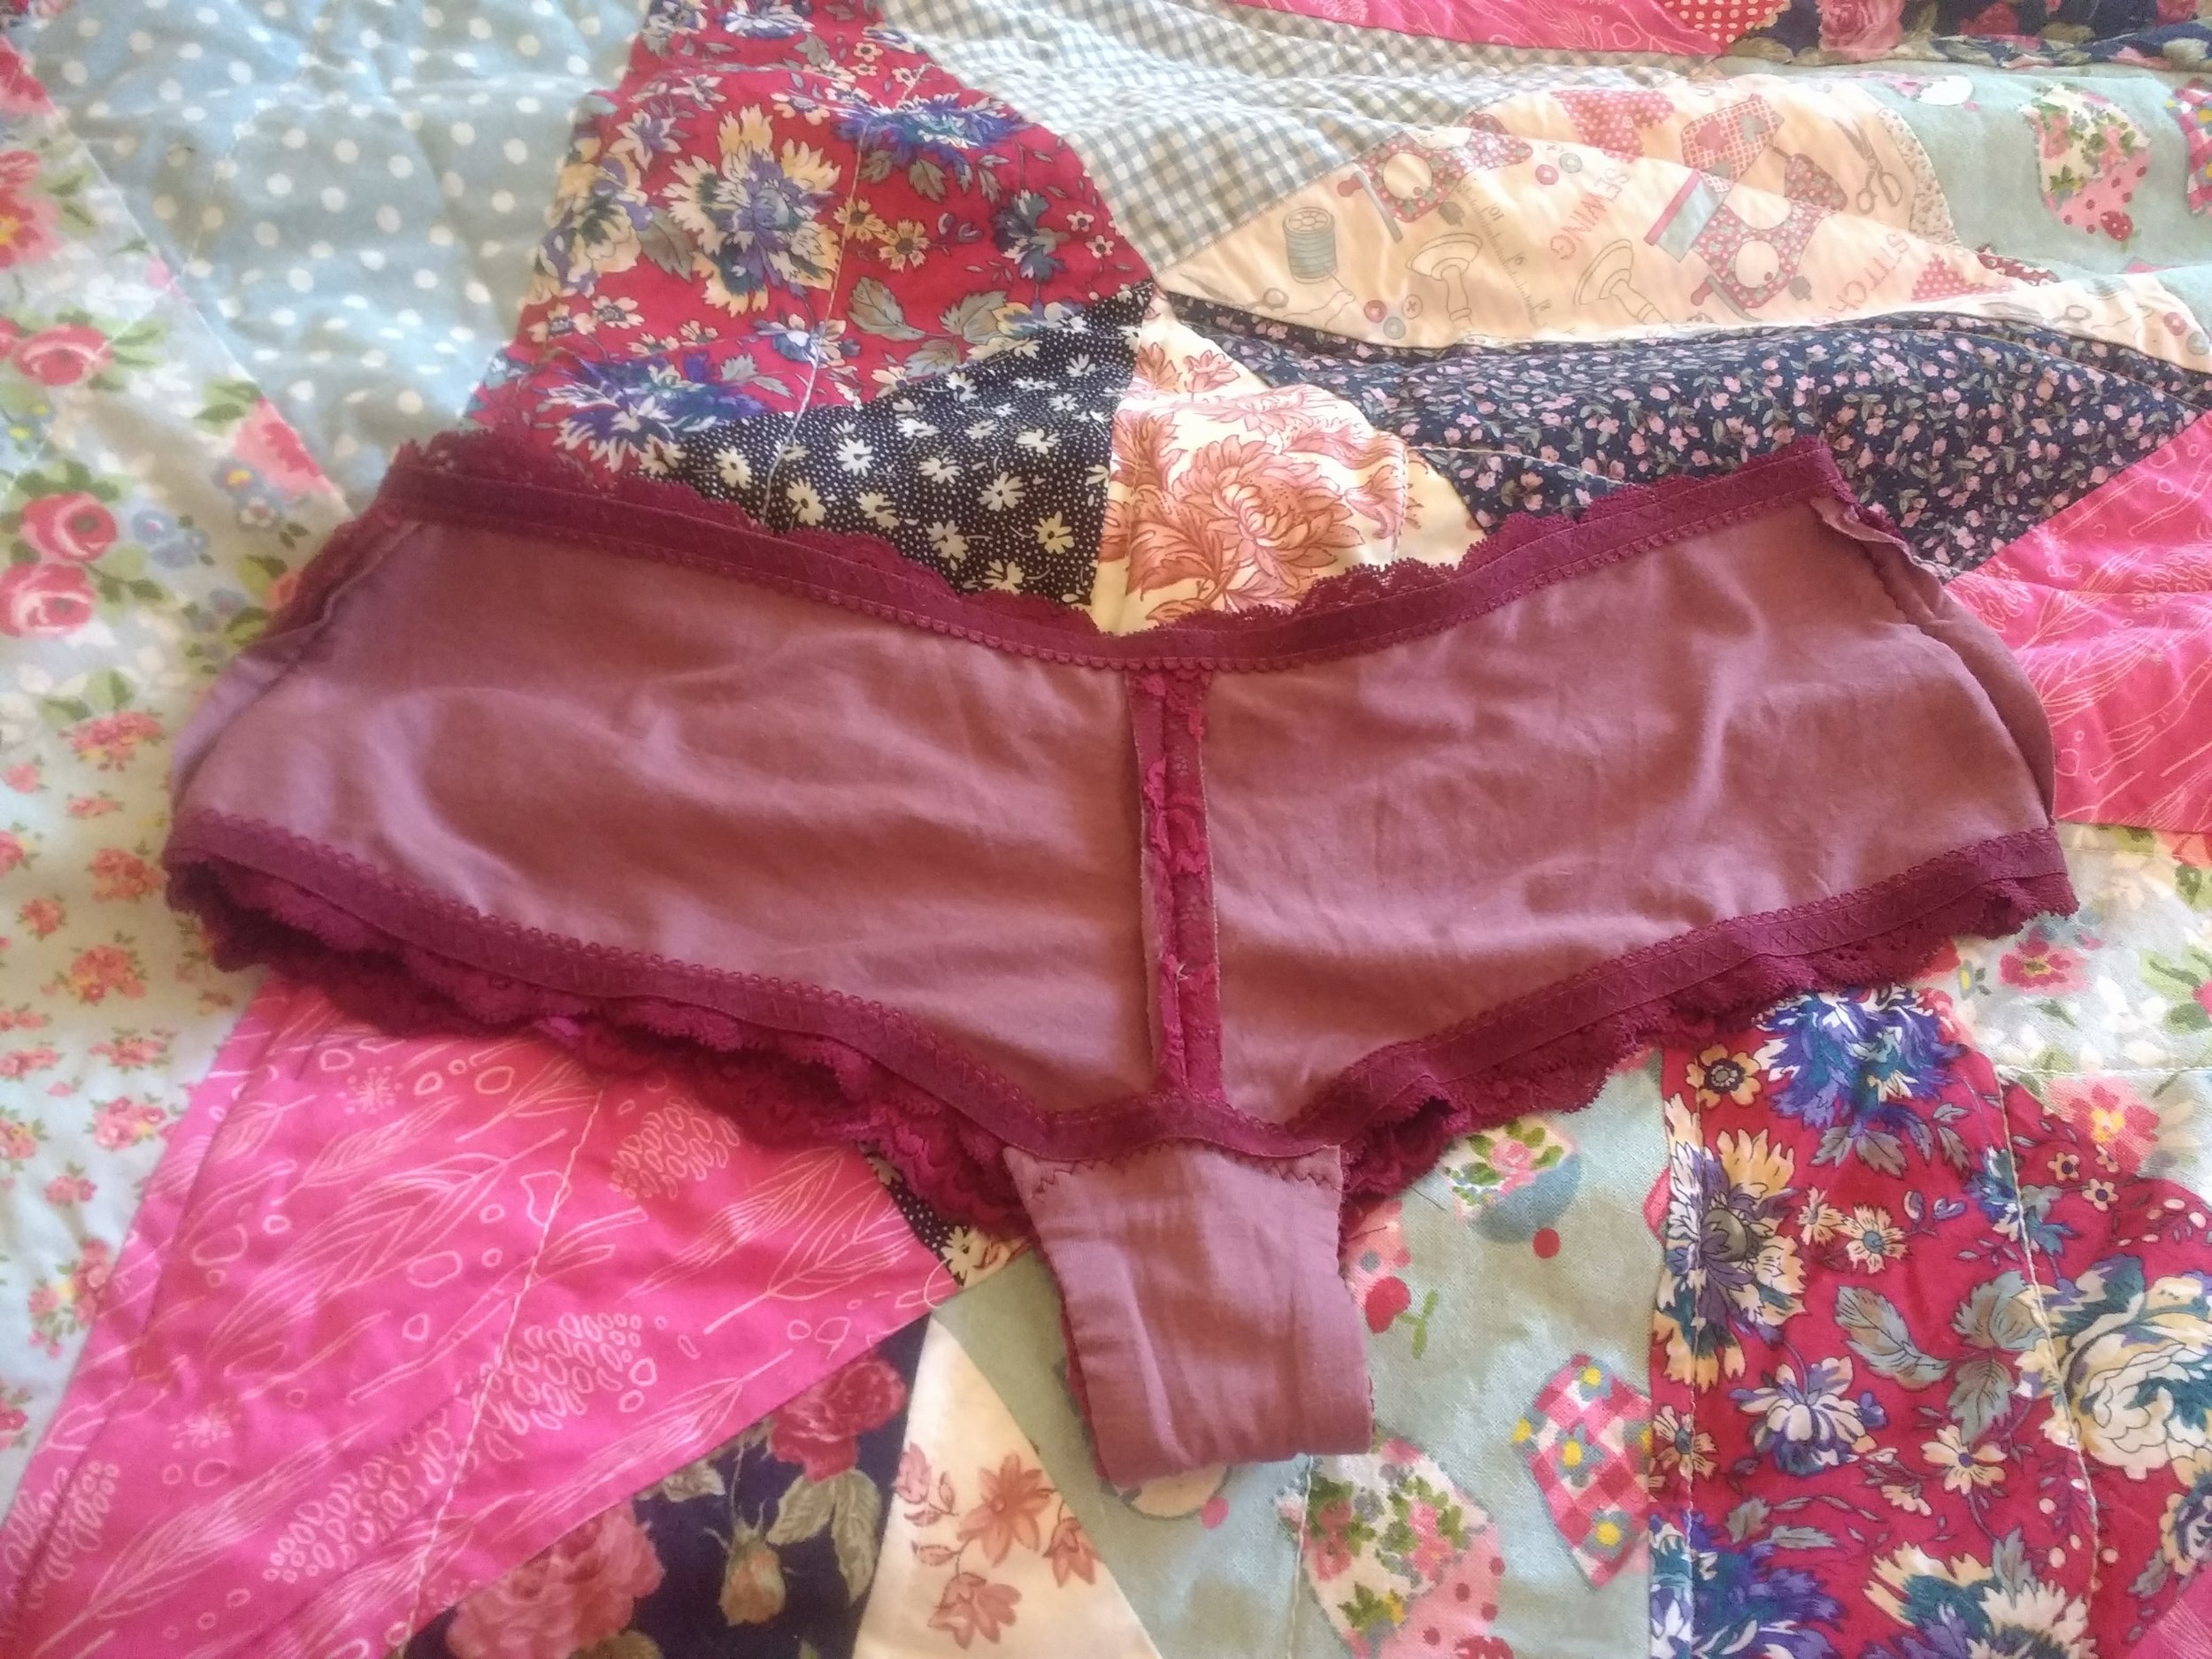
For the pants I wanted the scallops on the waist and leg holes but wasn't quite sure how to go about it as it's quite a narrow lace. I ended up cutting out some boy short type things but the lace was too narrow and they sat far too low. I took a chance and added a gusset which actually did the trick perfectly. 

28343052_2029815890368591_1646315150_o.jpg

I lined the pants completely with viscose jersey scraps left over from a minerva project because I wasn't a fan of the concept of see-through pants. Although the scalloped edges are obviously already finished I wanted to stabilize them with some elastic and figured out an ingenious way to also enclose the gusset seam allowance within that (shown below). The elastic also did the trick of securing the lining. 

28499788_1621508847928089_974460962_o.jpg

So that's my new set of underwear! This is actually the first underwire bra I've ever owned, so I'm looking forward to taking it out for a test run and seeing what I think to it. As a first impression, I'm so impressed at how flat the bridge sits, which is obviously thanks to the underwires. The pants are also a bit of a new style for me so we'll see how comfy they are in comparison to my normal ones. I have some lace and elastic left over but not enough bra strapping so I think I'll make another pair of pants to match the bra. Maybe in a more standard brief style though. 

28500875_2029815497035297_1688680905_o.jpg

Thank you very much for reading and to Abby for taking the pictures!

Lauren xx

A British Outfit: Making the Shirt

Now I have my shirt buttons all ready to go, it's time to move onto the shirt. I could have easily chosen to make a wrap shirt and called it job done. However, I really wanted a white classic shirt in my wardrobe. This meant making my own buttons (see previous blog post), but I knew that it would get worn infinitely more. Plus it would be good to have a decent shirt pattern in my arsenal. 

28309227_1613789382033369_1954597042_o.jpg

I used the classic shirt block from Winnie Aldrich's basic patterncutting book and made no alterations on paper. I cut it out in the main fabric which was silk habotai. It was somewhat of a novelty at this point to be able to use the fabric straight away without any long dye processes beforehand. The closest I could get to British silk thread was thread outsourced from Turkey but with the finishing done in Macclesfield, UK. I tacked it all together for the first fitting, and in the fitting I raised the back neckline, raised the sleeve so it sat more at my shoulder and pinned out some of the excess width in the sleeve. You can see the original sleeve on the left side of the shirt and the altered sleeve on the right. 

shirt first fitting.jpg

For the second fitting I drafted, cut out and attached the collar and cuffs with the updated collar measurement. In the fitting I pinned out some more excess at the underarm and in the sleeve so it would hang evenly. Excess was also pinned out of the cuff and the sleeve width. 3cm was taken out of the side seam. I found it surprisingly tricky to get my shirt the right amount of 'oversized'. 

shirt second fitting.jpg

I had a quick 3rd fitting after these changes were made and the only change I made was to add 1cm to the sleeve and cuff width. 

shirt 3rd fitting.jpg

Then it was time to get cracking on the construction for real. I started with burrito-ing the yoke and quickly learned that top-stitching and silk habotai do not play well together. 

IMG_20171215_141904437.jpg
IMG_20171215_151647610.jpg

I chose to do tower plackets on the sleeves, but I think in hindsight they are a tad too heavy for this fabric. They are neat though, and I am proud of them. Silk organza was used as interfacing.

placket.jpg

I french seamed all of the insides as delicately as possible, including the sleeve heads. 

28217251_1614942978584676_762821243_o.jpg

The collar I did using the method I learnt from this blog post years ago. It never fails to give me a neat collar.

28275352_1614943001918007_1451195576_o.jpg

I cut strips of organza bias binding and used that to finish the hem.

IMG_20180124_140232191.jpg

After referring to my shirt making book I marked 7 buttonholes down the centre front of the shirt. The first is 5.5cm from the top of the buttonstand and the rest 8.5cm apart. Then there is on horizontal button in the middle of each cuff. I don't like the fact that the buttons are unevenly spaced at the top. I think it looks messy and that I can't measure accurately. I'd space them evenly next time. 

28278655_1613811855364455_2091869703_o.jpg

And that's my shirt finished! Now it's just the trousers, jumper and shoes to go. 

Thanks for reading!

Lauren xx

A British Outfit: Making the Buttons

Buttons turned out to be a harder part of the project that I had anticipated. I researched glass buttons, ceramic buttons, commercially made wooden buttons, pearl buttons, horn buttons, pewter buttons and shell buttons. The only truly British buttons that I found were pewter buttons, which are too heavy for a silk shirt. This meant that I had to go DIY, and I had a go at creating my own wooden buttons, with my wonderful friend Zoe by my side. 

The first step was to go to the Scenic Arts department with my twig of choice. We cut it into tiny discs with a band saw and then drilled two little holes into each disc. 

IMG_20171201_111738557.jpg

Next was to sand down all of the rough edges and to remove the bark on the edges. I quite liked how it looked, but I didn't want it to snag on the delicate silk fabric. The buttons on the bottom are before sanding and the buttons on the top are after sanding, and you can see how much difference it makes. 

IMG_20171201_114057030.jpg

The last step in the button making process was to waterproof them. I soaked the buttons in Thompson's Water Seal (made in Sheffield) for a few hours and that should be enough for them to survive the washing machine. 

IMG_20171201_115437722.jpg

I'm really proud of my little buttons and think they look so good! Here's a sneak peak of how they look on the shirt.

28275352_1614943001918007_1451195576_o.jpg

Thanks for reading and to Zoe for helping me out with these!

Lauren xx

Elephant Onesie

Hello all! For the entirety of my (admittedly short) life I have coveted a soft snuggly onesie to curl up on the sofa in. Luckily Minerva Crafts had the perfect fabric to make the snuggly onesie of dreams, so that's what I chose for my February make. 

IMG_1716.JPG

You can read all about the making process on the Minerva Crafts blog here.

Thanks for reading, to Bethan for taking the pictures, to MK for trimming all of my loose threads and to Minerva Crafts for supplying the kit for this make!

Lauren xx

A British Outfit: Making the Pants

When the bra was finished it was time for the other half of the underwear. The main challenge here was again not being able to use elastic. I wasn't worried about fastenings because I could easily make a self fabric drawstring to hold them up. I used British grown silk again, but this time from a different supplier. The plan was to use the rest of the dyed fabric that I made the bra from, but I severely underestimated how much I needed and as a result didn't have enough. I chose to dye my fabric with red cabbage and you can read all about that process here.

I drafted the French knicker pattern from Pattern cutting for Lingerie, Beachwear and Leisurewear by Anne Haggar. From the get go I dropped the waist 10cm and lowered the side seam hem by 1inch. I then drew in the design lines that I was after and cut them out of Calico for a first fitting.

IMG_20171128_141325230.jpg

For the first fitting I topstitched cotton tape on the waistband point of the panties to thread a drawstring through. The only alteration I made was to pin the excess out at each buttock.

shorts first fitting.jpg

I adapted the pattern and made the second toile out of a drapier fabric to get a truer idea of how the panties would look in the final fabric. Truth be told, I probably should have started in a drapier fabric and skipped the Calico all together. I pinched yet more excess out of the buttock in this fitting and also took some ease out of the buttock to make them more slim fitting.

shorts second fitting.jpg

I cut out and tacked together the panties out of the final fabric for the last fitting. I tacked them together by hand because I didn't want to leave machine holes when I unpicked the garment to sew it again for real. There were no changes this time so then I got on with putting these together for real.

pants 3rd fitting.jpg

As with my bra, neat finishing was very high on the agenda. The centre front seam was pressed open and each SA was finished individually so that I'd be able to thread a drawstring through the waistband later. The centre back and side seams were french seamed and the inserts were hand flat felled. The leg holes were bias bound. 

Flatfelling in progress on the left and a finished french seam on the right. 

Flatfelling in progress on the left and a finished french seam on the right. 

When all of the seams were finished I folded down the waist twice to make a channel for the drawstring.  I top stitched it down by hand because I was very wary of distorting the delicate fabric with the sewing machine (especially as these were cut on the bias.)

IMG_20171201_141233915.jpg

The final step was to make a little gusset which was tacked onto the crotch area of the pants. Ideally I would have used a cotton jersey, but that wasn't an option so I just went for matching silk. 

gusset.jpg

And my pants are finished! I'm so proud of the insides. I tried to make them as delicate as possible and I think I succeeded. 

finished outside and inside.jpg

Thank you for reading, the next post in the series will be talking about the shirt portion of the outfit!

Lauren xx