Hello all!
I took a bit of a leap into the unknown by writing, composing and staging a musical for my friend Millie's 19th birthday over the Easter holidays. Aggy Gnome was the tale of a girl that magic was not kind to. She gets turned into an aggy gnome by a jealous witch, and then into an aggy dragon by a wizard who's not entirely sure what he's doing. (aggy is a shortcut for aggravated) It was great fun to write. I've never written original songs before so that was a pretty big learning curve, but it was pretty cool to hear them sung on stage/in our kitchen. We also had some classic songs including 'Somebody to Love', Wicked's 'Defying Gravity' with the title words exchanged for 'being a lesbian' and 'At Last' by Etta James.

Aggy Gnome was set in a fairytale universe, so it needed appropriate props and costumes. I managed to adapt lots of existing pieces in my collection, spending only £4.50 on some hessian sacking for the cretin costume, custard creams and for masks and leaves for the dragon masks.
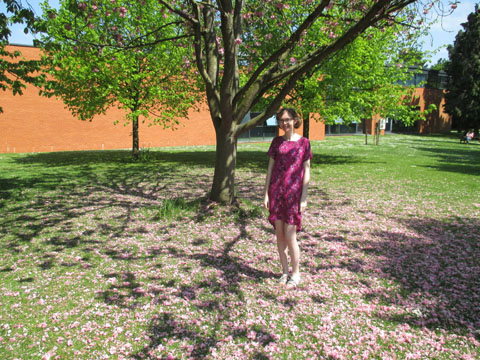
This dress and
this top made an appearance.
Props-wise I made 2 dragon masks with masks, leaves and pva glue. My friend MK stuck some cotton balls onto the lower half of a mask for the gnome mask. I made a sword from my strongbow cider box and wrapped that in tin foil. The crown was cut out of a rice crispie box and left as is as I was pretty much done at that point. Below is Lydia wearing her dragon wings and mask. I could have done a lot better with the wings but I didn't have enough fabric so had to make do.
I also made a tree from a big cardboard box, green card, masking tape and brown paint. This tree caused a lot of trouble. It was being stored in the kitchen and was mistaken by rubbish by the cleaner so I had to go on a tree rescue mission. It was eventually recovered (my first bin diving experience). There was also a wasp nest made from brown paper wrapped around a big water bottle. The 'tree' was no where near as stable as it needed to be and collapsed halfway through the show to general hilarity.
Costume-wise I made a shirt for myself as the Prince, a sack dress for the cretin and some dragon wings for the aggy dragon. For the shirt I wanted something massive and pouffy. I used the Grainline Archer pattern as a base, with major adaptations. The leather jacket soon got abandoned because it was far too hot.
It was made from an old white sheet. I decided that I wanted a front and back yoke, with a gathered front and back attached with massive gathered pouffy sleeves with a ruffle-y cuff. I also wanted a neckline ruffle.
First, I decided to discard the front Archer piece and work only from the back. I cut 2 yokes -
1 for the front of the shirt and 1 for the back. I then cut 2 back pieces on the fold, placing the side seams as close to the selvedge as I could so it could be gathered into the yoke. I split the sleeve into 3 lengthways and spread it out for a puffed sleeve. I also made it 10cm longer so I could turn it back on itself, and insert some elastic to make an easy gathered cuff.
When that was all put together I gathered up a long rectangle folded in half so the outside edge would be clean and gathered that into a V neckline on the skirt. It was sewn wrong side to wrong side, then trimmed, turned over to the right side and topstitched. My gathers didn't work very well and they aren't very even. 2 layers of the sheet fabric was very bulky.
As a performer I loved this shirt. It really helped me get into character and it's so incredibly comfy!
So yeah, that's what I got up to over Easter!
Thanks for reading,
Lauren xx